
Small Kitchen Remodeling on a Budget That Feels Brand New
A small kitchen can absolutely feel brand new without a full gut renovation. The key is to spend where it shows, keep what works, and make a few high-impact upgrades that improve function as much as style.
Use the tips below like a checklist: each one is budget-minded, practical for tight footprints, and focused on remodeling choices that make a small kitchen look and live better.
1) Keep the Layout, Upgrade the “Touchpoints”
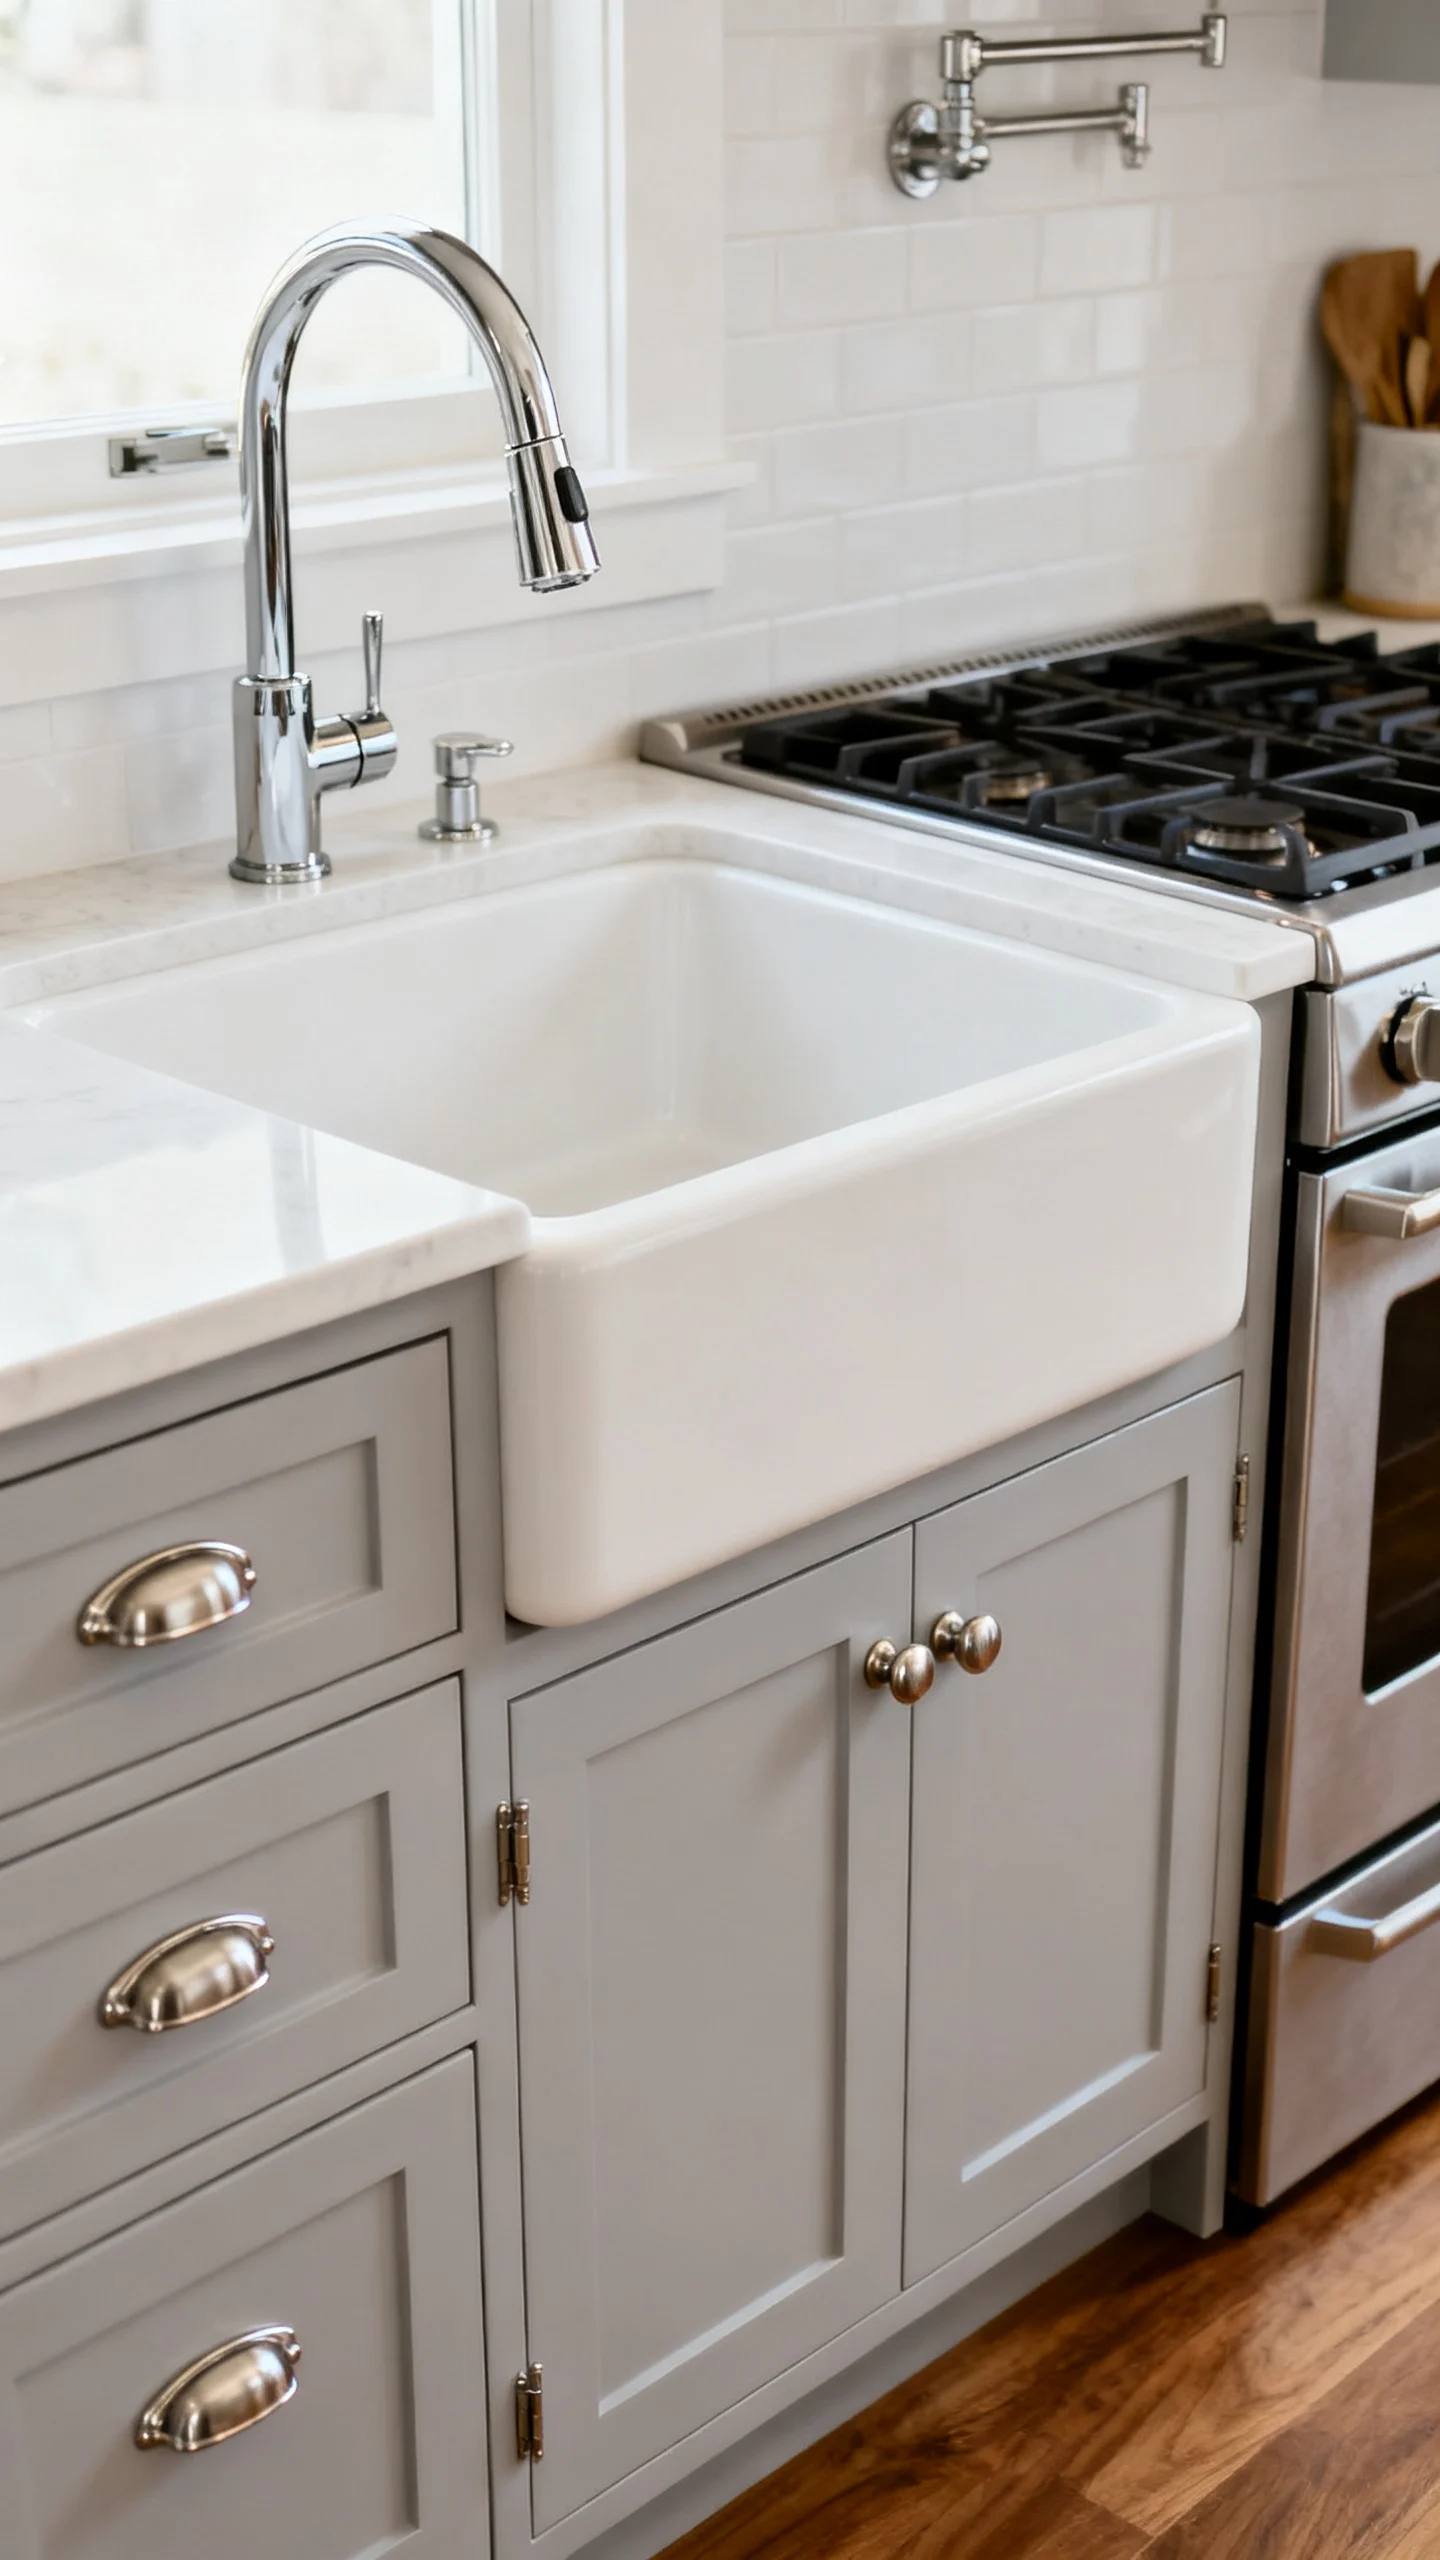
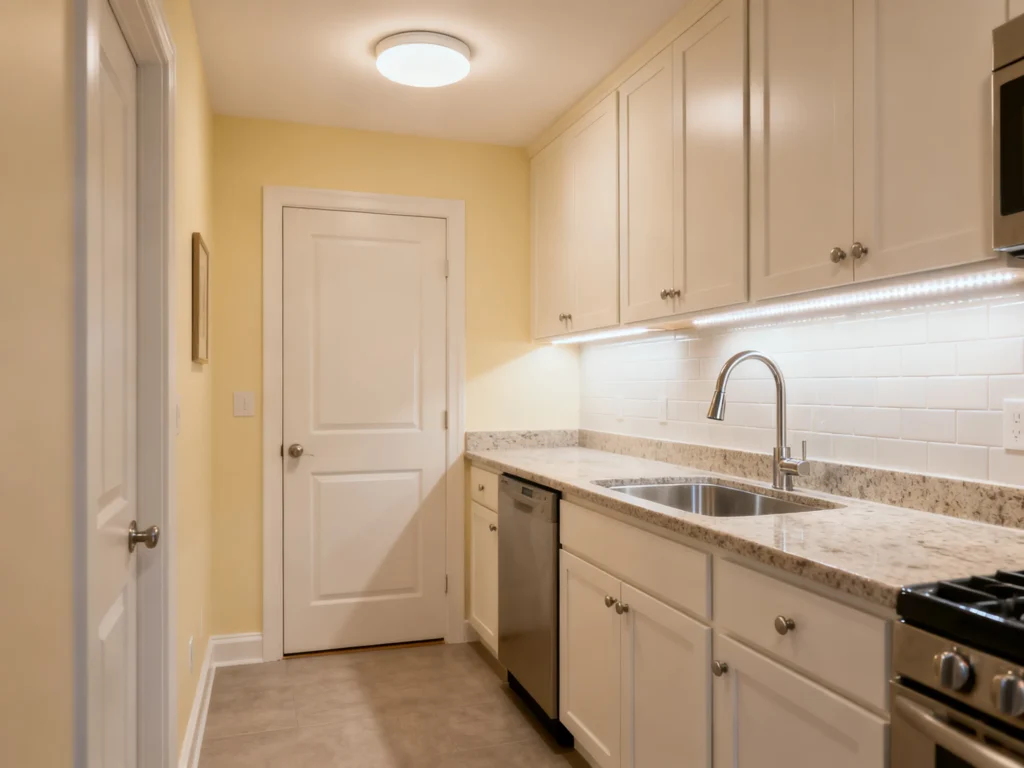
Moving plumbing and gas lines is where budgets disappear fast—so start by keeping the existing layout if it’s even remotely workable. Instead, remodel the “touchpoints” you interact with daily: faucet, sink, cabinet hardware, lighting, and outlet covers. A new pull-down faucet and deep single-bowl sink can make the whole workspace feel updated, while avoiding costly wall and floor repairs that come with relocation. If you do change anything major, prioritize a better fridge door swing or a wider prep zone rather than shifting everything.
2) Refresh Cabinets Without Replacing Them
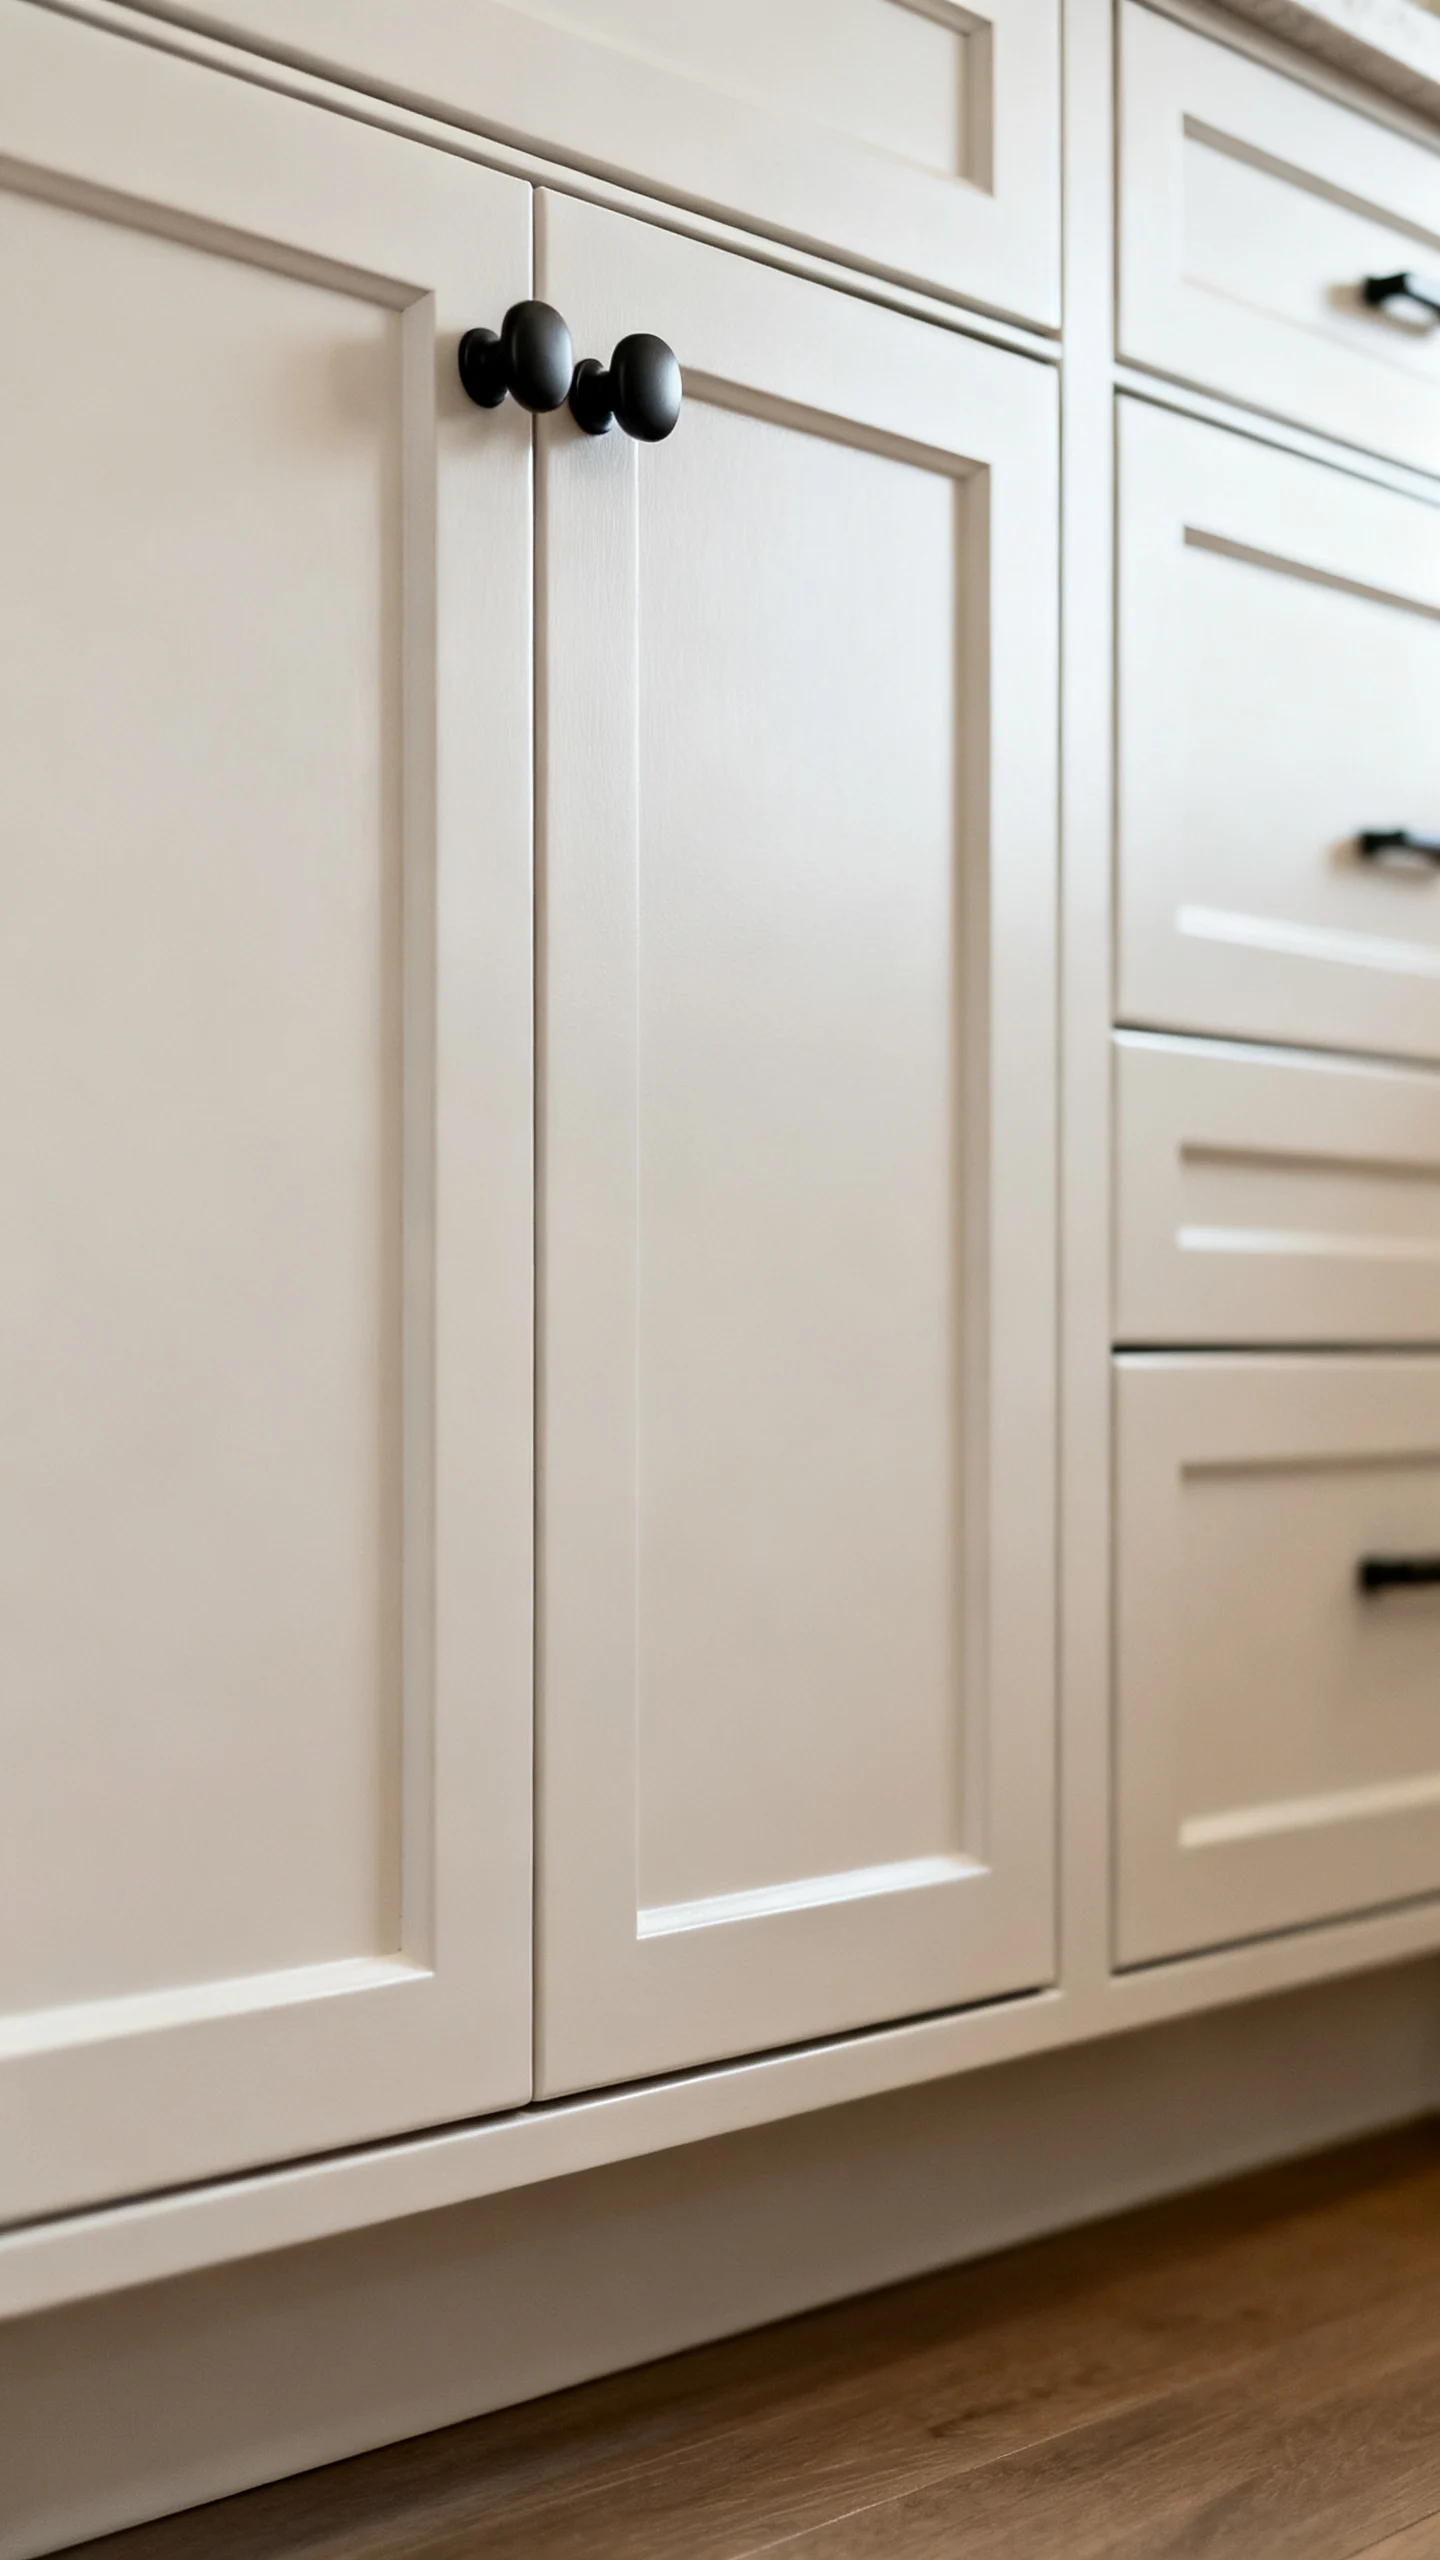
Cabinet replacement is often the largest line item, but most small kitchens can feel transformed with a cabinet refresh. If boxes are sturdy, choose paint or a new door-front approach. Painting costs less but requires careful prep: degrease, scuff-sand, prime, and use a hard-wearing cabinet enamel. If you want a “new cabinet” look, consider replacing just the doors and drawer fronts (and adding new hinges) while keeping the boxes. It’s also a smart moment to add soft-close dampers or updated drawer slides—small upgrades that feel surprisingly luxe.
3) Add “Budget Built-In” Details With Panels and Filler Strips
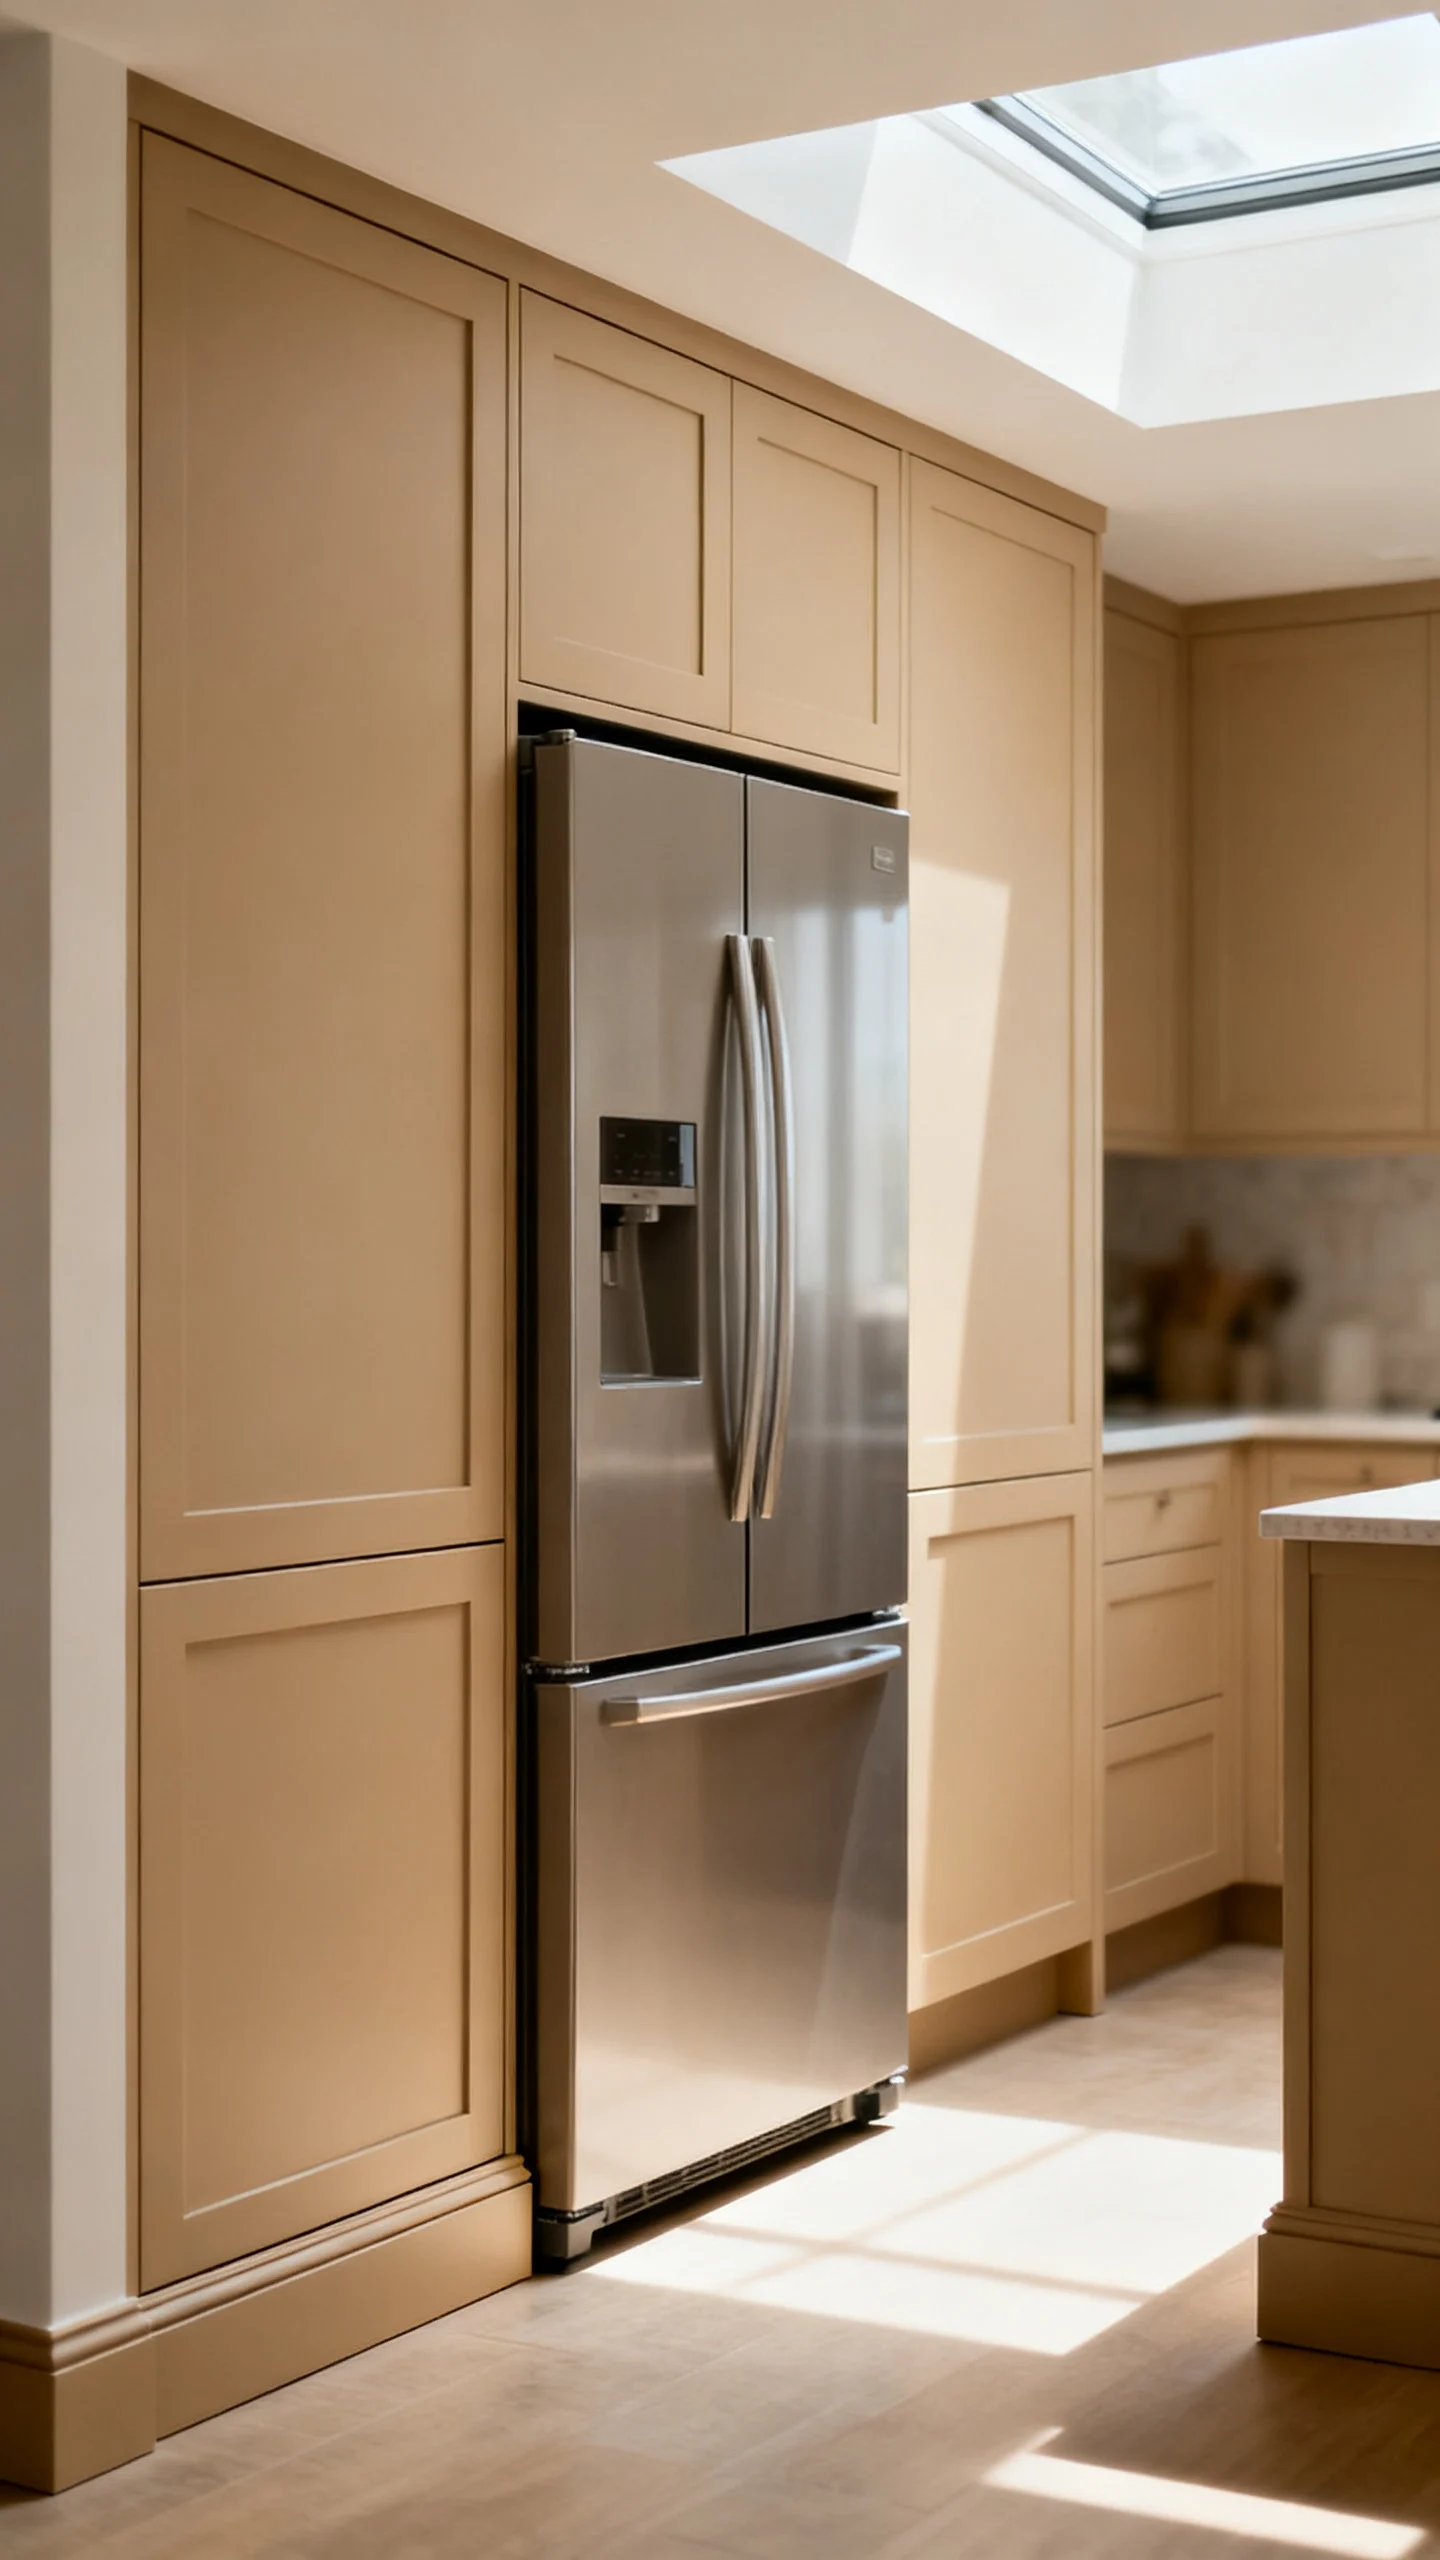
In a small kitchen, tiny gaps and exposed sides can make everything look less finished. Use inexpensive cover panels and filler strips to create a more seamless, built-in look around the fridge, at cabinet runs, and beside dishwashers. For example, a 3-inch filler can prevent handles from banging into walls and improve door clearance. Matching end panels on exposed cabinet sides instantly reads custom, especially when paired with a toe-kick skin for a clean, continuous base line.
4) Choose Affordable, High-Impact Counters (With Smart Edge Details)
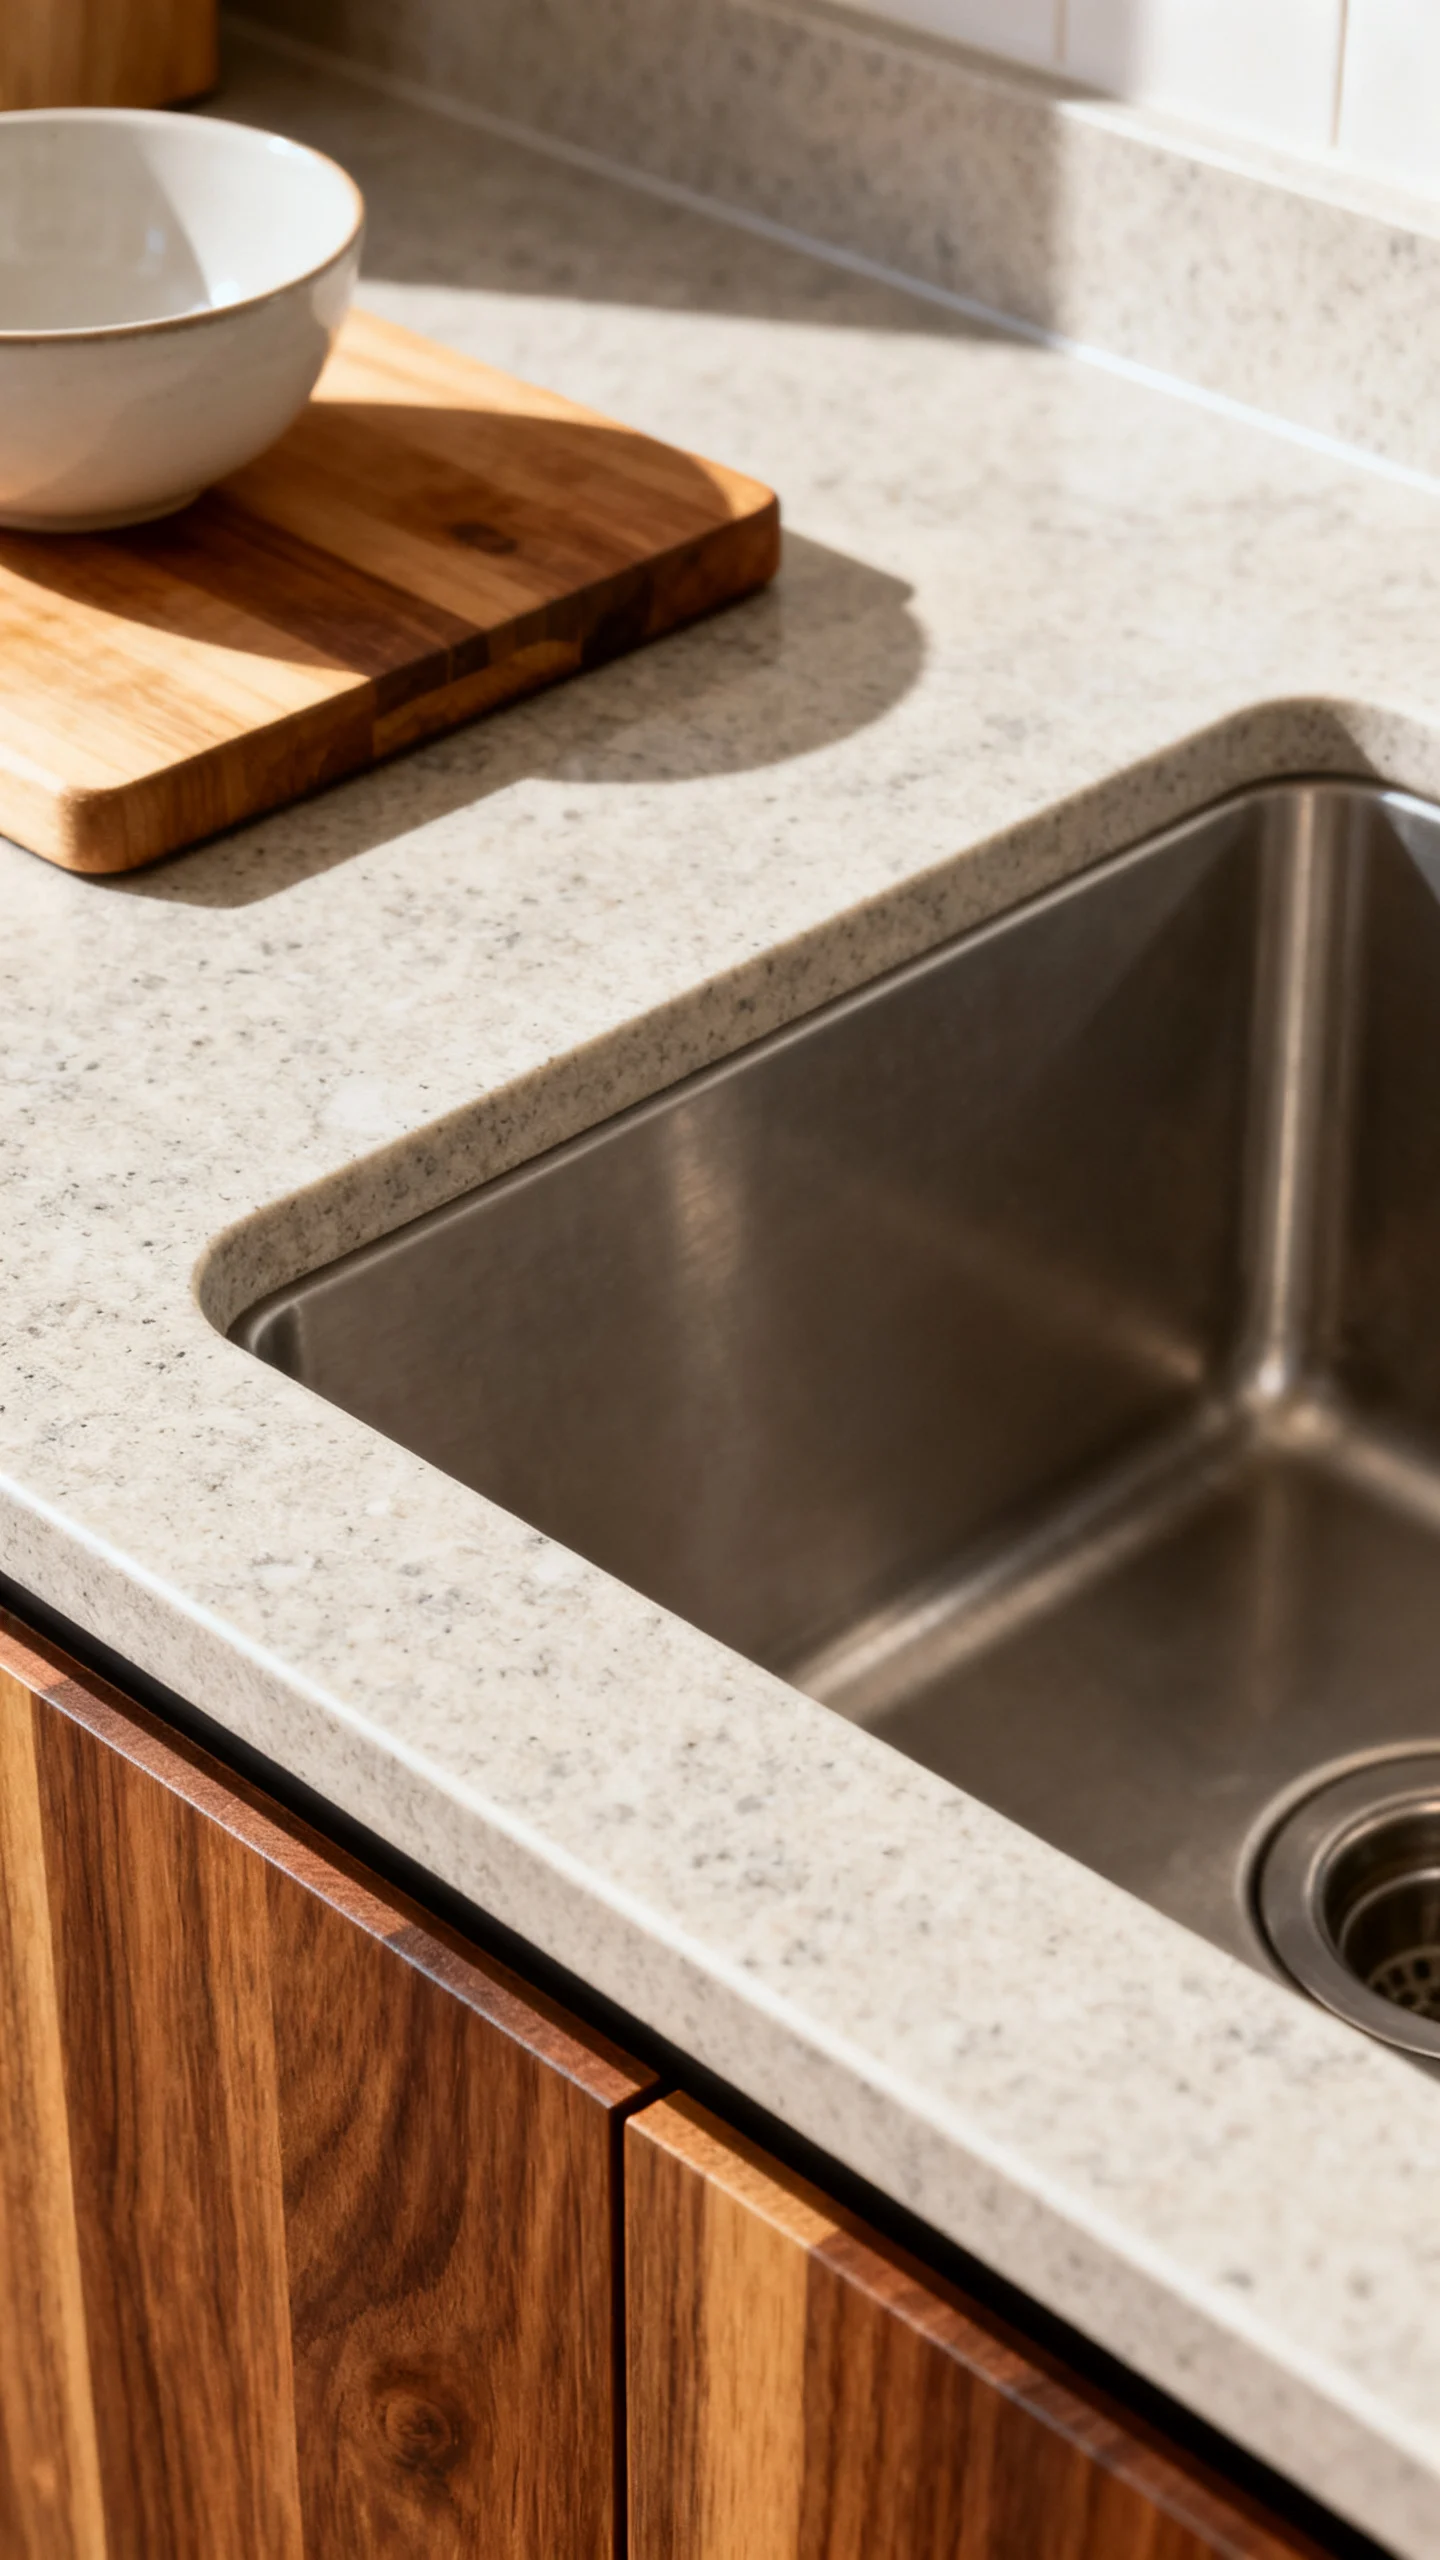
Countertops dominate the visual field in small kitchens, so upgrading them can make the room feel brand new. Budget-friendly options include quality laminate (now available in convincing stone looks), butcher block, and entry-level quartz. Laminate is low cost and easy-care, but it can’t take hot pans; butcher block is warm and inviting, but needs sealing and quick wipe-downs to avoid water staining. If you’re trying to elevate a lower-cost material, pay attention to the edge profile: a thicker-look edge or clean square edge can make a budget counter feel more premium.
5) Install a Backsplash That Looks Custom (Without Custom Prices)
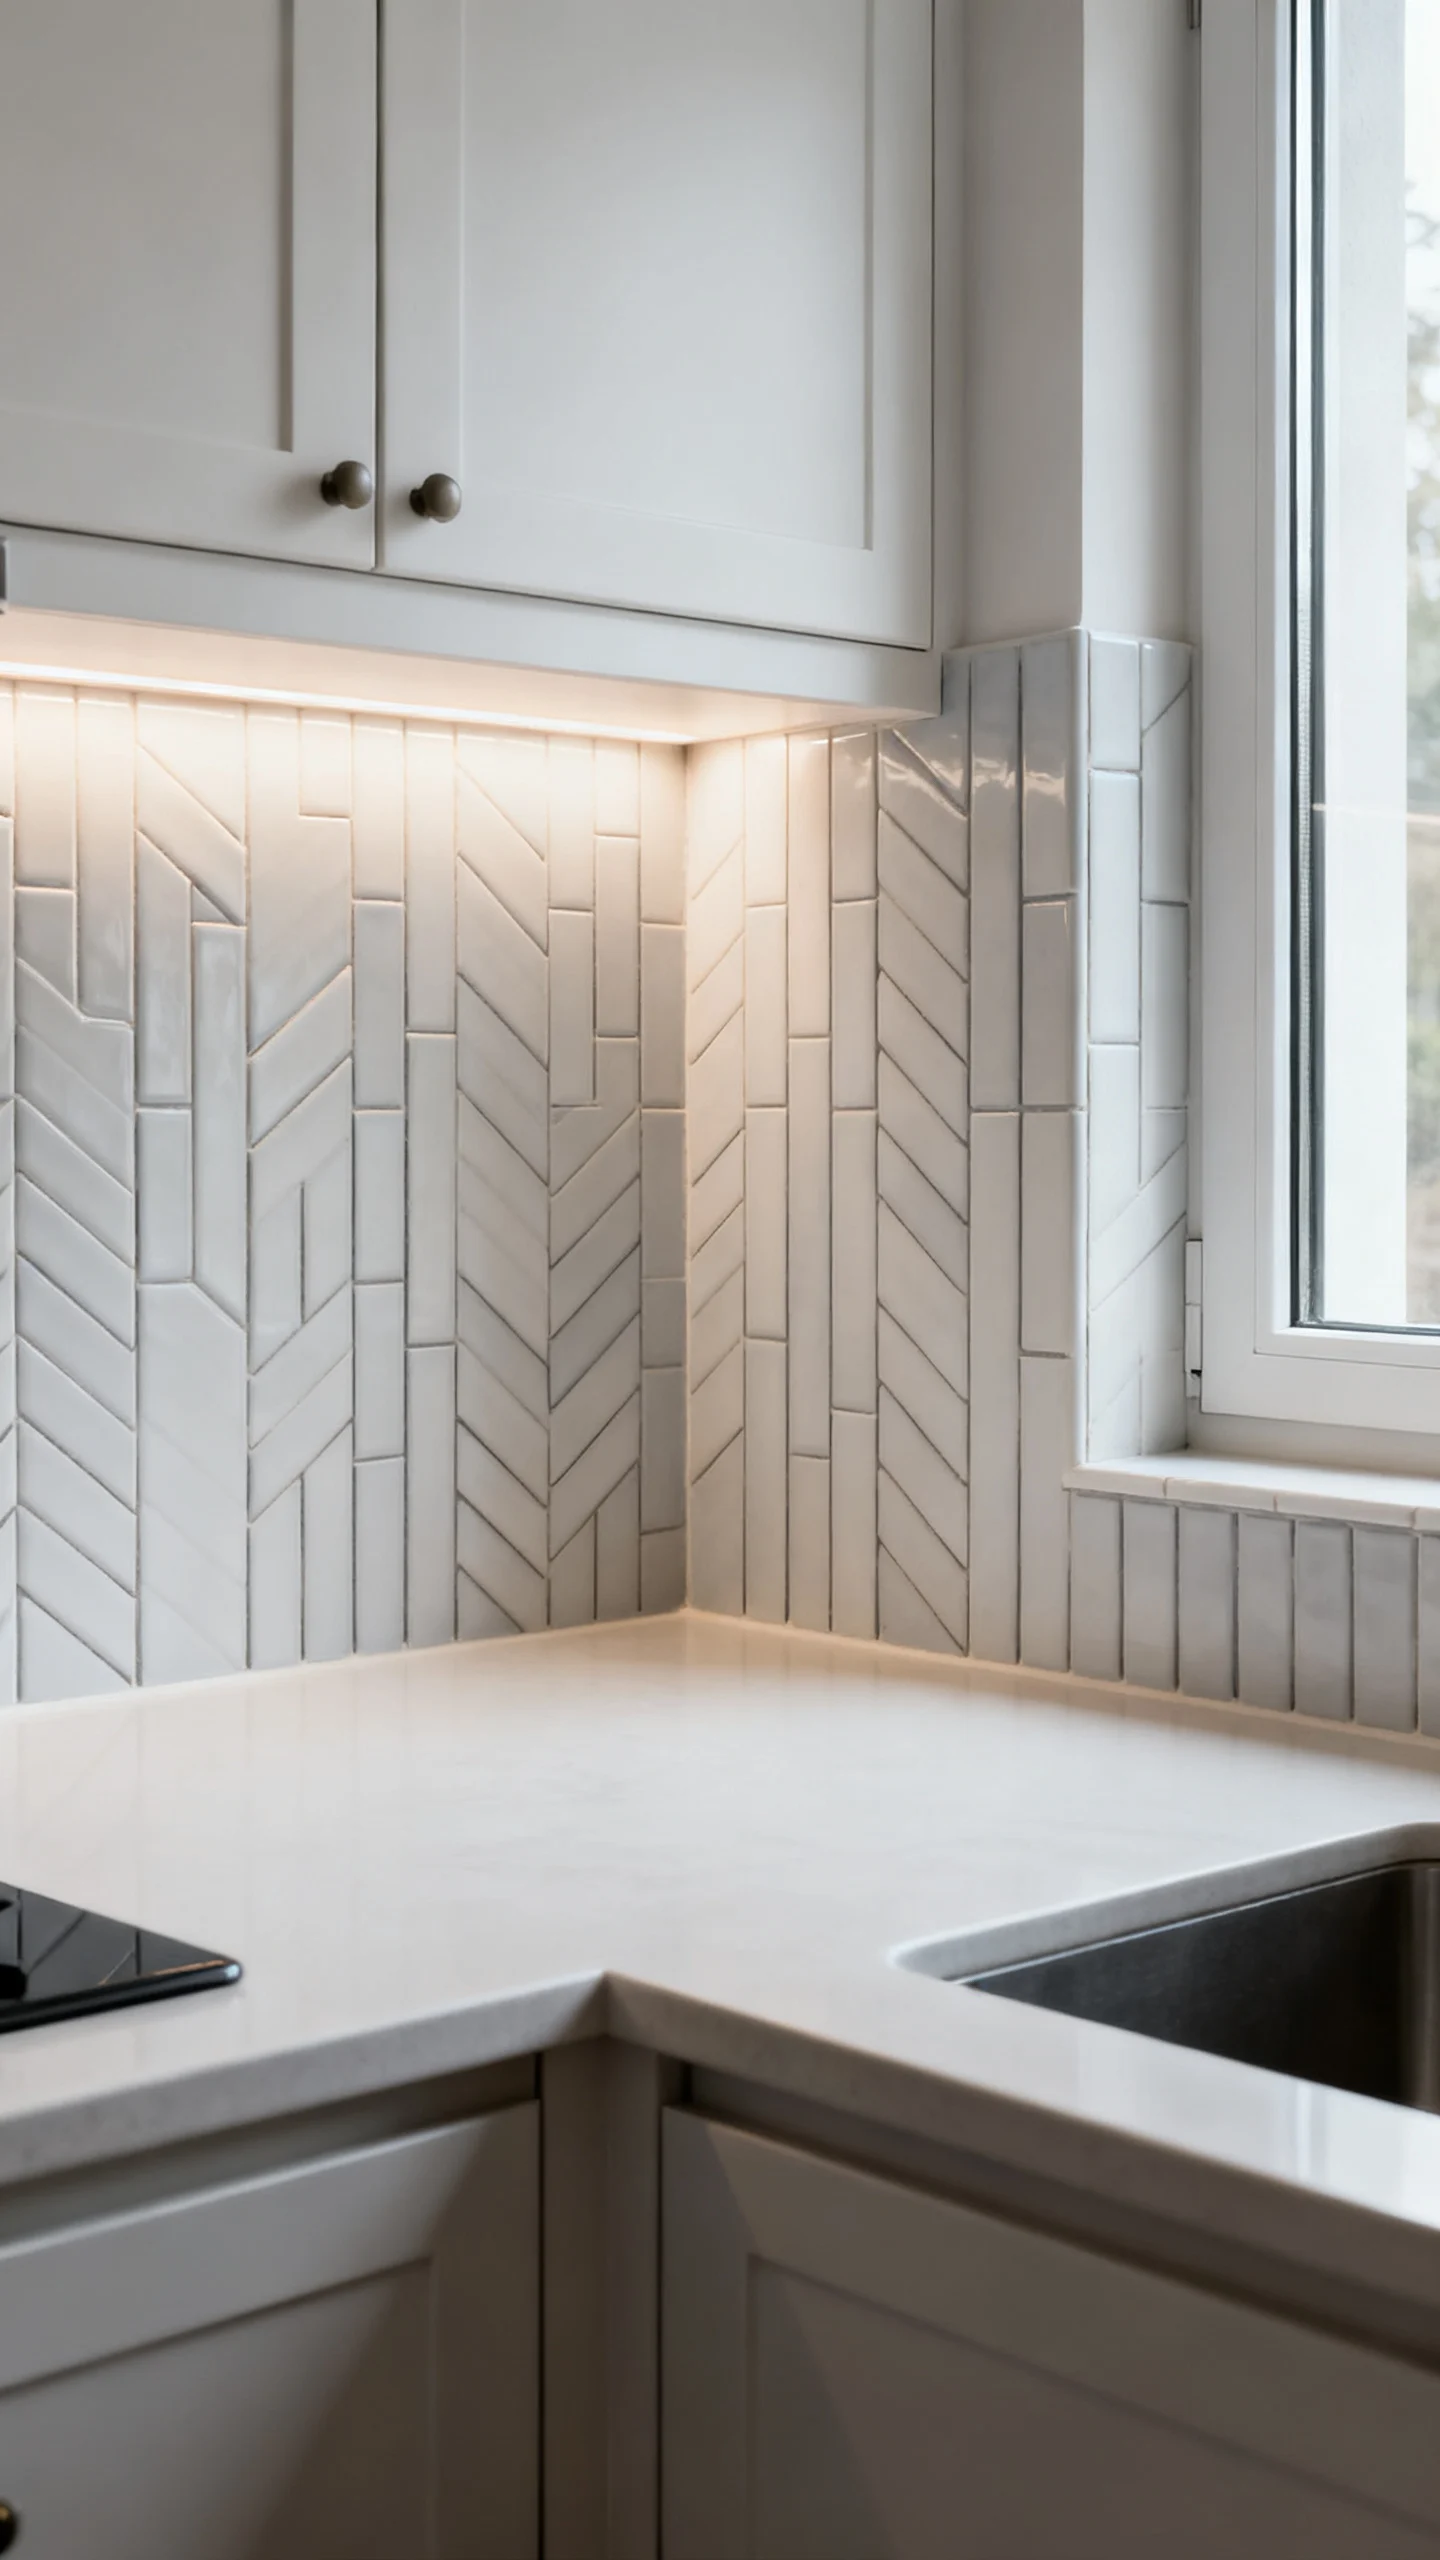
A backsplash is a classic “small space, big payoff” remodel move. Keep costs down by choosing widely available tile (subway, simple ceramic, or 4×4 squares) and installing it in a slightly elevated way—like vertical stack, herringbone on a small section, or a full-height run behind the range only. For easier installation, use larger tiles to reduce grout lines and labor. Finish strong with color-matched caulk at counter transitions and crisp trim at edges; these details make the work look professional and intentional.
6) Upgrade Lighting in Layers (And Fix the Shadow Zones)
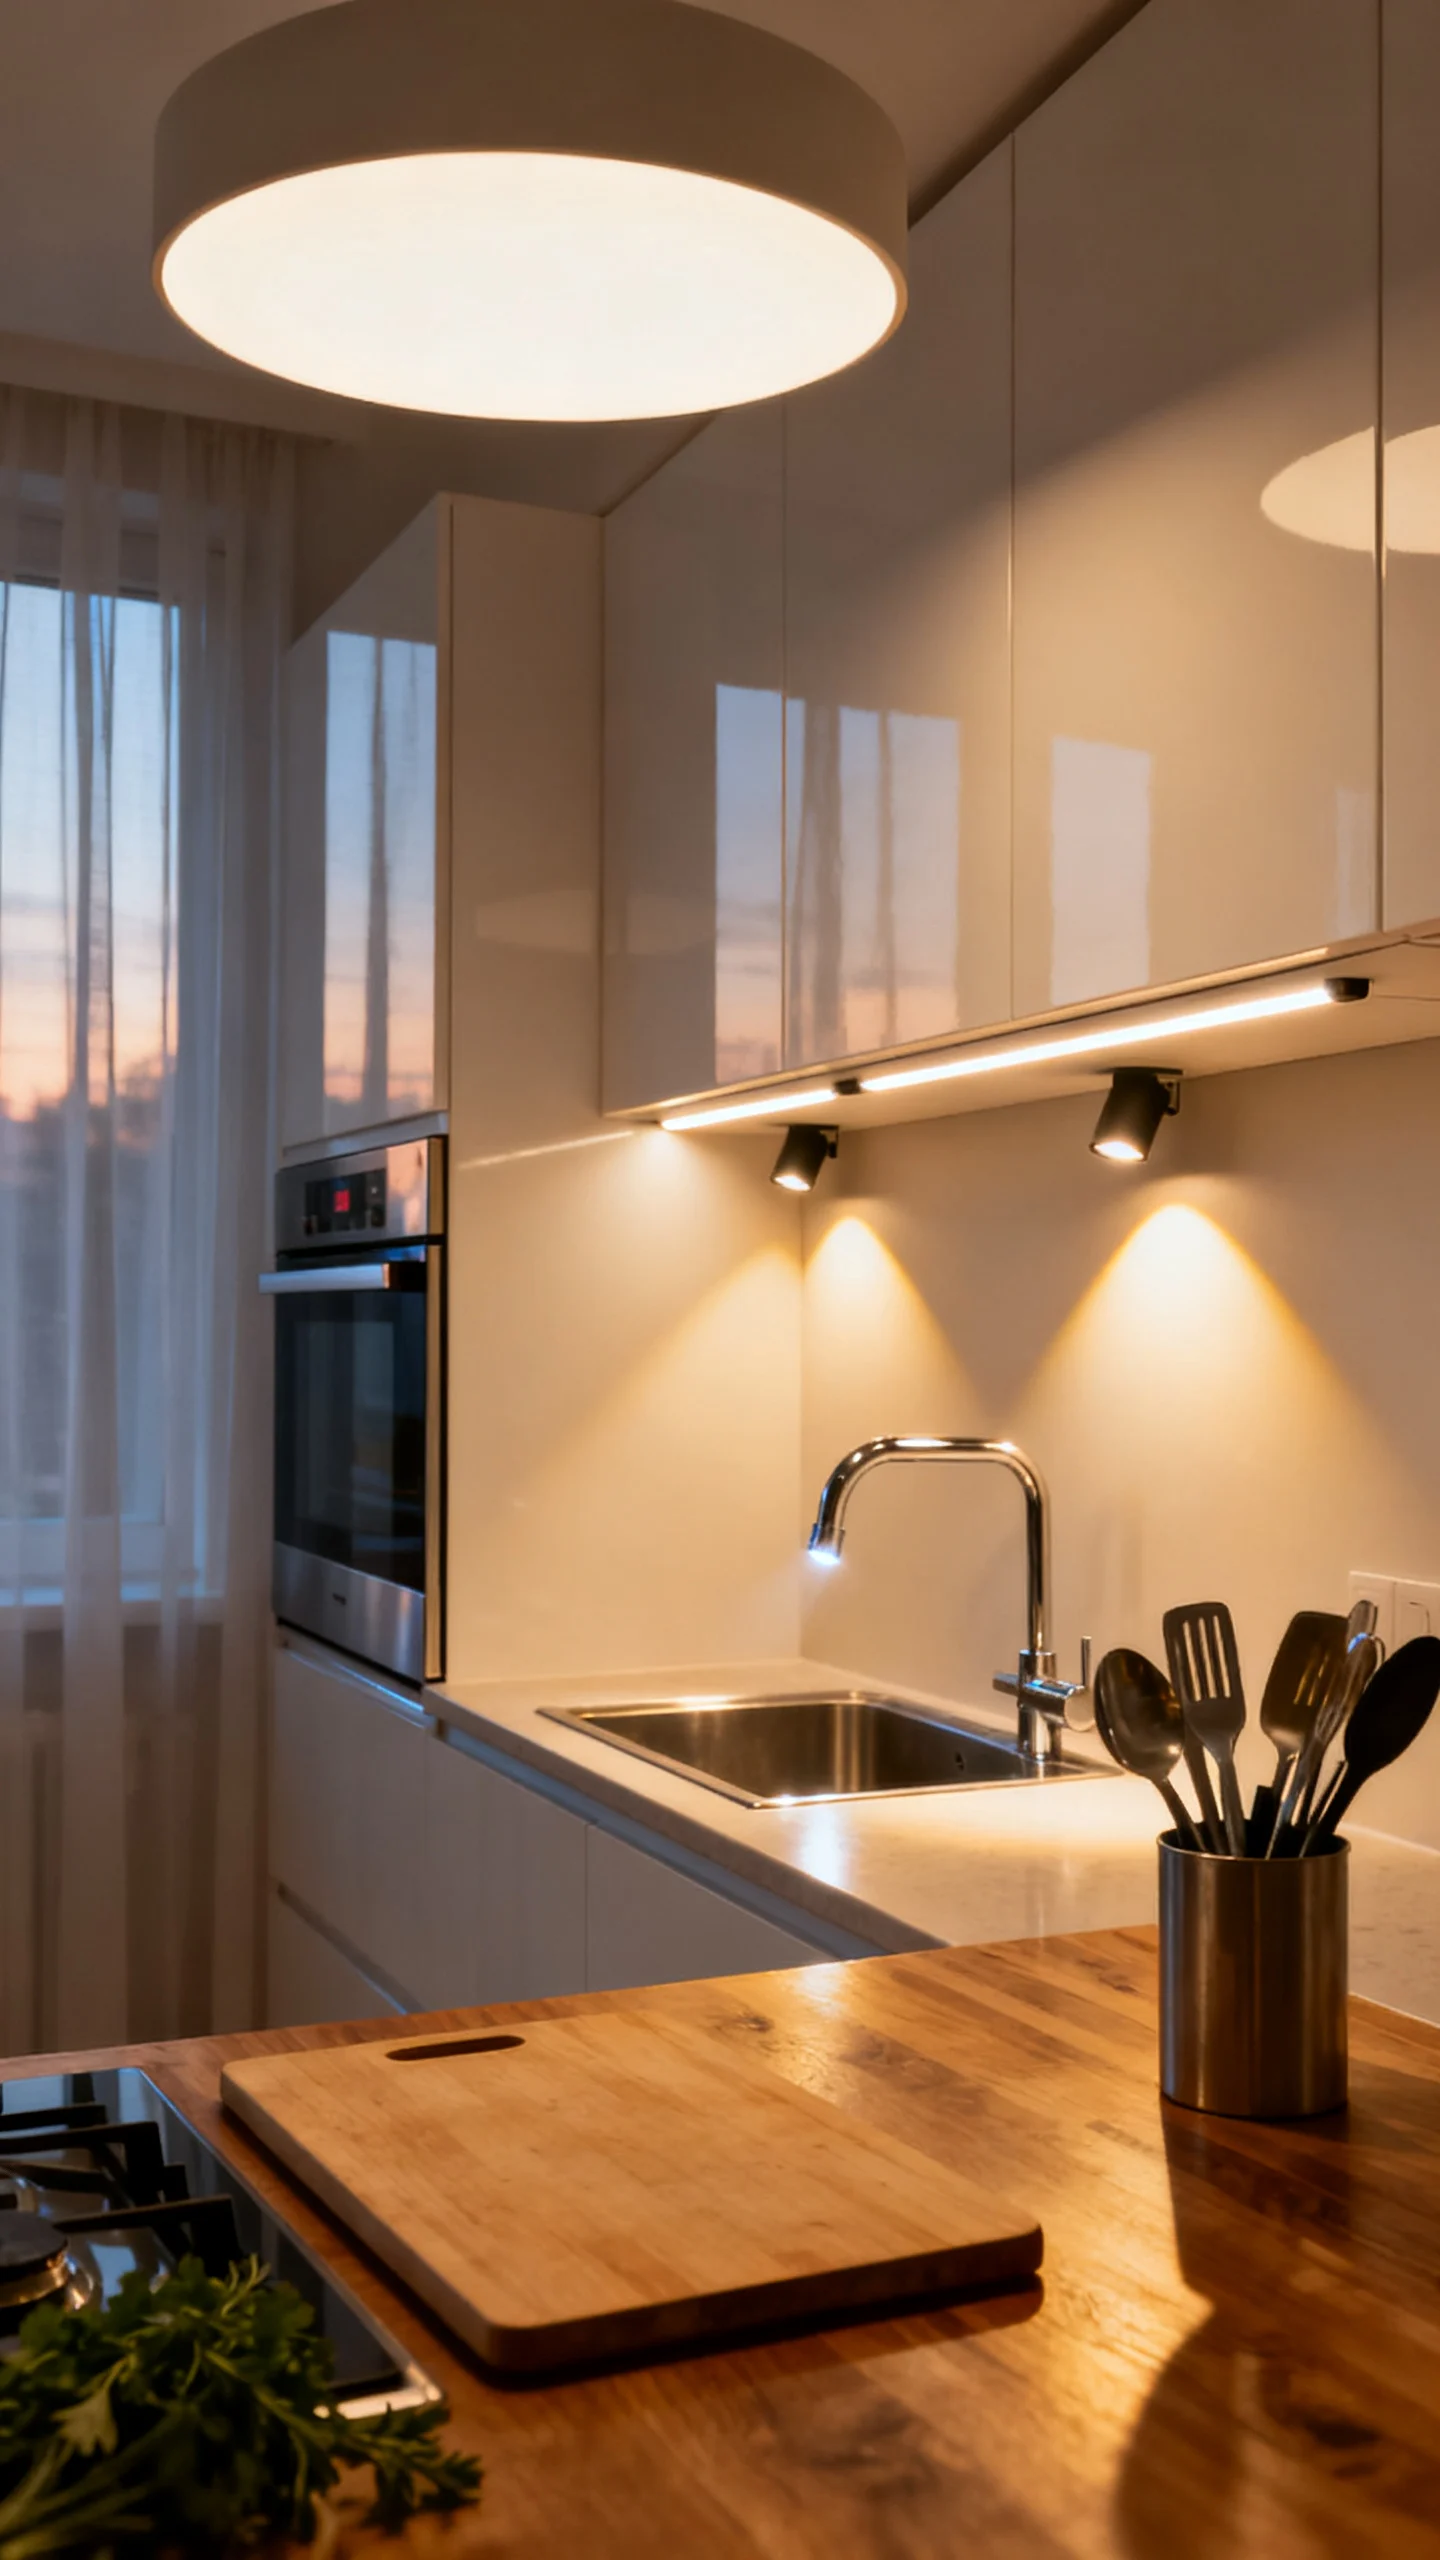
Small kitchens often feel dated because lighting is flat or dim. Aim for three layers: ambient (ceiling), task (under-cabinet), and accent (over sink or a small semi-flush). Under-cabinet LED strips or puck lights are a budget hero—especially if your counters sit in shadow. Choose a warm-neutral color temperature (around 2700K–3000K) for a fresh but not harsh feel. If you’re rewiring, budget for a dedicated switch so task lighting is easy to use daily; if not, plug-in options with a clean cord cover still look polished.
7) Improve Clearance and Flow With Small-Dimension Choices
Remodeling a small kitchen is as much about clearance as it is about finishes. A few smart swaps can dramatically improve movement: consider a counter-depth fridge to reduce aisle crowding, a slimmer vent hood profile, or a single-bowl sink to increase usable counter on one side. As a general guideline, aim for about 36 inches of walkway clearance in primary paths; even gaining 2–4 inches from a bulky appliance can make the kitchen feel easier. Also check door swings: reversing a fridge hinge or choosing a smaller handle profile can prevent daily bumps and bottlenecks.
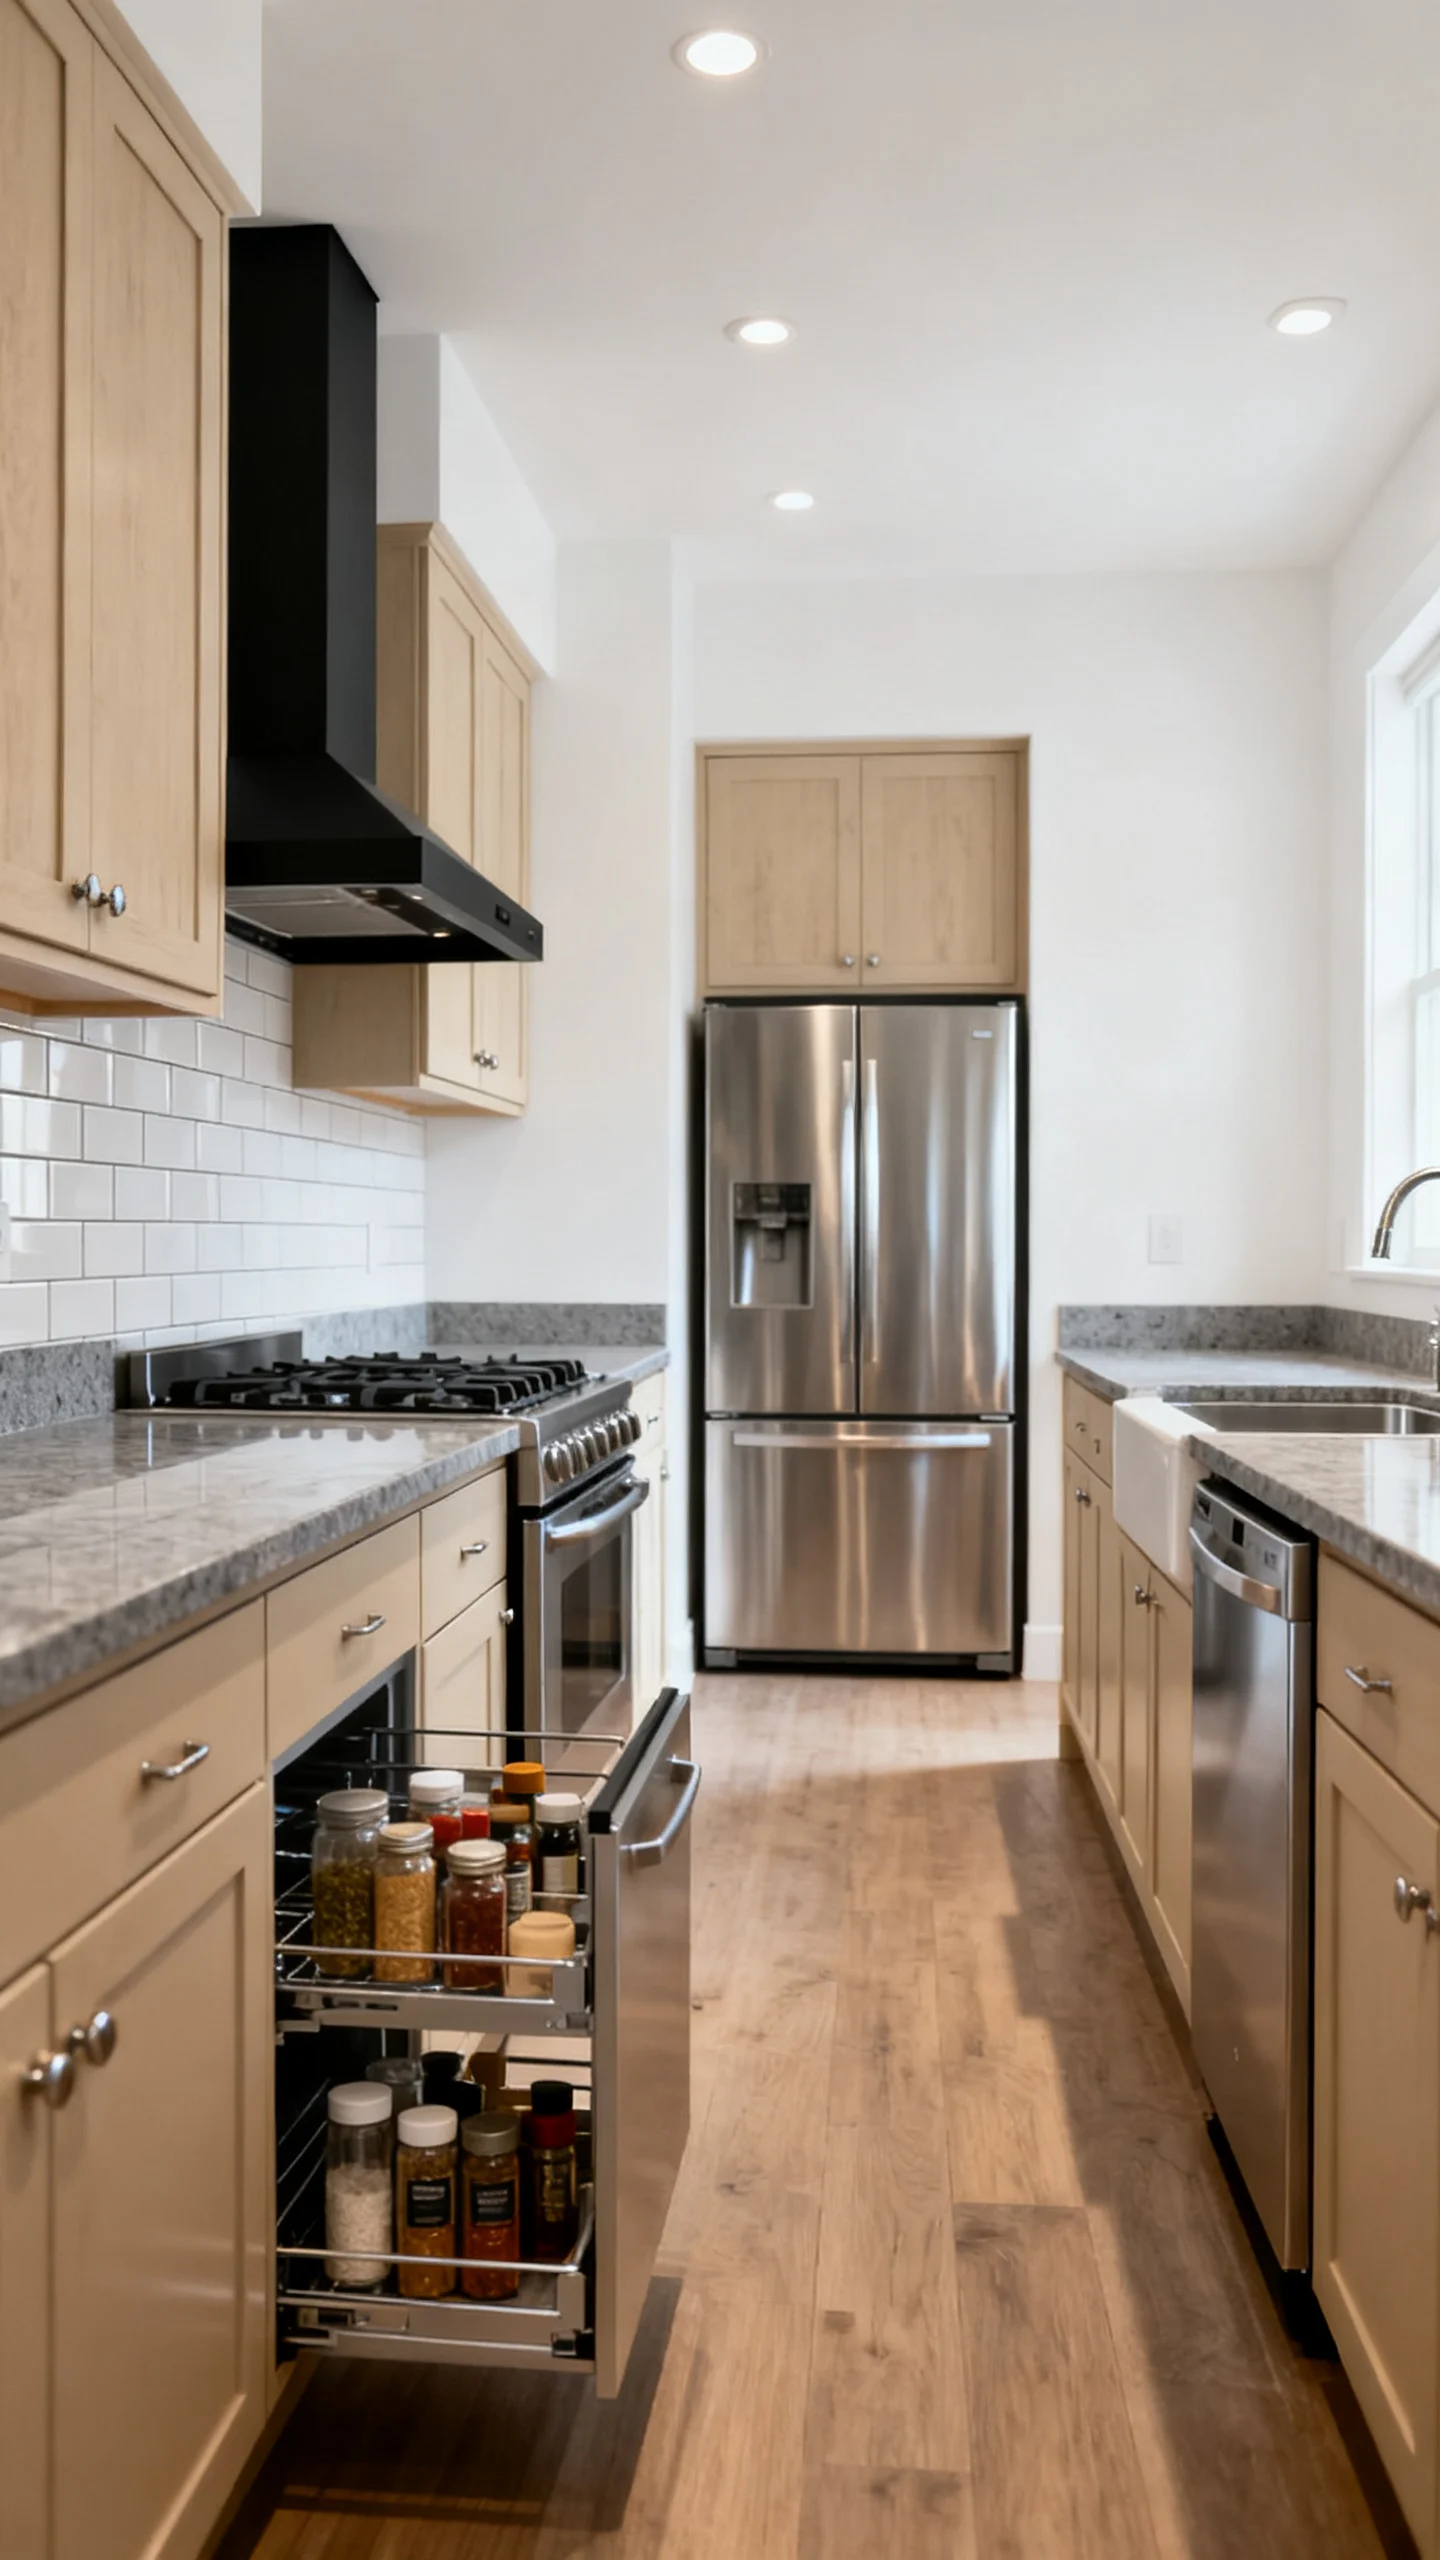
8) Add Storage Where It Counts: Pull-Outs, Rails, and Vertical Space
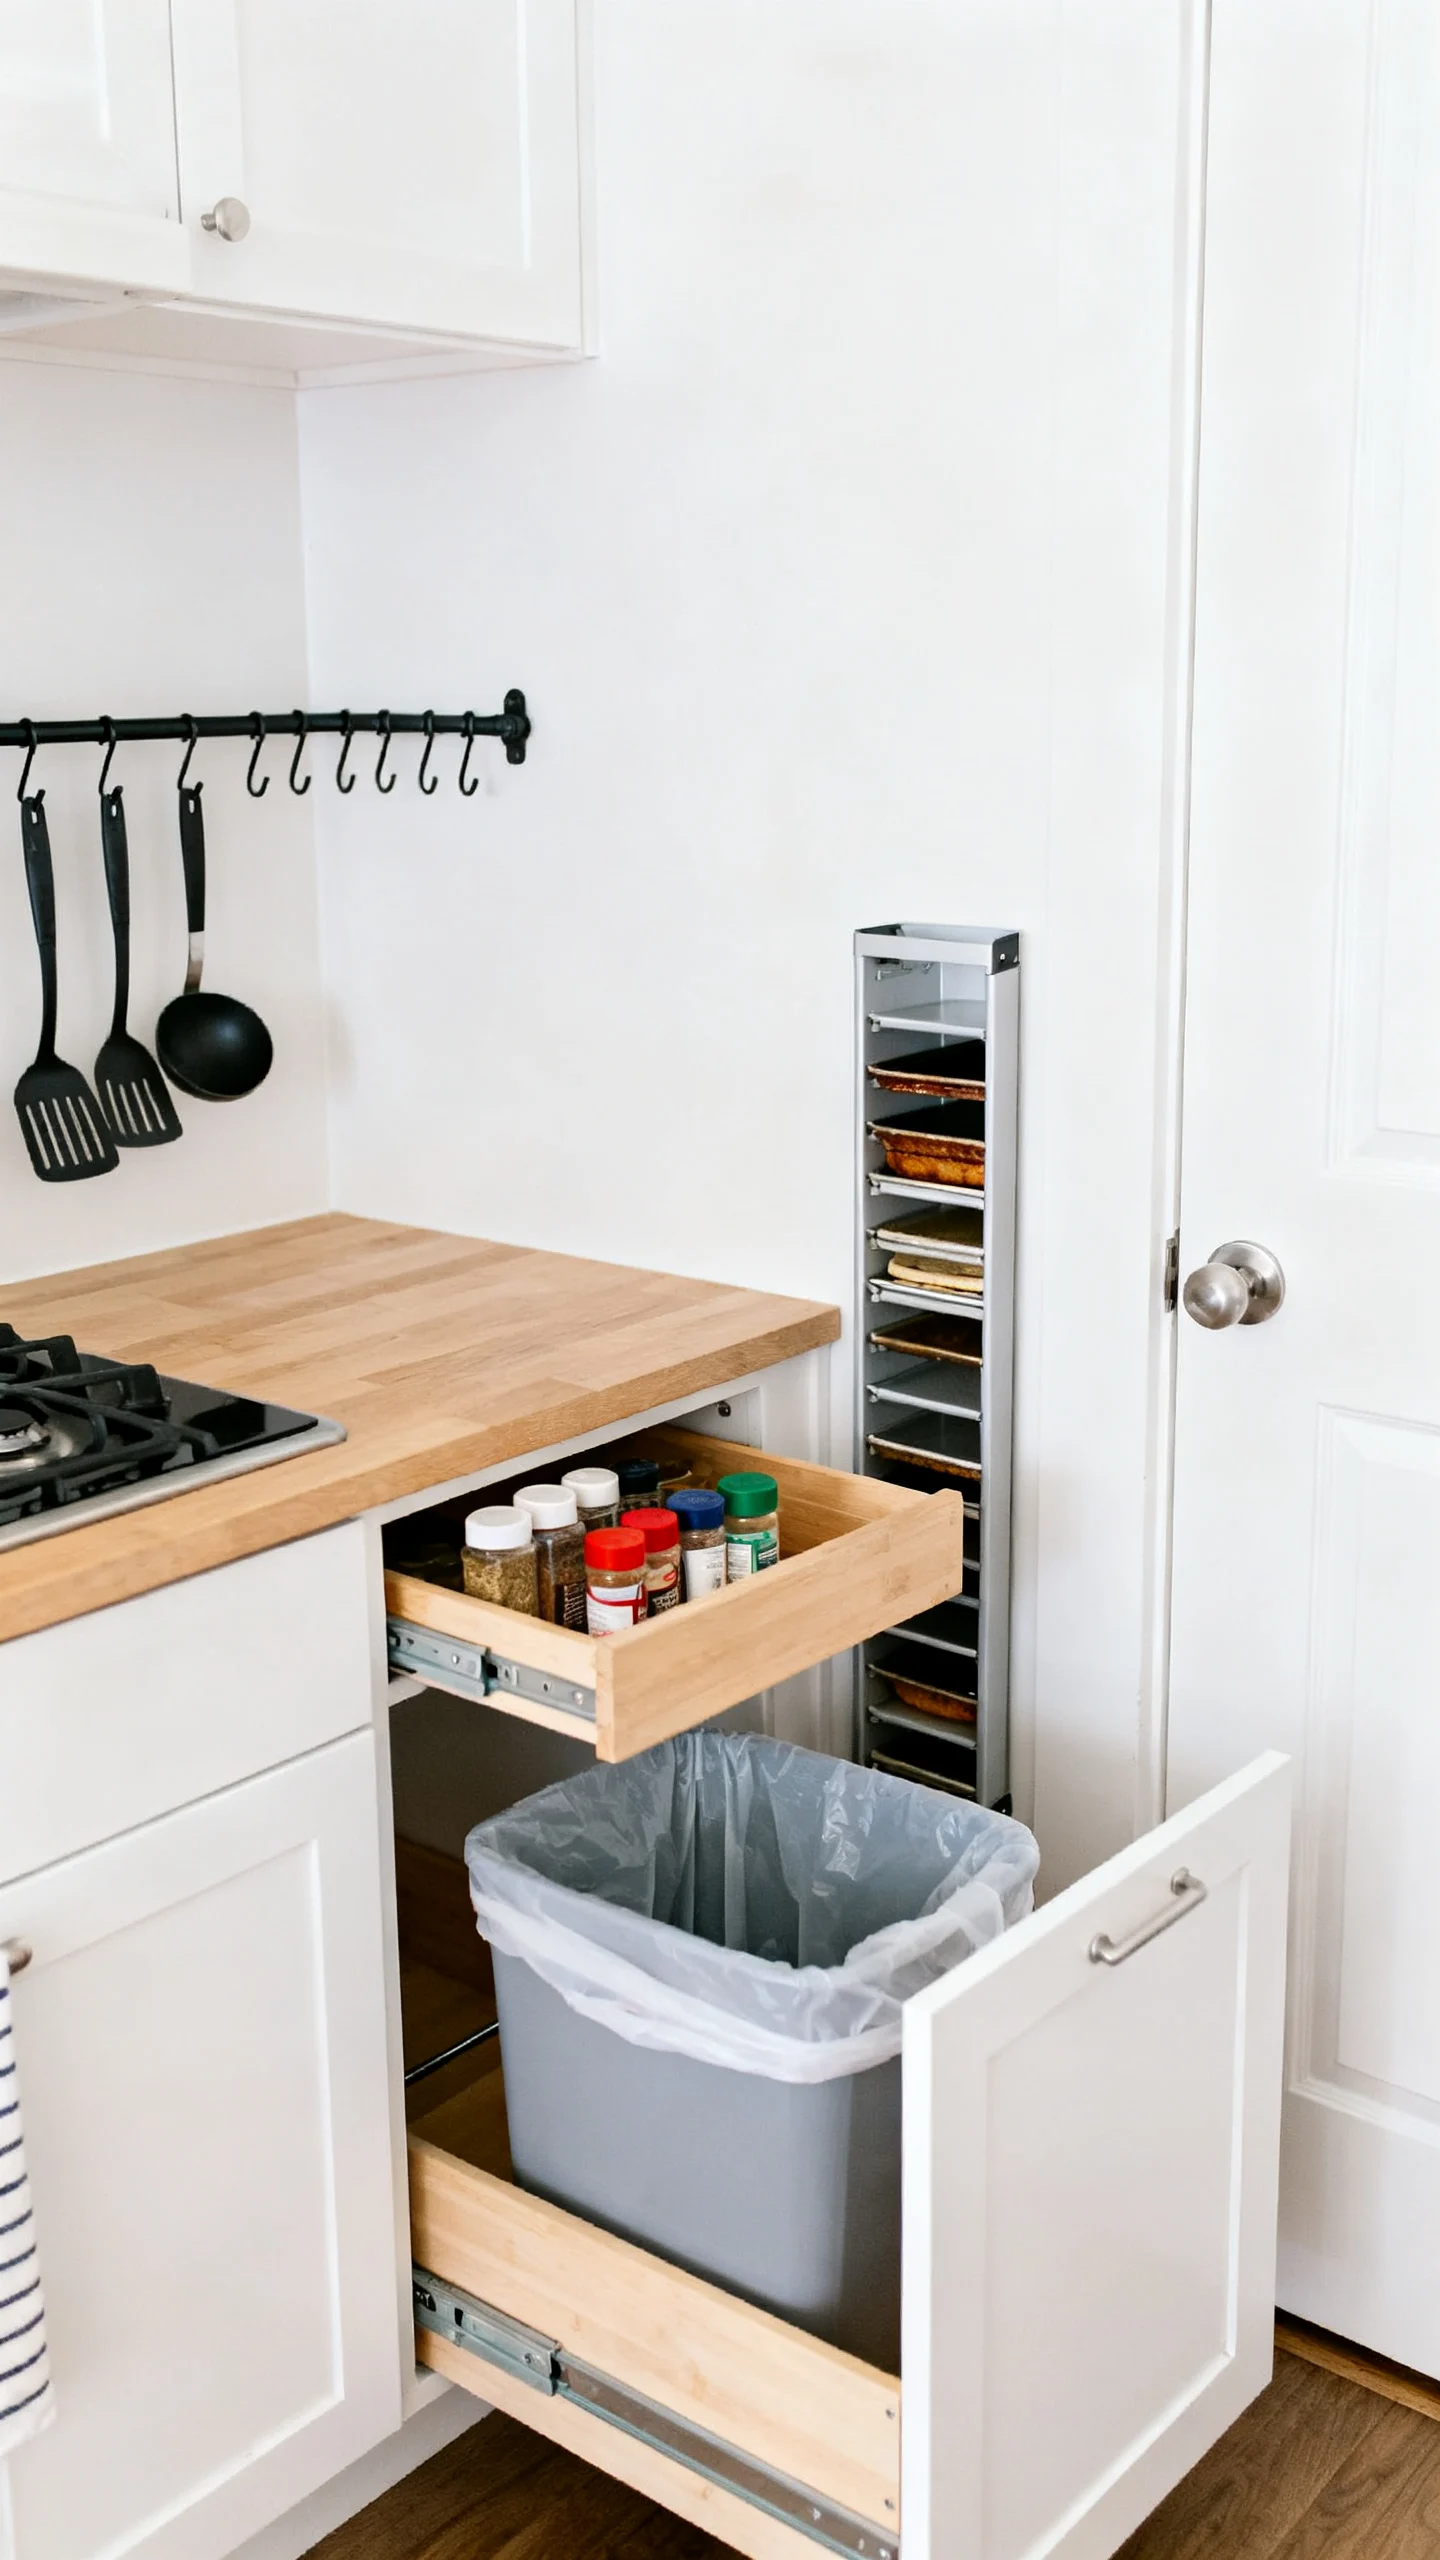
A “brand new” feeling often comes from a kitchen that works better. Instead of buying more cabinets, retrofit what you have: add roll-out trays in lower cabinets, a pull-out trash/recycling kit, and a narrow pull-out for spices or oils if you have a skinny gap. Use vertical real estate with a simple rail system or a magnetic knife strip (installed safely away from traffic zones). For uppers, consider one section of open shelving only if it replaces an awkward cabinet and you can keep it curated; otherwise, prioritize enclosed storage for a cleaner look in a small footprint.
9) Update Appliances Strategically (Not All at Once)
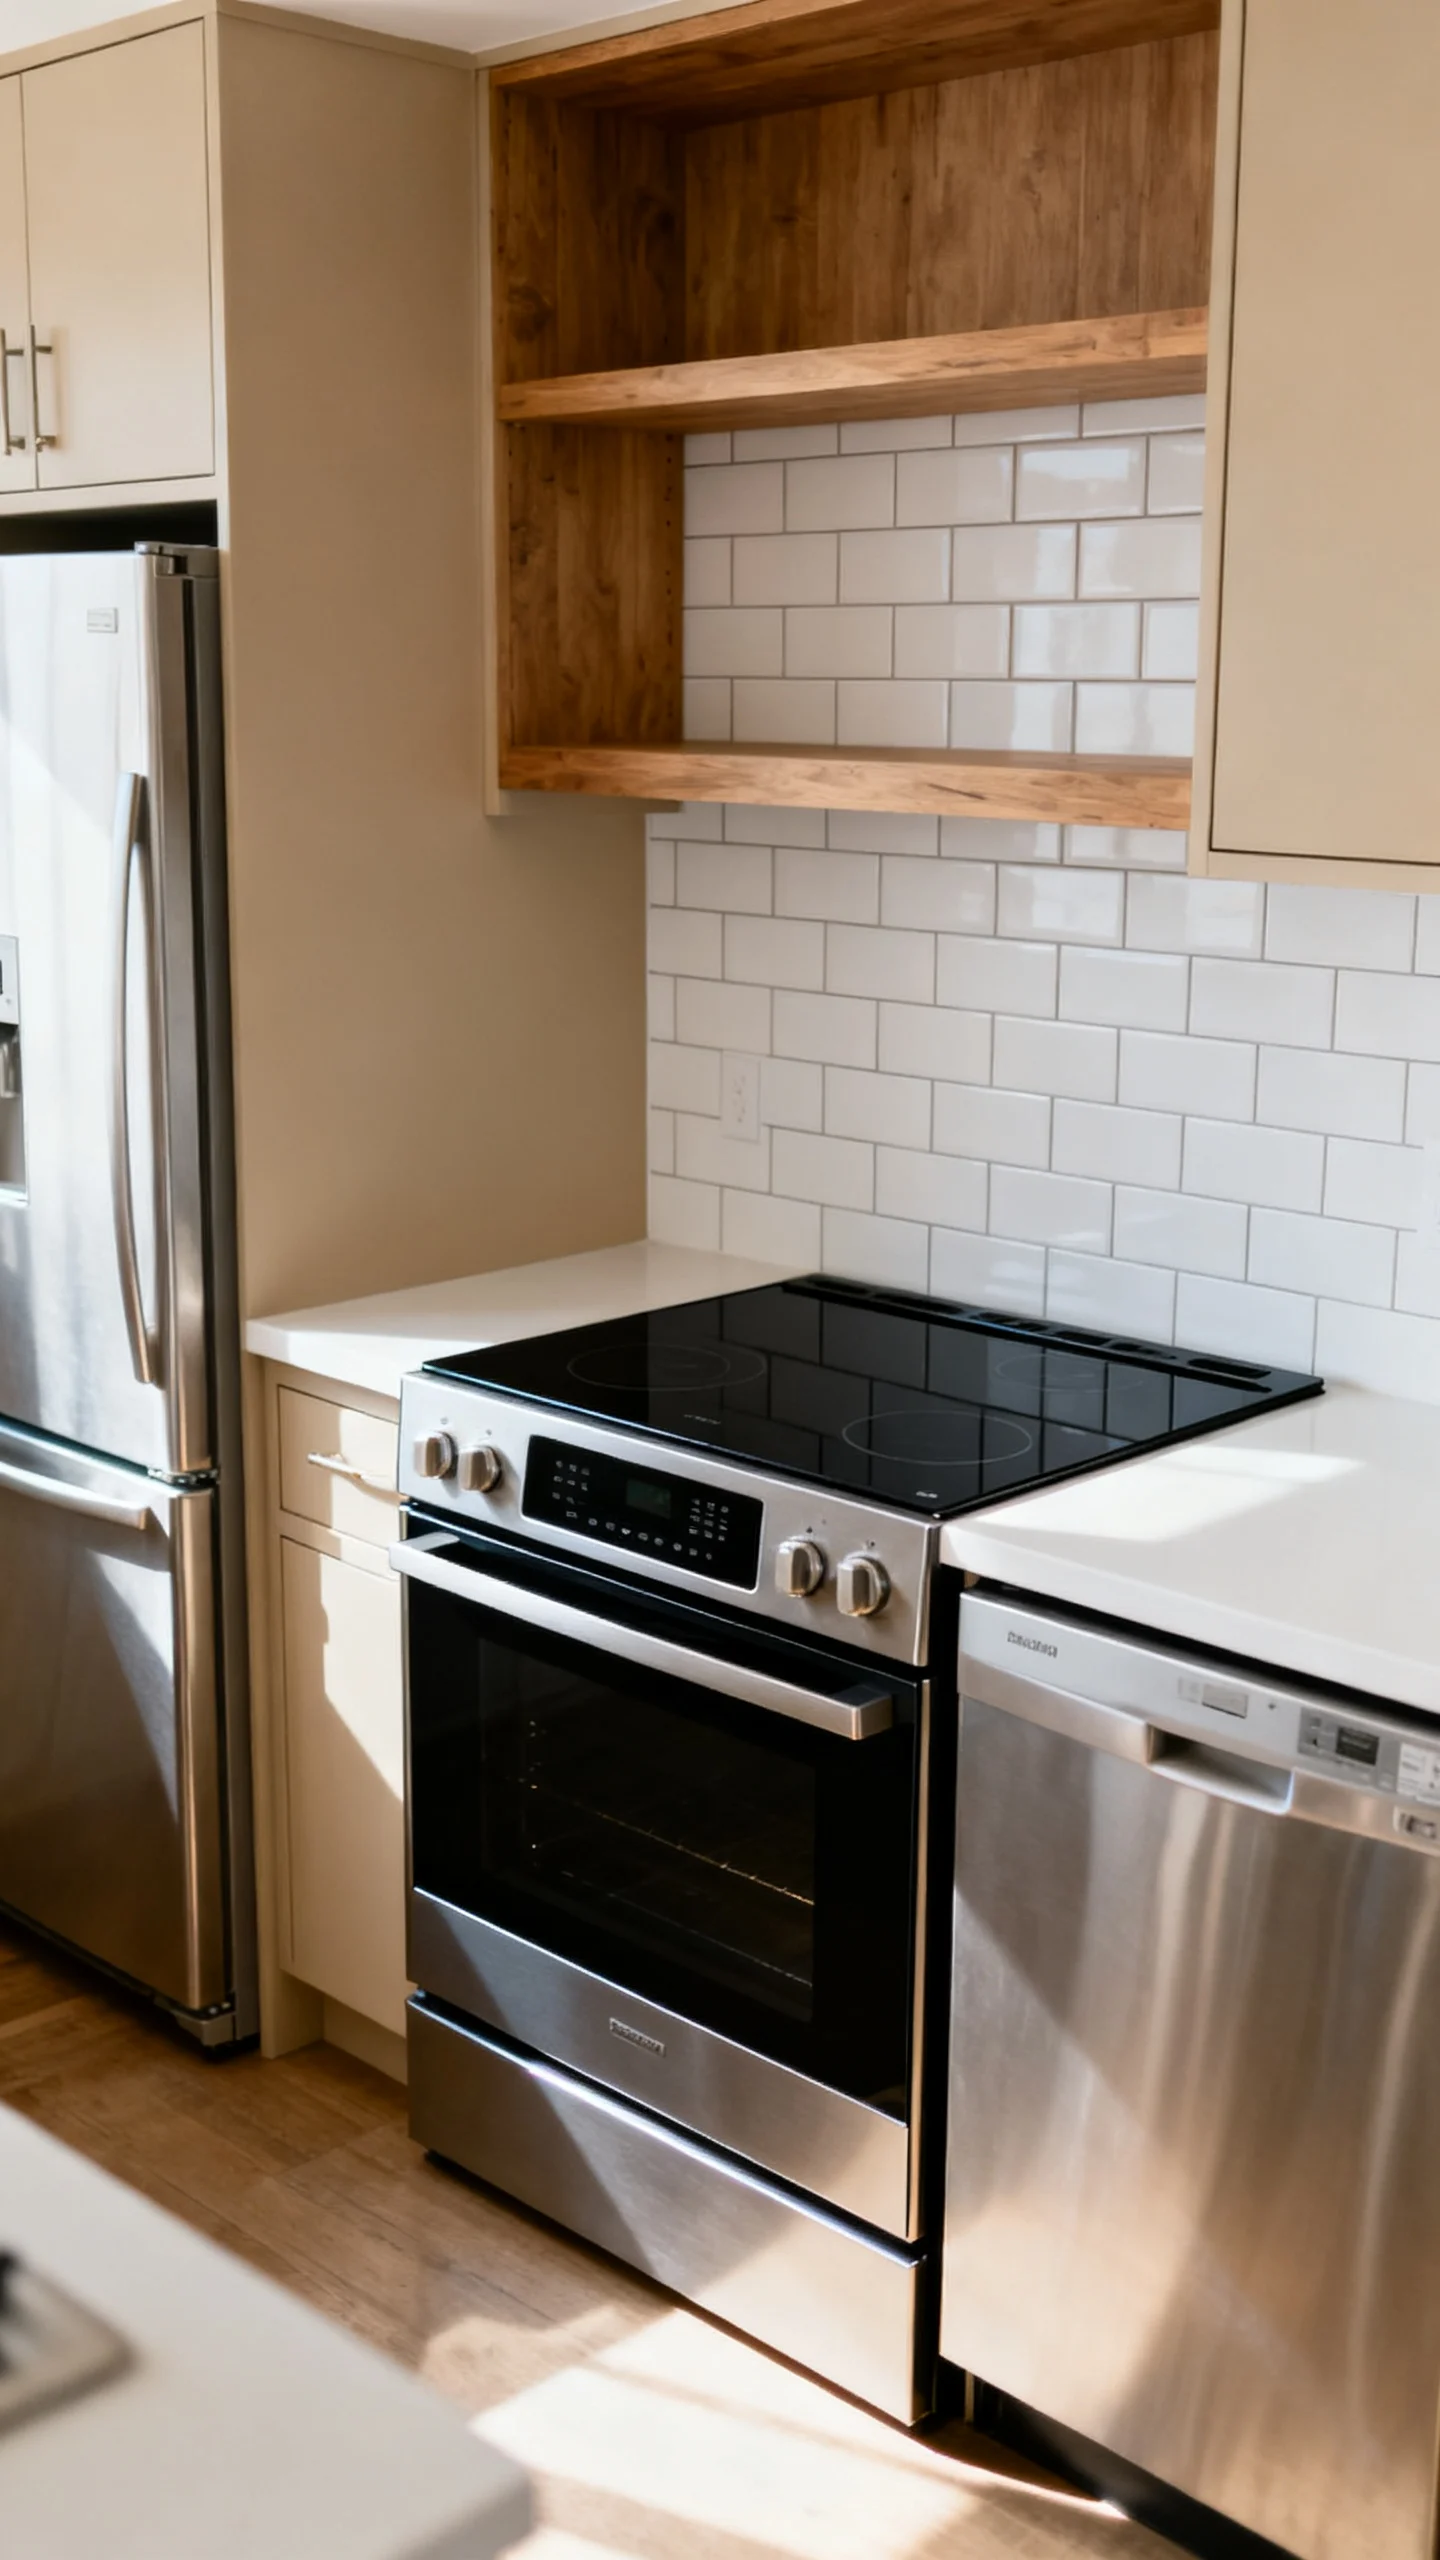
You don’t have to replace every appliance to get a remodeled feel. Start with the one you see the most or the one that creates the biggest functional win—often the range or the fridge. Look for package deals, scratch-and-dent outlets, and last-year models. If mismatched finishes bother you, choose one unifying element: matching handles, a cohesive color (all black or all stainless), or a consistent hardware finish on the surrounding cabinetry. In tight kitchens, double-check appliance dimensions and required clearances—especially fridge door swing and range depth—before you buy.
10) Paint and Flooring: The Two Finishes That Reset the Whole Room
If you want the “brand new” reset, paint and flooring do it fast. Choose a durable, wipeable wall paint in a light, warm tone to brighten a small kitchen without looking stark. For floors, focus on thin, renovation-friendly options that don’t require major height transitions: luxury vinyl plank (water-resistant, budget-friendly), sheet vinyl (seam-minimizing in small spaces), or click tile for a crisp look. If you’re keeping existing floors, a deep clean plus new toe-kicks and fresh paint can still make the whole base area feel updated and intentional.
FAQ
What’s the best budget remodel order for a small kitchen?
Start with layout (confirm you’re keeping it), then cabinets (paint/doors), then counters and backsplash, followed by lighting, and finally appliances and flooring. This order helps you avoid redoing work—like installing a backsplash before counters are finalized.
How can I make cheap upgrades look expensive in a small kitchen?
Prioritize clean lines and finished edges: consistent hardware, matched fillers/panels, crisp caulk lines, and good lighting. In small kitchens, these details are highly visible and create a custom, “new-build” effect.
Is it worth replacing cabinets in a small kitchen?
Only if the boxes are damaged, the layout truly fails, or you need drastically better storage. If boxes are solid, painting or refacing plus pull-out inserts usually delivers the “new kitchen” feeling for far less money.
What countertop material is most budget-friendly for a remodel?
Laminate is typically the lowest-cost option and has improved a lot in appearance. Butcher block can be affordable too, especially on smaller runs, but it needs regular sealing and careful water management around the sink.
How do I make a small kitchen feel bigger during a remodel?
Increase brightness (layered lighting and lighter wall color), reduce visual clutter (simple cabinet fronts and fewer competing finishes), and improve flow (better door swings, slimmer appliance choices, and clear walkways where possible).