
You don’t need a sledgehammer or a six-month reno plan to make your home feel brand new. Give me two days, a playlist, and a shopping list, and we’ll transform your space without blowing the budget—or your sanity. Ready to make your place look “who is your designer?” good?
1. Paint An Accent Wall (Or Two) For Instant Drama
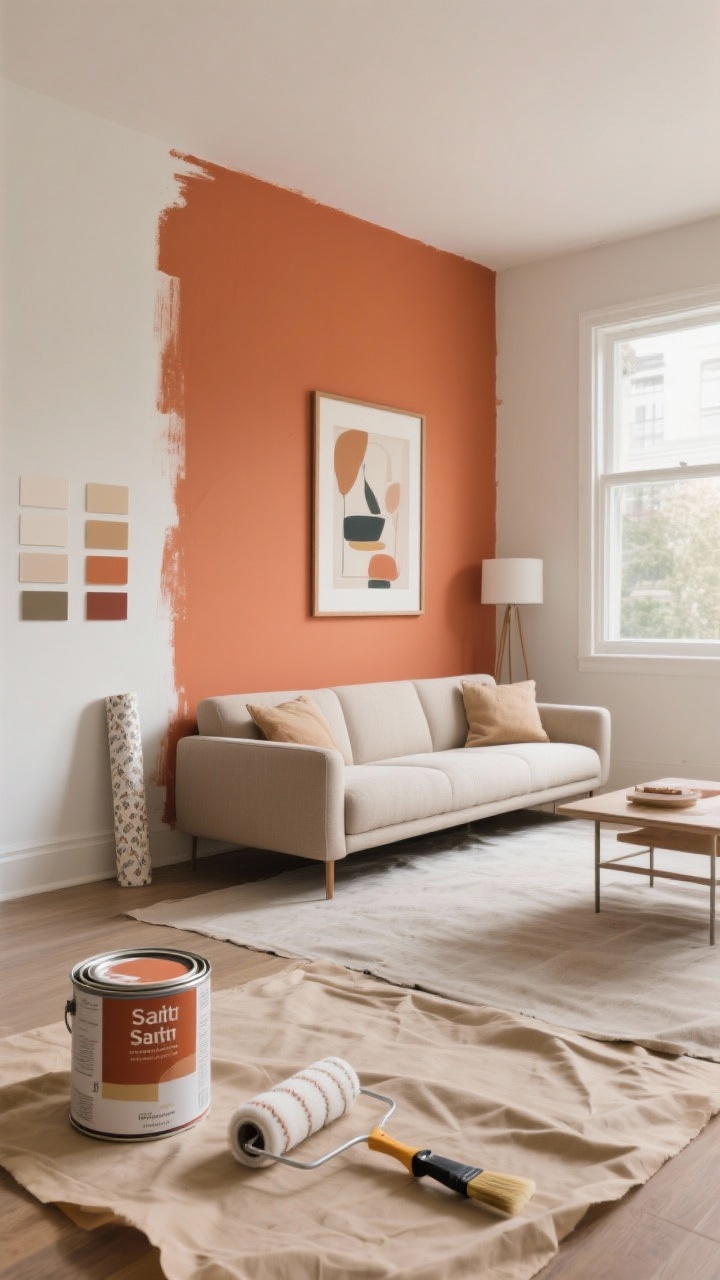
Nothing changes a room faster than color. A bold accent wall adds depth, frames your furniture, and makes everything else look intentional. It’s like contour for your room—subtle but powerful.
Color Tips That Never Fail
- North-facing rooms: Go warm—terracotta, camel, or muted mustard to fight cool light.
- South-facing rooms: Try moody shades like charcoal, forest green, or navy.
- Open concept: Use one color to define a zone (dining, reading nook, office).
Pro Moves
- Sample first. Paint swatches on three walls and check them morning and night.
- Use a quality angled brush for edges and a 3/8″ roller for smooth walls.
- Finish with satin in high-traffic areas; eggshell elsewhere.
FYI: If you’re commitment-phobic, try removable paintable wallpaper in a solid color. It’s renter-friendly and surprisingly convincing.
2. Swap Your Hardware For A Custom-Look Glow-Up
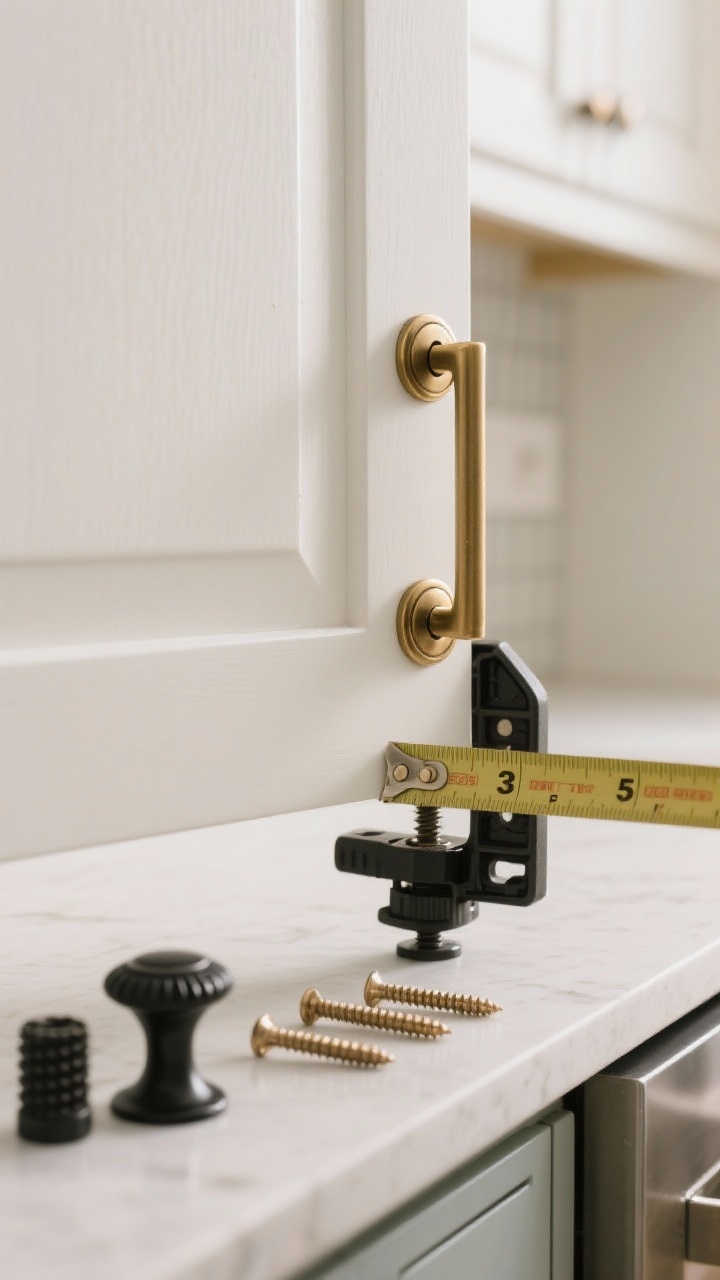
New knobs and pulls can make dated cabinets and furniture look custom. It’s the jewelry of the room—small but loud. You’ll be shocked at the difference.
Where To Upgrade
- Kitchen cabinets: Matte black or brushed brass makes a white kitchen pop.
- Bathroom vanity: Swap builder-grade chrome for knurled black or antique brass.
- Dressers and nightstands: Mix knobs and pulls for a high-end feel.
Quick Tips
- Measure hole spread before ordering longer pulls (typically 3″, 5″, or 6″).
- Use a cabinet hardware jig to drill perfect holes—no guessing, no regrets.
- Match finishes across the room for cohesion (not necessarily the exact style).
Bonus: Add soft-close hinges while you’re at it. Your future self (and your cabinet doors) will thank you.
3. Create A Statement Entry With Peel-And-Stick Everything
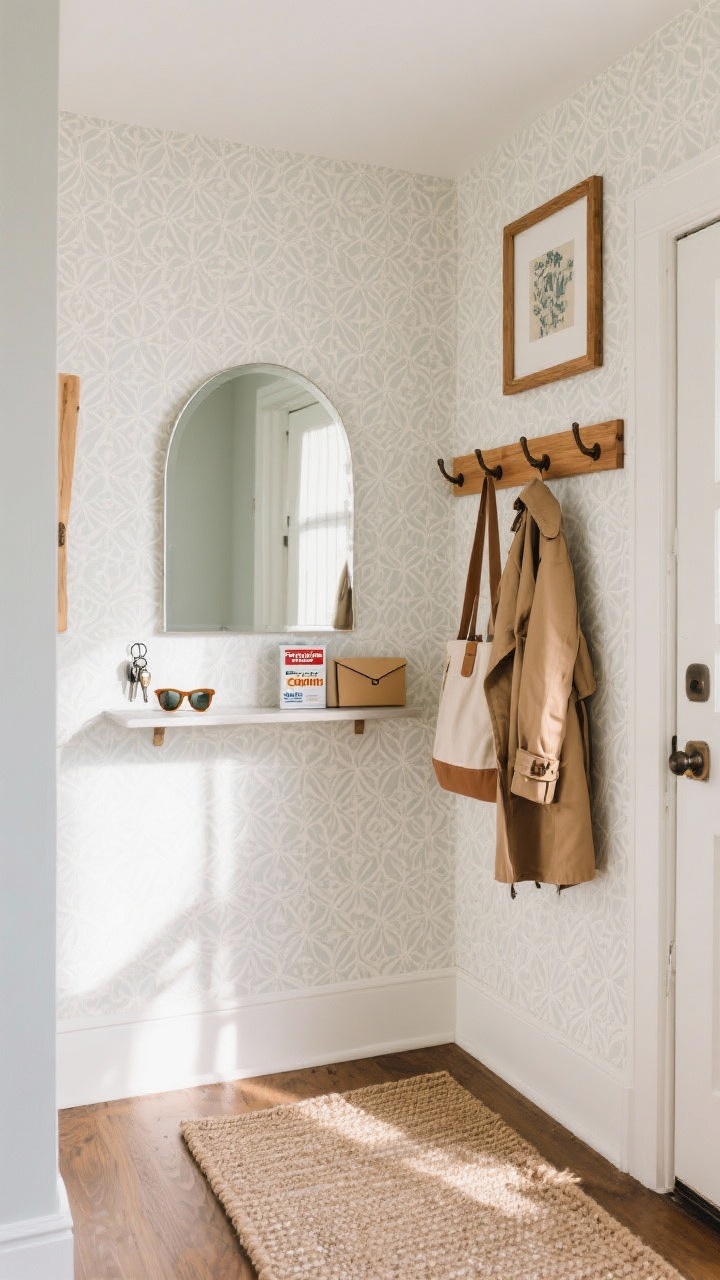
Your entry sets the tone. Make it say “effortlessly stylish” without trying too hard. Peel-and-stick is your best friend here—fast, forgiving, and removable.
Weekend Checklist
- Removable wallpaper: Try a subtle pattern for texture or a punchy print for personality.
- Wall hooks or a shaker rail: Keeps bags and coats off the floor (amen).
- Slim console or floating shelf: Keys, sunglasses, mail—handled.
- Mirror: Round for modern, arched for classic, oversized for drama.
- Rug runner: Choose washable. Mud happens.
Pro Moves
- Hang art at eye level—about 57″ from the floor to center.
- Repeat one material twice (wood hooks + wooden frame) to tie everything together.
- Use Command strips for renters or commitment issues.
Small space? A wall-mounted shelf and a skinny mirror still do the trick. No excuse zone.
4. Layer Lighting Like A Stylist (No Electrician Needed)
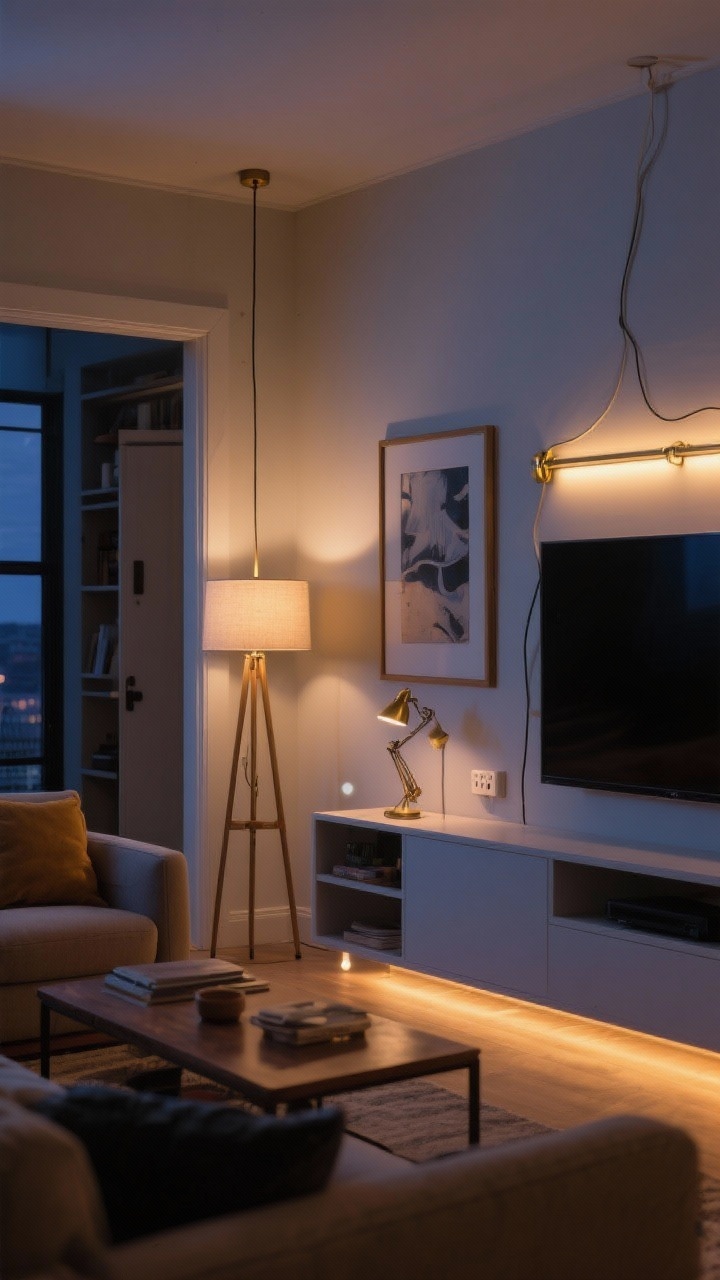
Overhead lights alone? Harsh. Layered lighting makes your home feel cozy, curated, and expensive. The good news: it’s mostly plug-and-play.
The Three Layers
- Ambient: Floor lamps or plug-in pendants for the overall glow.
- Task: Desk lamps, under-cabinet strips, or swing-arm lights where you work.
- Accent: Picture lights, LED strips behind TVs, or shelf lighting for vibe.
Weekend Wins
- Install plug-in sconces and hide cords with paintable channels.
- Add smart bulbs for dimming and warm-to-cool color control.
- Stick motion-activated lights in closets and pantries. Tiny upgrade, huge payoff.
IMO, dimmers are the secret sauce. Dinner party? Movie night? One tap, instant mood.
5. Build A Chic DIY Headboard (No Carpentry Degree Required)
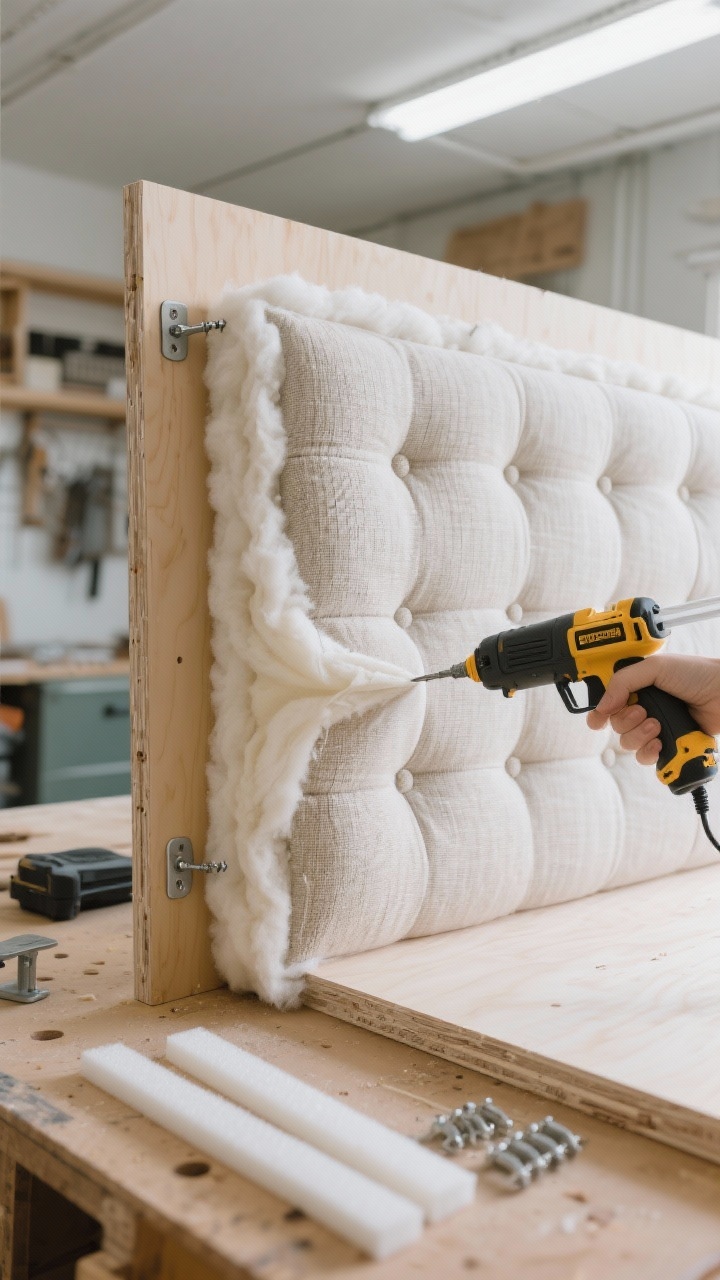
Your bed is the star of the bedroom. A simple upholstered headboard makes it look intentional and luxe—without the designer price tag.
Simple Upholstered Method
- Supplies: Plywood cut to width, 2″ foam, batting, staple gun, and upholstery fabric.
- Steps: Spray-glue foam to wood, wrap with batting, then fabric. Pull tight, staple back.
- Mount: French cleat on the wall or directly to the bed frame.
Style Ideas
- Channel-tufted: Use foam strips for that boutique-hotel look.
- Scalloped: Cut a wavy top and cover in velvet for soft glam.
- Textile art: Stretch a kilim or vintage rug over the panel for texture.
Keep fabric durable: performance linen, velvet, or faux leather are forgiving and pet-friendly. And yes, pattern hides coffee spills. Hypothetically.
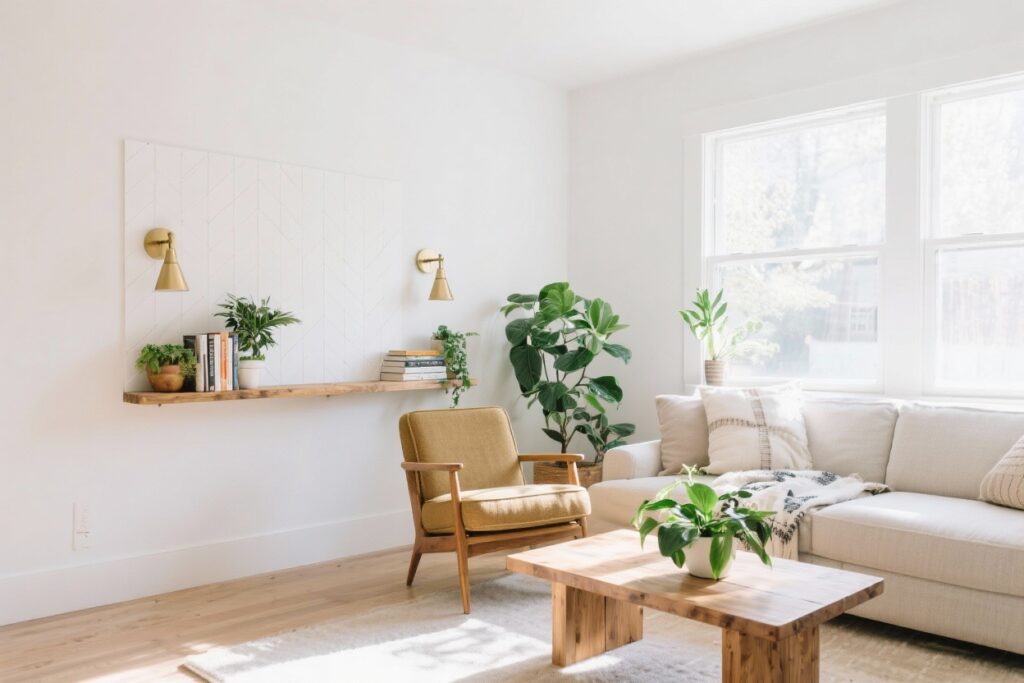
6. Upgrade Open Shelving With A Styled, Shop-The-House Makeover
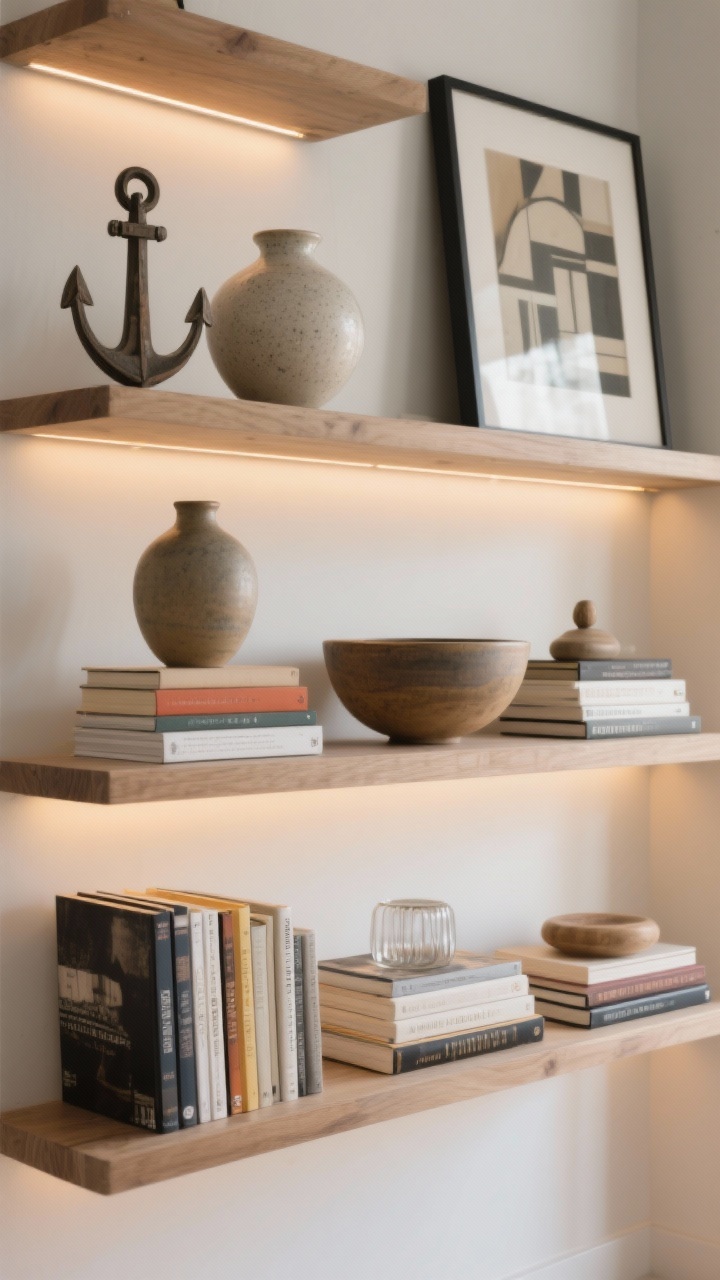
Open shelves can look messy or museum-level chic. The difference? Editing and styling. You probably already own everything you need—just rearrange like a pro.
The Formula
- Anchor pieces: Larger items like vases, bowls, or framed art go first.
- Stacks: Pile books horizontally and top with a small object for height play.
- Odd numbers: Group items in threes or fives—it’s weirdly satisfying.
- Texture mix: Wood, ceramic, glass, and metal so it doesn’t fall flat.
Practical Tips
- Leave negative space so shelves don’t scream “gift shop.”
- Color-block books or turn some spines inward for a calmer palette.
- Use clear museum gel to secure wobbly decor (especially with kids or pets).
Bonus weekend flex: Add under-shelf LED strips with a warm glow. Suddenly, it’s a gallery.
7. Refresh Floors With Rugs, Transitions, And A Deep Clean
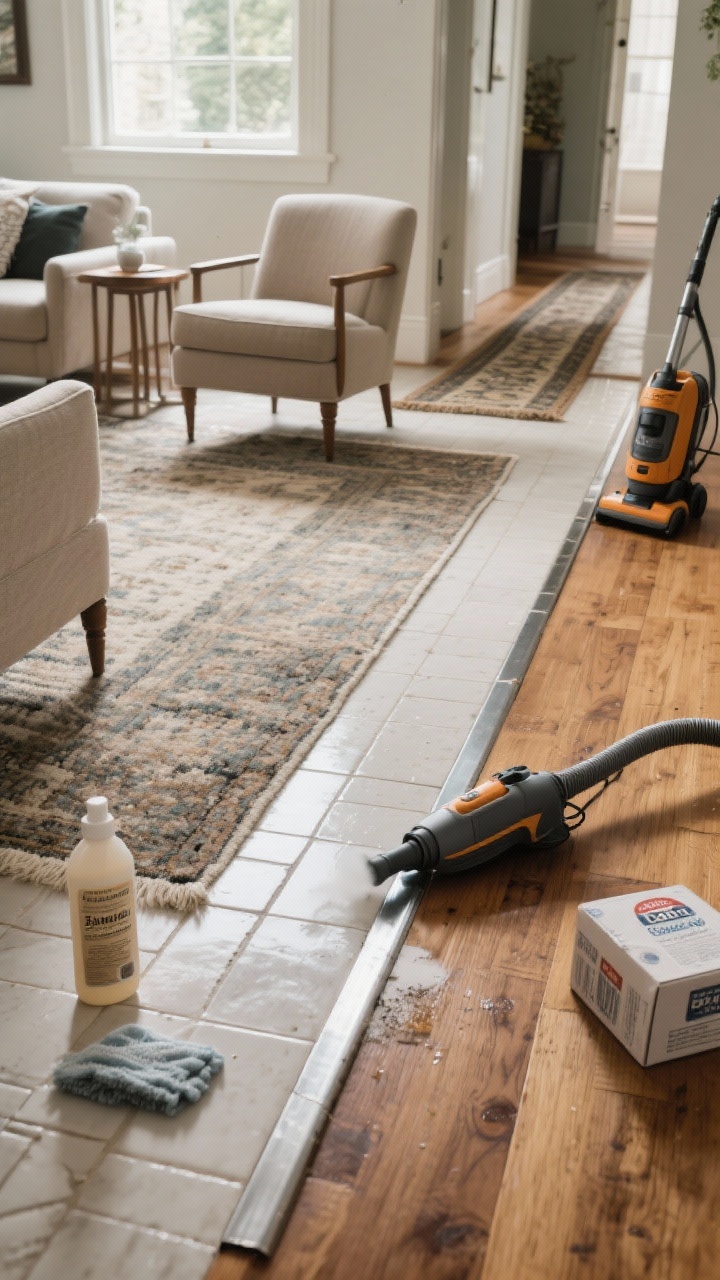
We ignore floors until they’re screaming. A weekend is plenty to make them look newish—no sanding marathon required. Strategic rugs and cleaning go a long way.
Rug Rules That Work
- Living room: Front legs of furniture on the rug, minimum. Bigger is better.
- Bedroom: 8×10 under a queen (or two runners on each side for small rooms).
- Dining room: Rug should extend 24″ beyond the table on all sides.
Mini Makeovers
- Lay a washable rug or vintage runner in high-traffic zones.
- Add floor transition strips where flooring changes—clean and intentional.
- Do a deep clean: Steam tile grout, polish wood with a neutral cleaner, refresh carpets with baking soda + vacuum.
FYI: A thick rug pad adds comfort, protects floors, and makes even cheap rugs feel luxe. It’s the unsung hero under your feet.
Wrap-Up
See? No contractors, no chaos, just smart upgrades with big impact. Pick one or two of these easy DIY home improvement projects you can finish in a weekend, grab your coffee, and hit play on your favorite podcast. By Monday, your home will look like it got a promotion—because it did.