
Your fence can either whisper “meh” or shout “wow.” The secret? Smart, stylish fence edging that frames your yard like eyeliner for your landscape. These nine ideas are easy to mix, match, and DIY—even if you only have a weekend and a trunk full of mulch. Let’s turn that perimeter into the prettiest part of your curb appeal.
1. Stone Ribbon Borders For Instant Polish
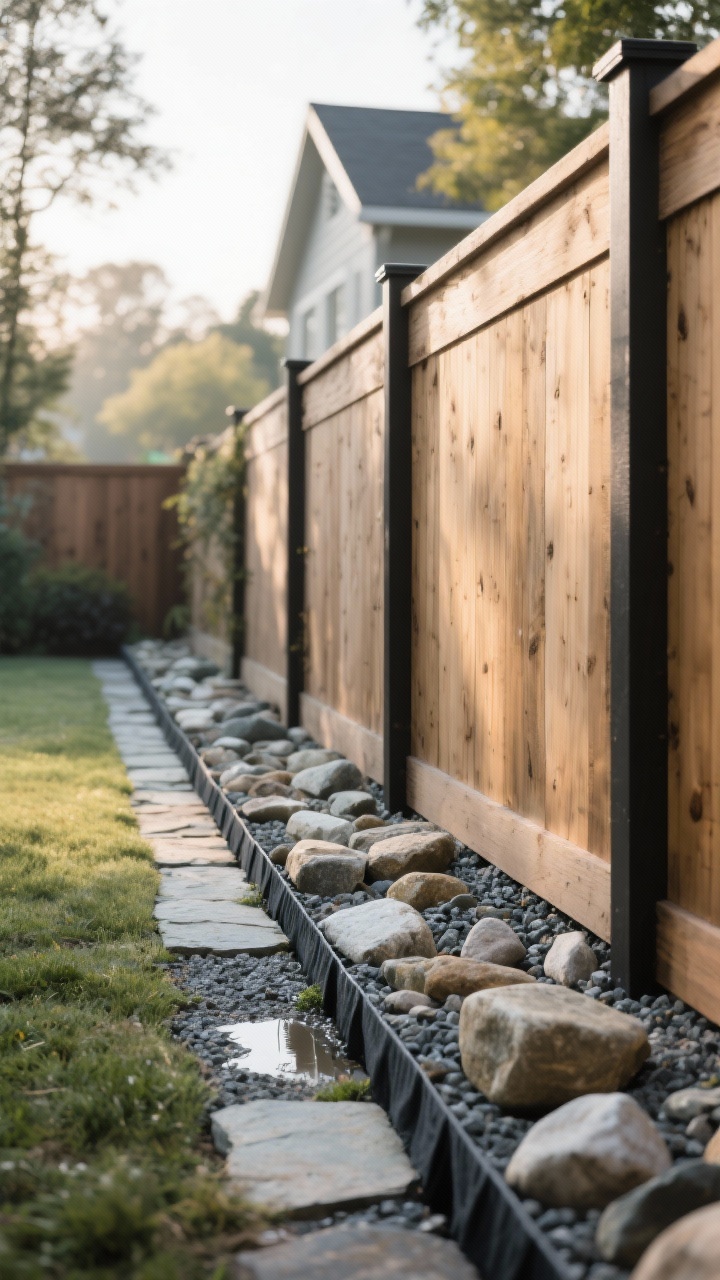
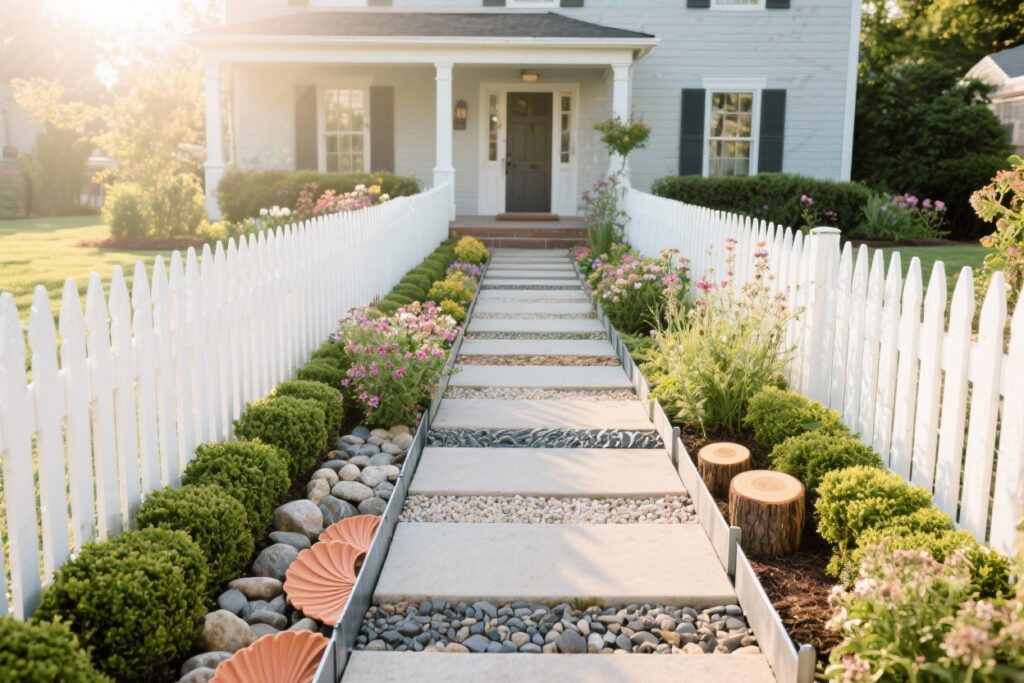
If you want timeless, go stone. A simple ribbon of river rocks, cobbles, or low-profile flagstone right along your fence gives the whole space a grounded, designer look without trying too hard.
Why It Works
- Texture and contrast: Stones play beautifully against wood, vinyl, and metal fences.
- Low maintenance: No mowing drama right up against the posts.
- Drainage: Helps keep water from pooling around fence bases. Your posts will thank you.
How To Do It
- Dig a shallow trench 4–6 inches deep and as wide as your stone.
- Lay landscape fabric to block weeds; top with 1–2 inches of crushed gravel for stability.
- Set stones snugly; mix sizes for a natural look or keep uniform for a modern vibe.
Pro tip: Use black steel edging or hidden plastic edging to keep stones from migrating into your lawn.
2. Brick Soldier Course With Classic Garden Energy
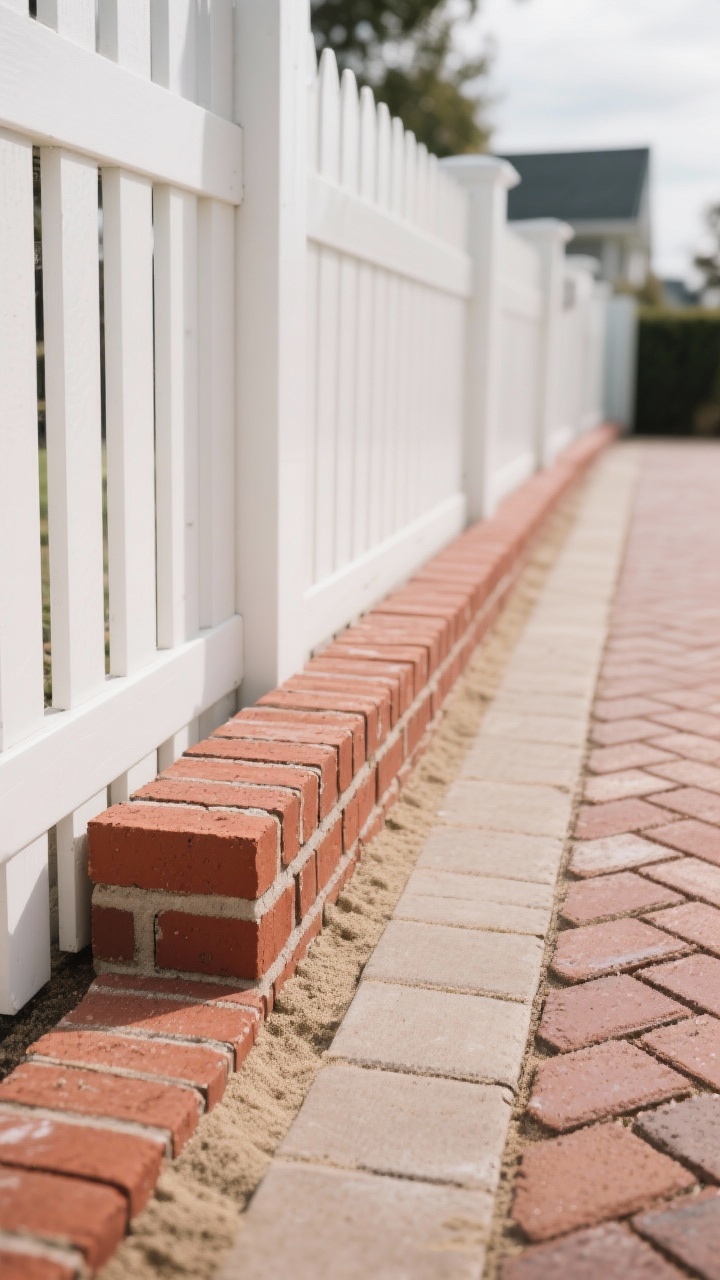
Want that “historic home, well-loved garden” vibe? Line your fence with a single brick “soldier course”—bricks stood on end, tight and tidy. It’s an instant upgrade that reads more custom than big-box.
Why It Works
- Evergreen style: From cottage to colonial, brick just fits.
- Durable: Frost-resistant and mower-friendly when set right.
- Defined beds: Makes clean bed lines a breeze.
How To Do It
- Excavate a trench 6 inches deep and a tad wider than the bricks.
- Add compacted paver base and a thin sand layer for leveling.
- Place bricks on end; tap into place; fill gaps with polymeric sand.
Style tweak: Try a herringbone pattern laid flat for a chunkier edge that screams “custom.”
3. Lush Gravel Beds With Drought-Smart Plants
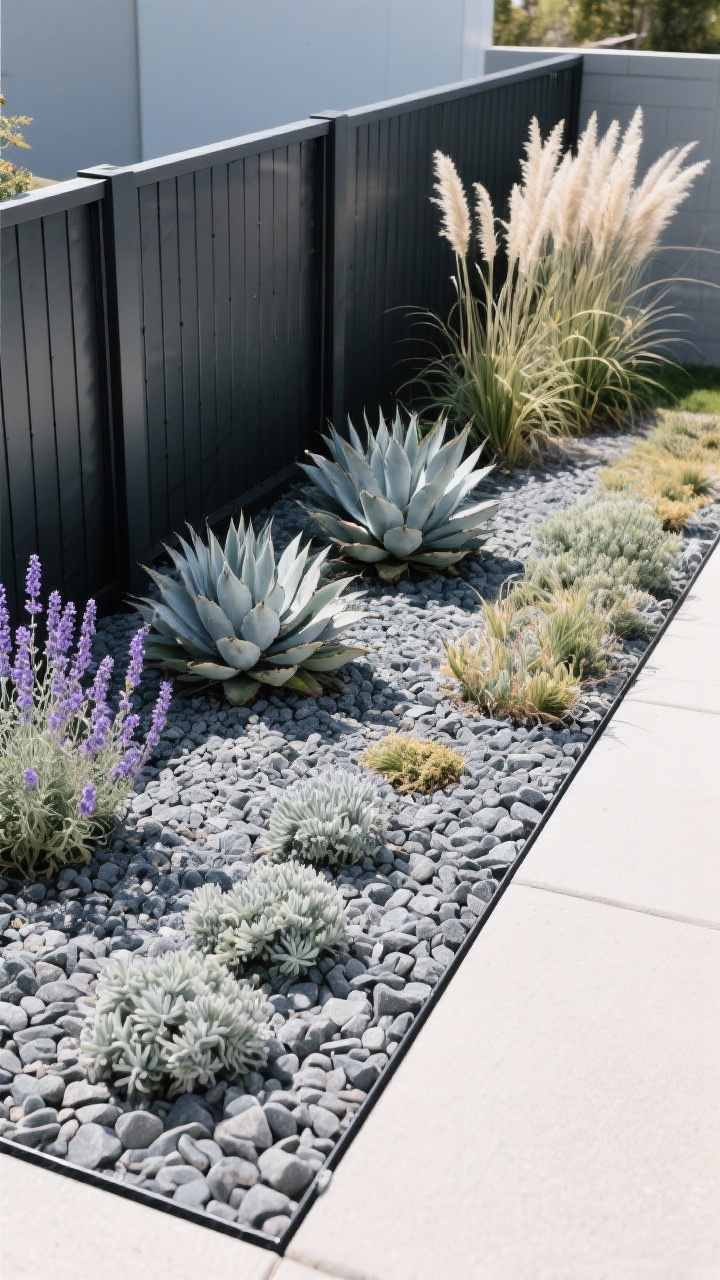
Gravel + drought-tolerant plants = low water, high style. Think silvery lavender, architectural agave, and breezy feather reed grass nestled in decorative gravel. Minimal upkeep, maximum chic.
Why It Works
- Modern color palette: Gray or buff gravel is the perfect backdrop for greens and blooms.
- Weed control: Use quality fabric under 2–3 inches of gravel. Your future self says thanks.
- Budget-friendly: Fewer plants, big visual impact.
Plant Pairings
- Sunny fences: Lavender, salvia, yucca, sedum, Russian sage.
- Shady fences: Heuchera, hellebore, liriope, ferns, hosta (add bark mulch pockets around roots).
FYI: Edge gravel beds with slim steel or aluminum edging for razor-clean lines.
4. Cottage-Style Border With Perennials And Bulbs
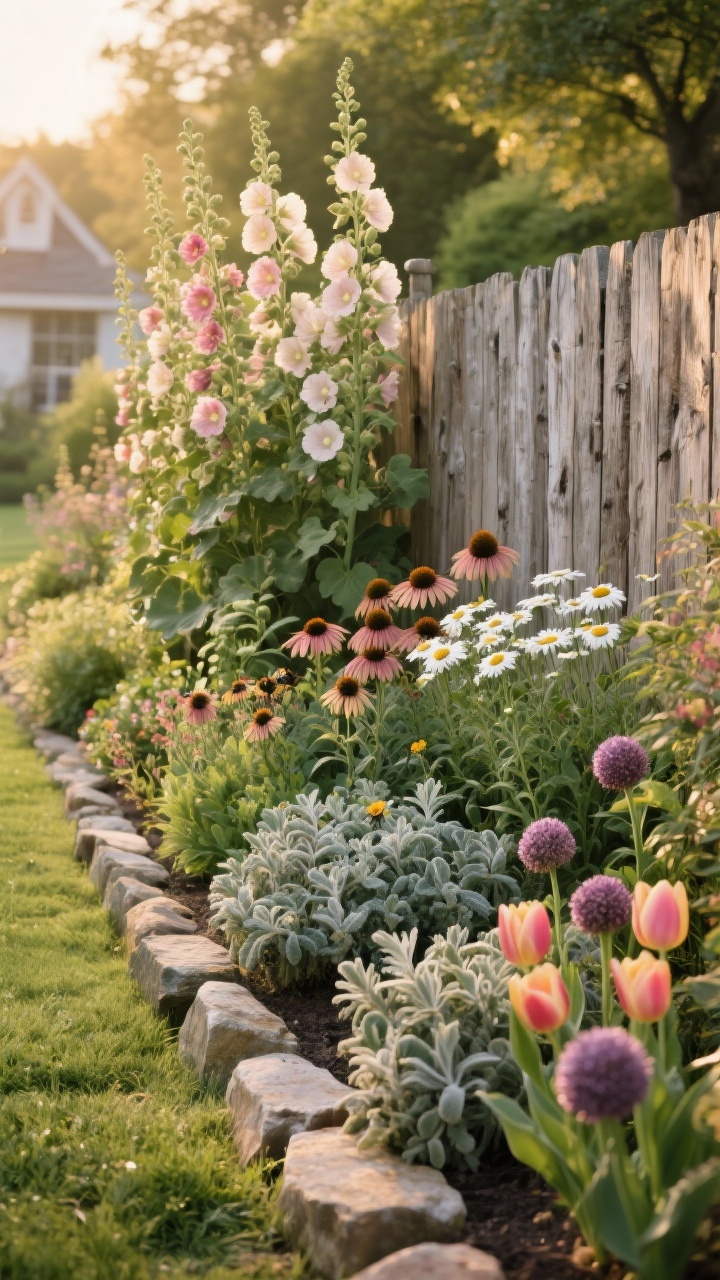
If you love that “I just casually live in a storybook” look, a soft, layered planting border along your fence is the move. It’s romantic, buzzing with pollinators, and looks expensive even on a small budget.
How To Layer Like A Pro
- Back row (tall): Hollyhock, delphinium, hydrangea, or ornamental grass.
- Middle row: Coneflower, shasta daisy, geranium, salvia.
- Front row (low): Catmint, thyme, lamb’s ear, creeping phlox.
Tuck bulbs (tulips, daffodils, allium) between perennials for spring fireworks, then let the perennials hide fading foliage. Your neighbors will think you hired a landscaper—let them.
Maintenance: Add a natural stone or brick edge to keep this wild child from flopping onto your lawn.
5. Wood Sleepers And Raised Edge Beds
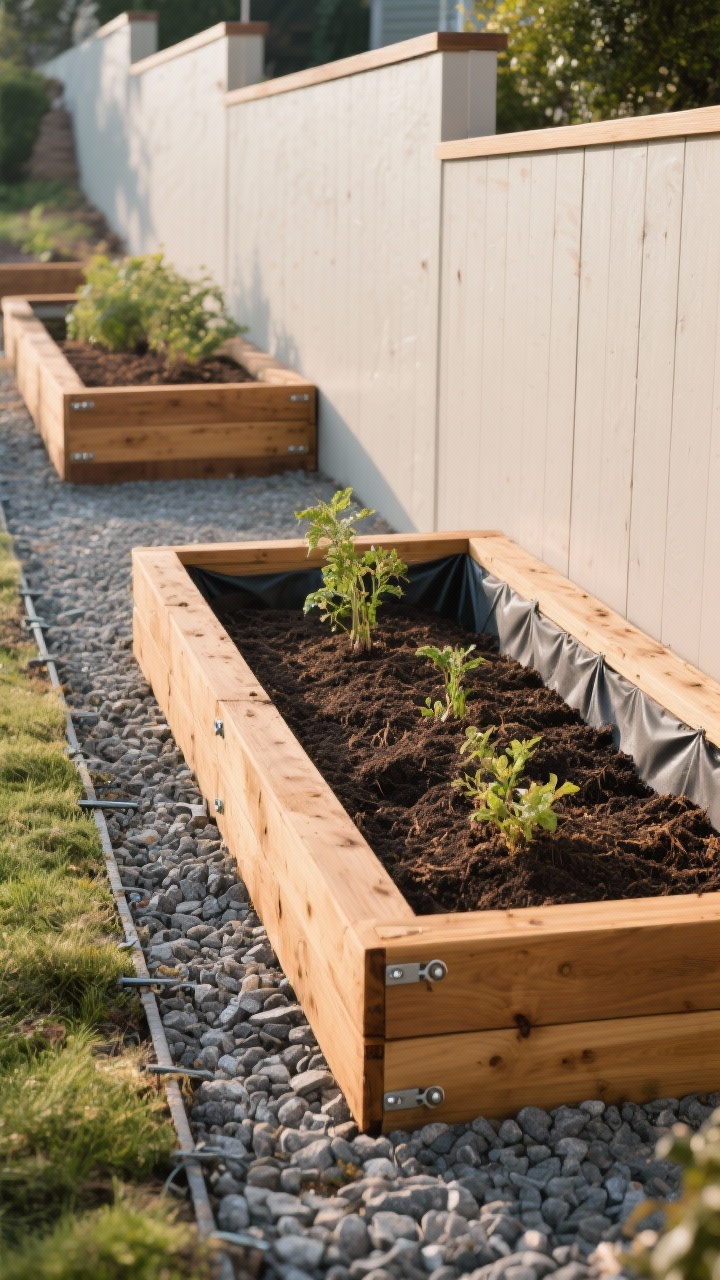
Got a slope or poor soil? Build it up. Wood sleepers (pressure-treated timber or rot-resistant cedar) make an elevated border that’s tidy, functional, and farmhouse-cute.
Why It Works
- Containment: Keeps soil, mulch, and plants where they belong.
- Better roots: You control the soil mix; plants reward you with lush growth.
- Visual heft: Adds structure against airy fences.
Install Tips
- Set sleepers on a compacted gravel base; spike with rebar or use sleeper brackets.
- Line the inside with heavy-duty landscape fabric to extend lifespan.
- Fill with a 60/40 topsoil-compost blend; mulch after planting.
Upgrade: Cap with a 2×6 board to create a perch for coffee mugs and impromptu garden chats.
6. Metal Edging For Sleek, Modern Lines
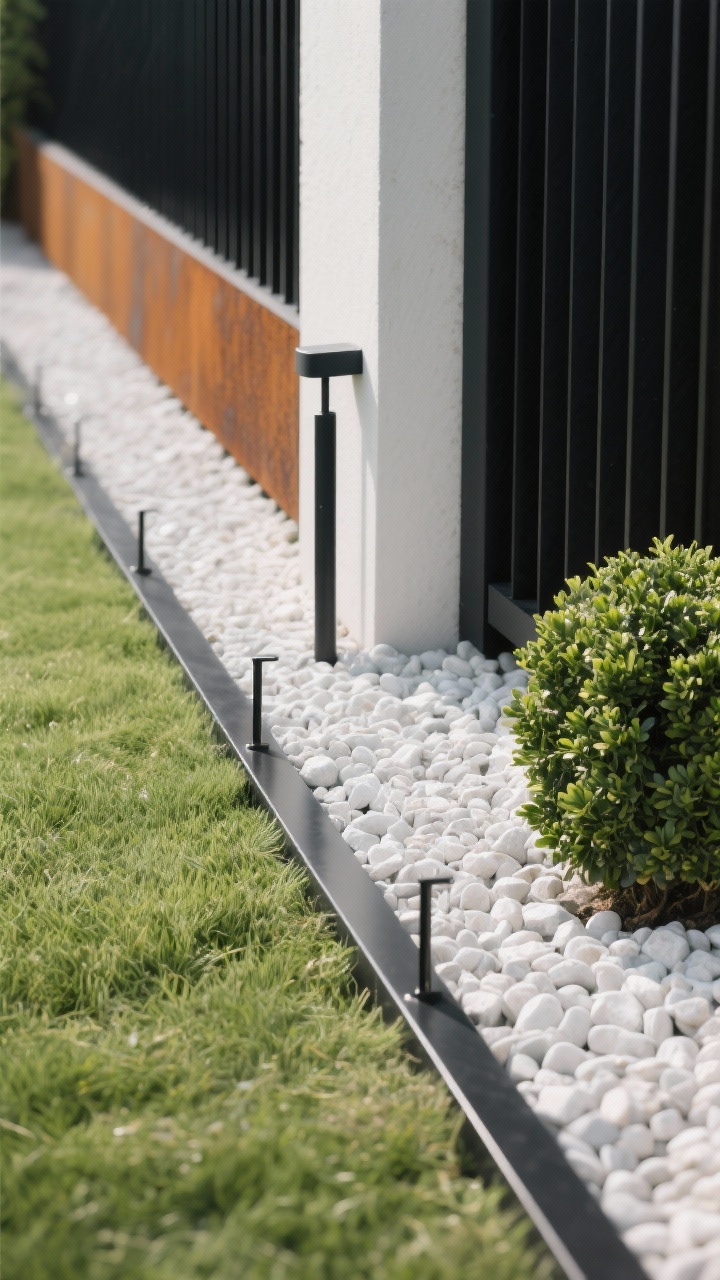
If your aesthetic is more “architect” than “cottagecore,” go with powder-coated steel or aluminum edging. Thin, crisp lines make everything look curated.
Why It Works
- Sharp definition: Ideal for minimalist gravel beds or tight boxwood borders.
- Long-lasting: Aluminum won’t rust; steel develops a cool patina (or choose Corten for drama).
- Flexible: Curves around posts and corners with ease.
Quick How-To
- Mark your line with a hose; cut a 3–4 inch slot using a flat spade.
- Set edging flush with lawn level; stake every 3–4 feet.
- Backfill and tamp for stability.
IMO: Pair black metal edging with white gravel for high-contrast, magazine-ready edges.
7. Mulch Bands With Hidden Weed Control
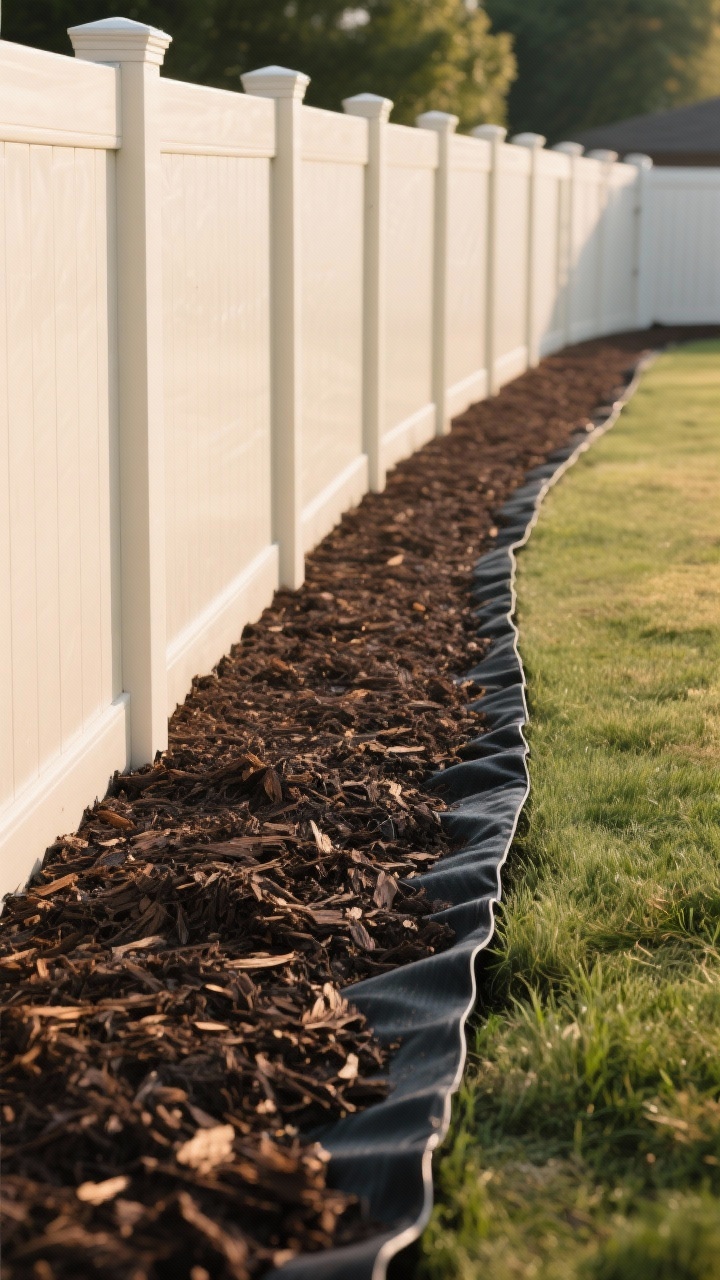
Sometimes simple is smartest. A clean, 12–18 inch band of dark mulch along the fence softens edges, protects your fence base, and looks super tidy. Also: budget win.
Make It Work Harder
- Use quality fabric under the mulch—then top up annually.
- Choose the right mulch: Shredded hardwood or pine bark lasts longer than dyed chips.
- Add a discreet edge: Plastic or steel edging keeps mulch from escaping into the lawn.
Bonus: Create a gentle curve to your mulch band for movement—curves read “custom,” straight lines read “contractor.”
8. Herb And Edible Strip For Beauty You Can Eat
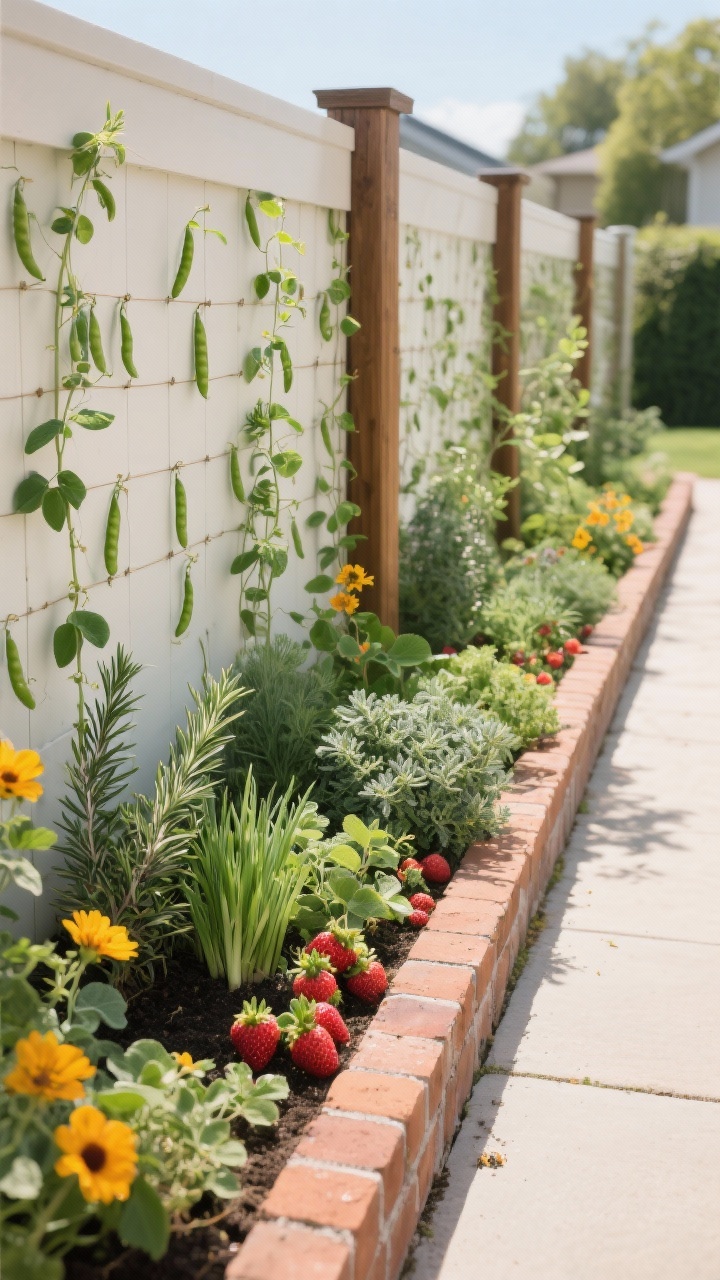
Pretty and practical? Yes please. A slim edible border along the fence gives you fresh snips for dinner and charming texture all year long.
Plant Mixes That Behave
- Sunny strip: Rosemary, oregano, thyme, sage, chives, strawberries.
- Partial shade: Parsley, mint (in sunken pots to contain it), lettuce succession, chard.
- Vertical helpers: Trellis peas, beans, or cucumbers on the fence for a living wall effect.
Design Tips
- Edge with brick or metal to keep soil off your path or lawn.
- Group herbs in repeating clusters for rhythm (not random chaos).
- Work in pollinator-friendly blooms like calendula and nasturtium—edible and adorable.
FYI: Keep edibles at least a few inches away from treated wood posts; use liners if needed.
9. Lighting And Accent Stakes For Nighttime Glow
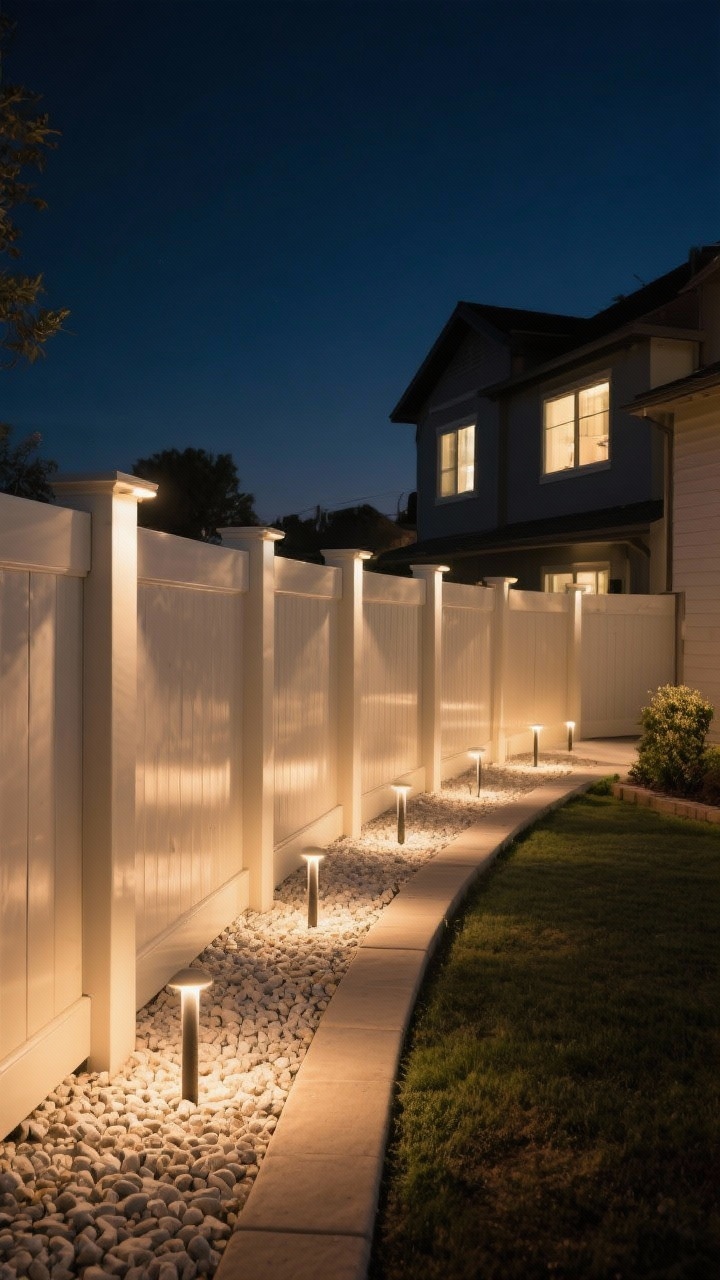
The right lighting turns your fence edging into a runway (minus the drama). Think subtle, not stadium. A few low-voltage or solar fixtures can completely change the mood after dark.
Glowy Ideas
- Path lights tucked in the edging to guide the eye and highlight textures.
- Downlights on fence posts to wash the edging with soft light.
- Accent stakes or discrete bollards to punctuate curves and corners.
Placement Rules
- Use the “every 6–8 feet” guideline for even coverage.
- Aim lights away from neighbors and windows—glow, don’t glare.
- Warm color temperature (2700–3000K) = cozy, flattering, welcoming.
Pro tip: Combine lighting with reflective materials like pale gravel or light stone to maximize brightness with fewer fixtures.
Quick Planning Checklist
- Fence material: Wood, vinyl, metal—choose edging that complements, not competes.
- Sun exposure: Plants and materials behave differently in full sun vs. shade.
- Drainage: Add gravel bases where water collects to protect posts.
- Maintenance level: Be honest—go gravel or metal if you hate trimming.
- Budget: Mix high-impact features (lighting, stone accents) with cost savers (mulch, perennials).
At the end of the day, your fence should frame your yard like a great picture frame—clean, intentional, and a little bit “wow.” Start with one edge this weekend, then build from there. Small border, big payoff. Your curb appeal is about to glow up—no gatekeeping.