
Cheap Backyard Landscaping Upgrades That Make a Big Impact
You don’t need a full backyard renovation budget to get that “freshly landscaped” look. With a few strategic, low-cost upgrades, you can make your outdoor space feel cleaner, greener, and more intentional—fast.
Below are 10 budget-friendly landscaping moves that deliver maximum visual impact, plus practical sizing, material tips, and easy ways to keep everything looking polished.
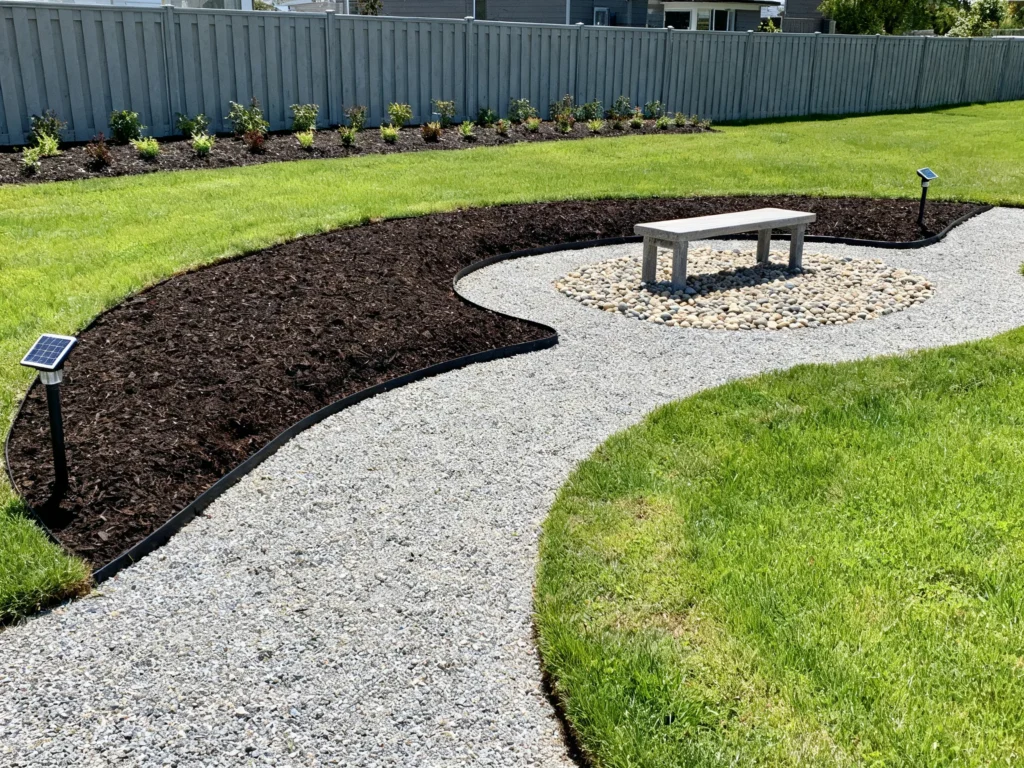
1) Refresh and Edge Your Mulch Beds for Instant Contrast
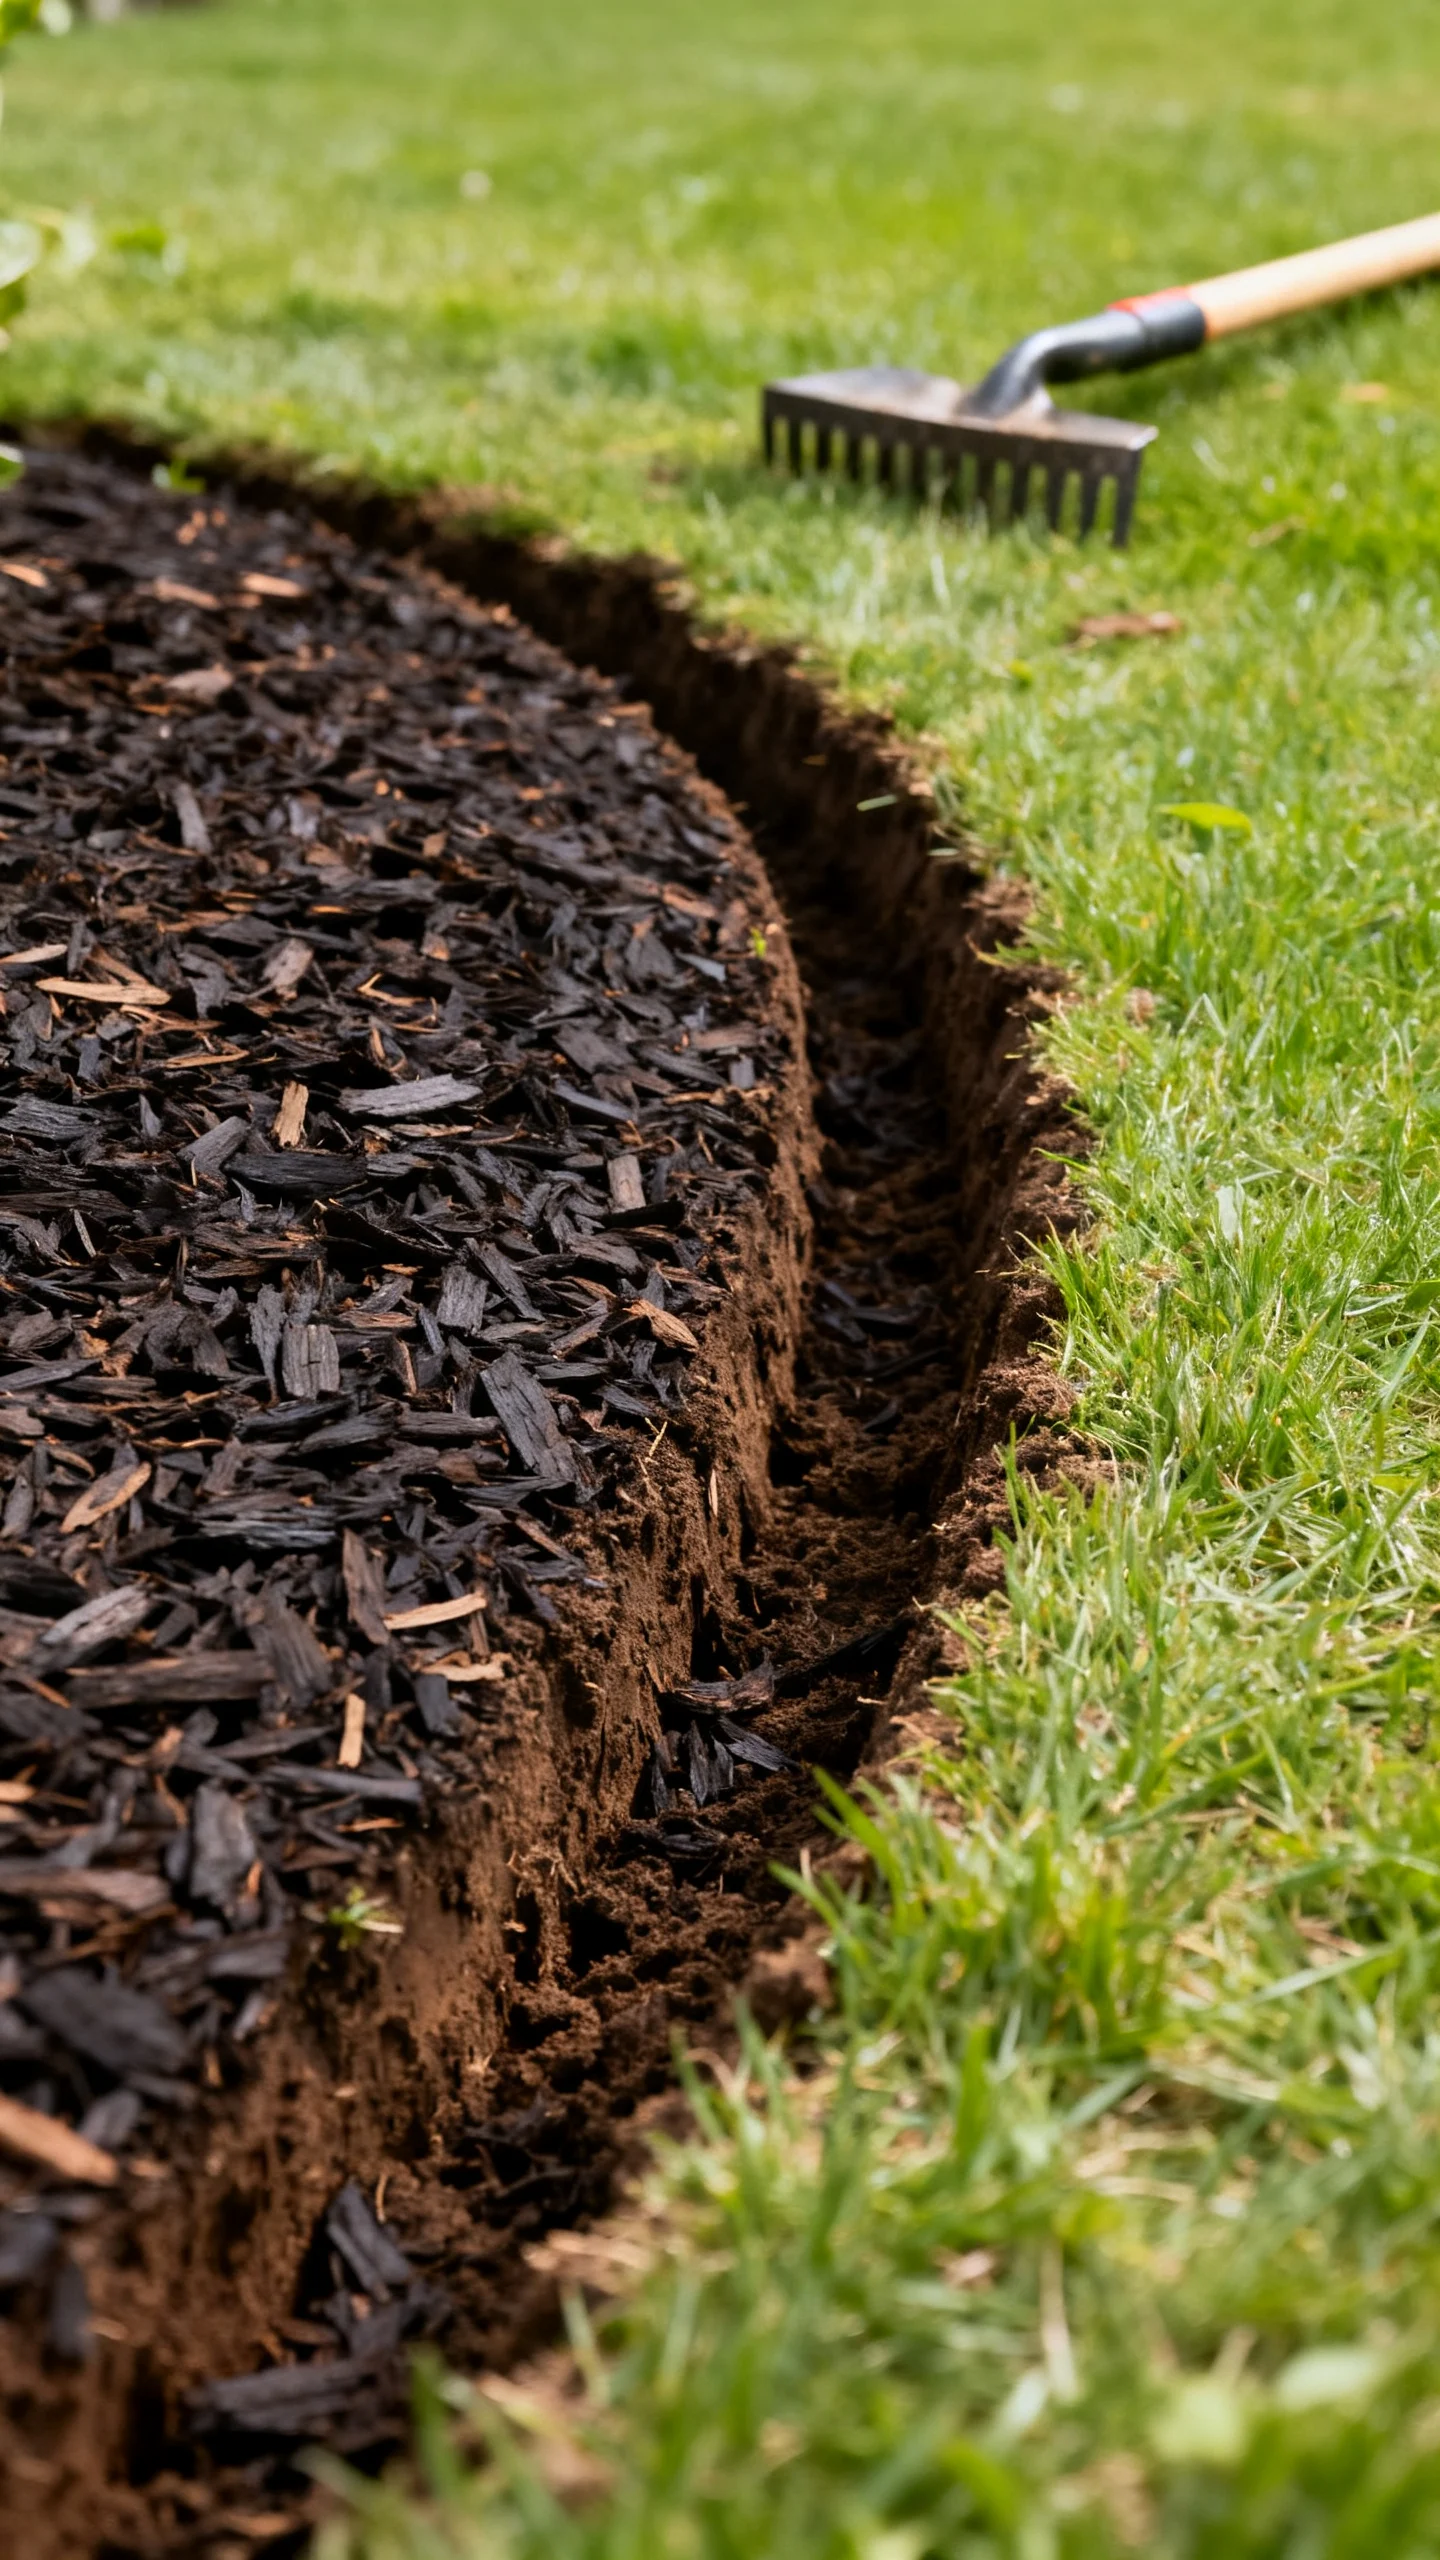
Nothing sharpens a backyard like crisp bed lines and fresh mulch. First, redefine your bed edge (use a spade to cut a clean trench) and aim for a visible edge depth of about 3–4 inches so it reads from a distance. Then top-dress with mulch at a final depth of 2–3 inches—enough to suppress weeds without smothering plant crowns.
Budget tip: Focus on the most visible zones first (along the patio, fence line, and around a main tree). Material notes: Shredded hardwood stays in place on slopes better than bark nuggets; bark nuggets can look great but tend to migrate in windy yards.
2) Create a Simple Gravel or Mulch Path to “Organize” the Yard
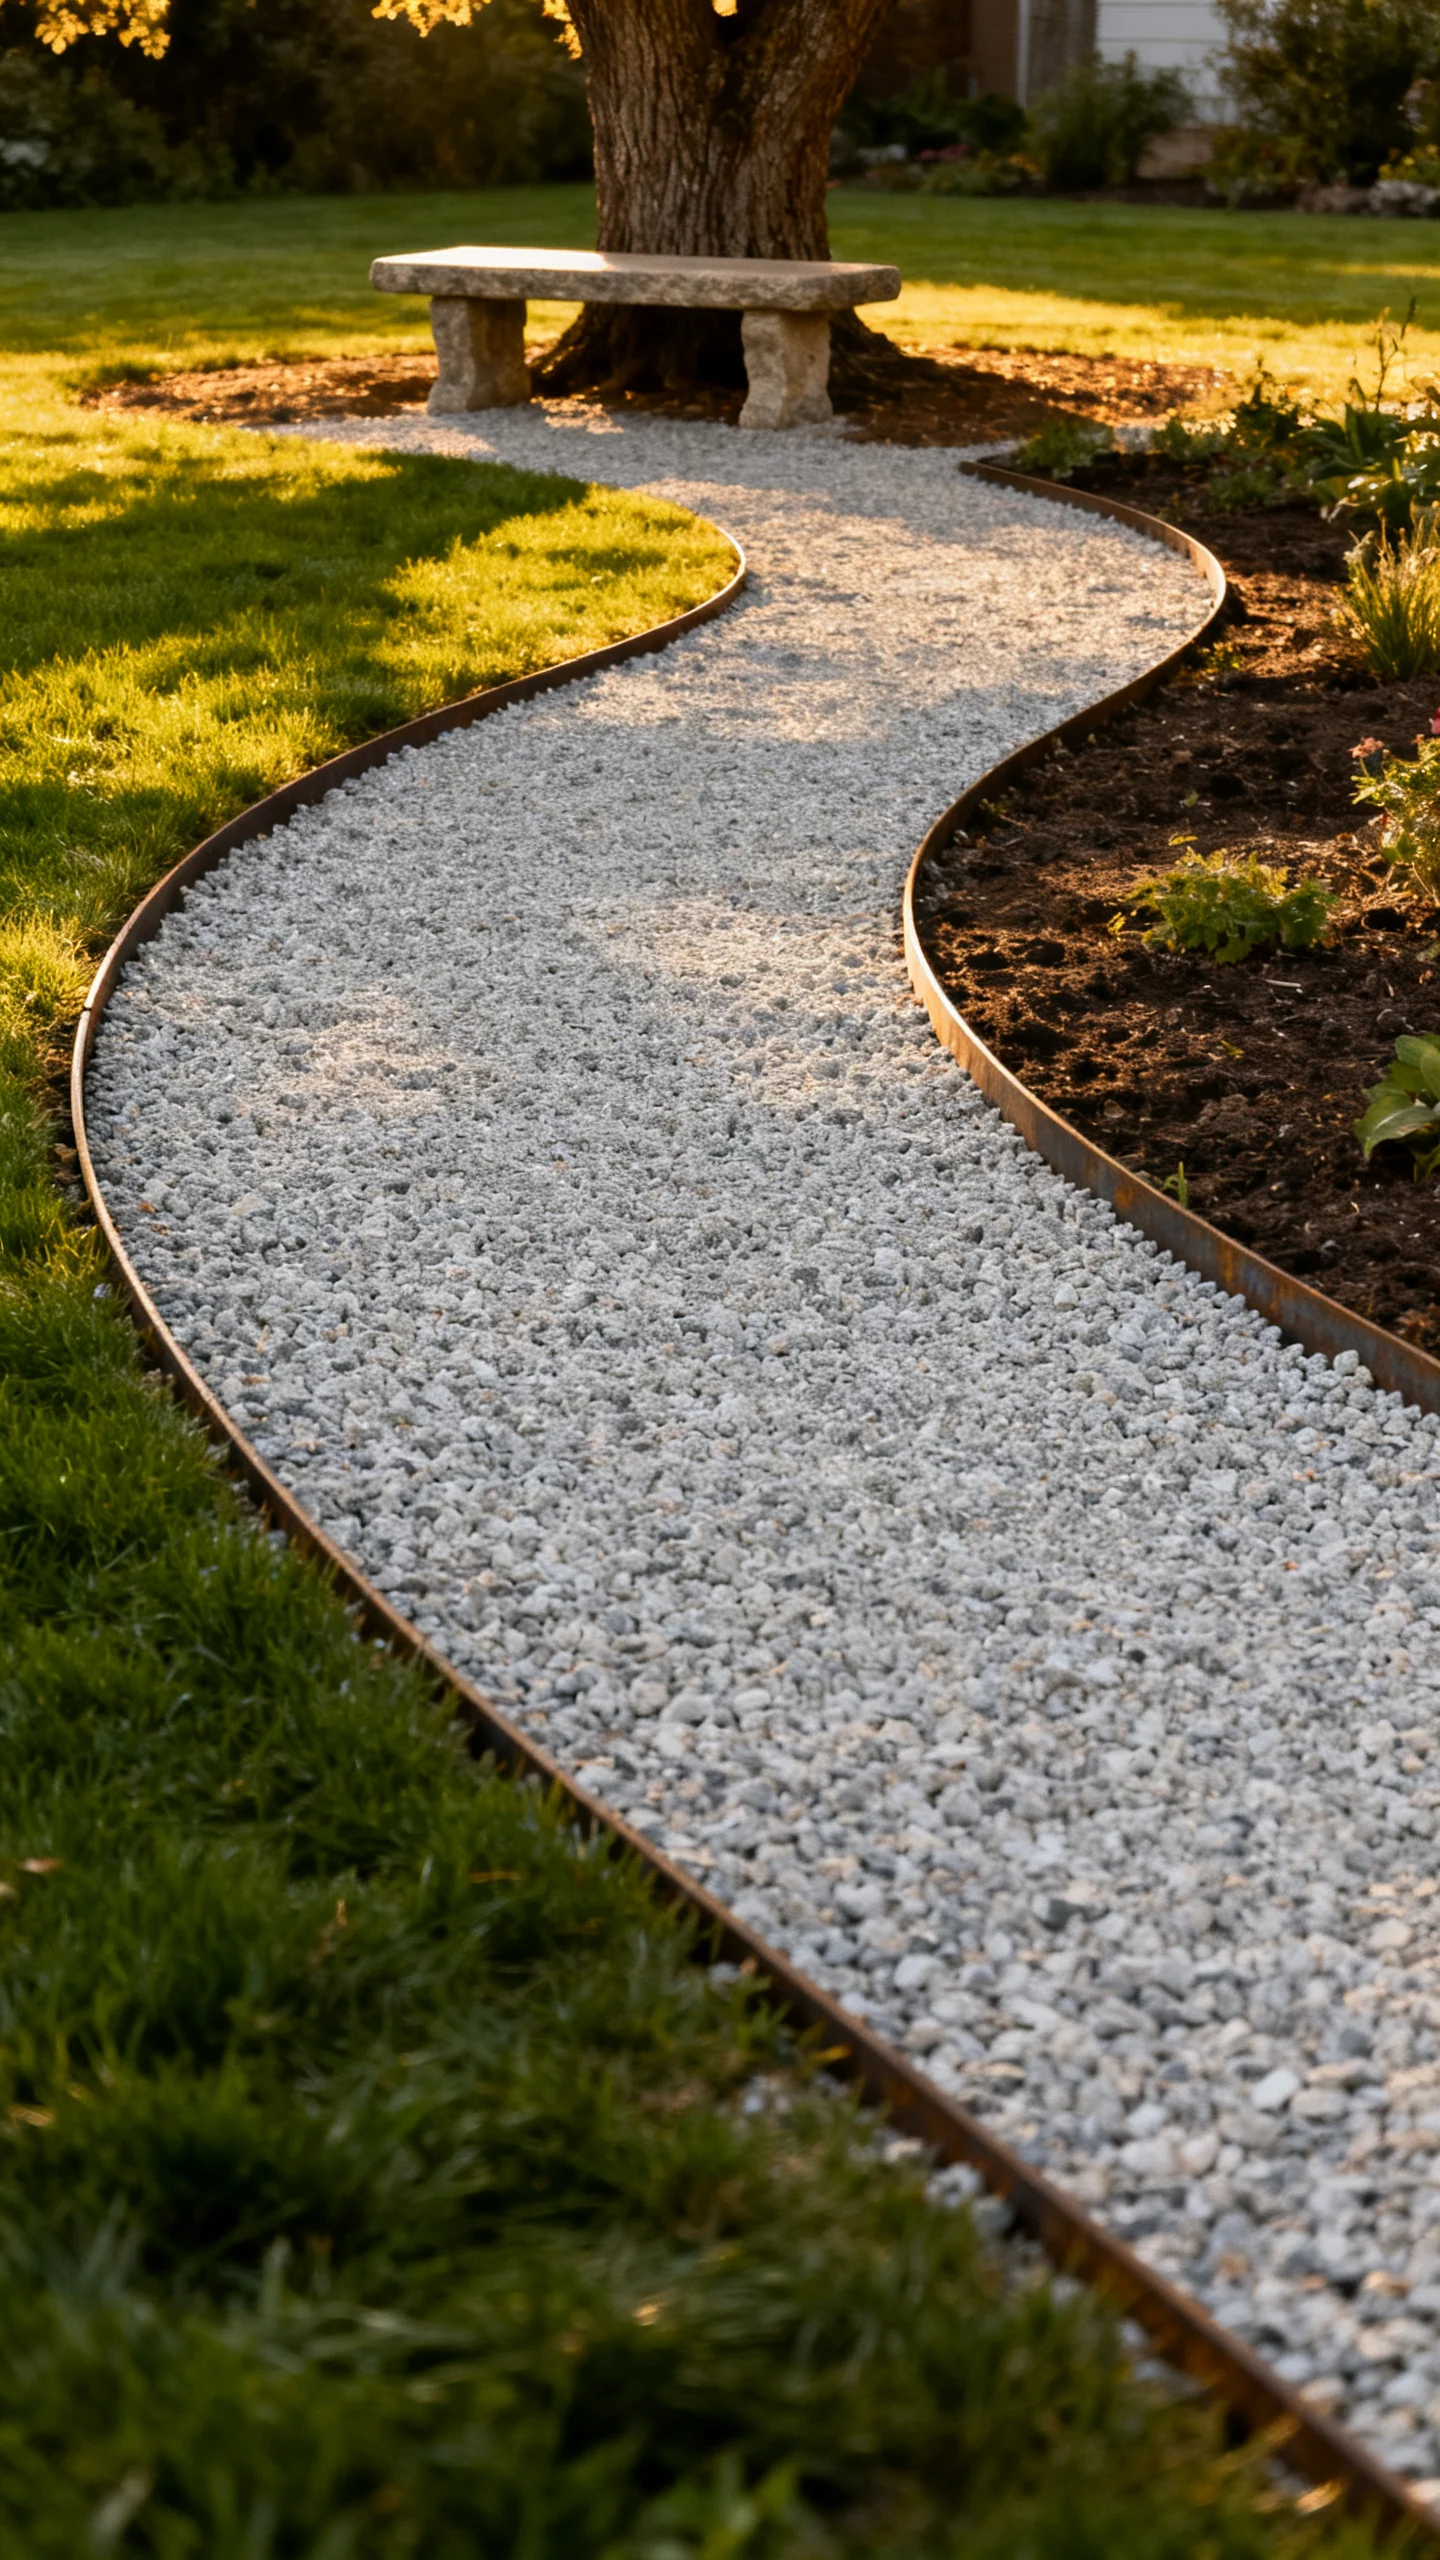
A path is a landscaping upgrade that makes everything feel intentional—like the yard has a plan. Keep it simple: outline a 30–36 inch wide walkway so two people can pass comfortably, or 24 inches for a single-person garden path. Excavate 2–4 inches, lay down landscape fabric (optional but helpful), and add 2–3 inches of compactable gravel or mulch.
Pro/Con: Decomposed granite and crushed stone compact nicely and look clean, but may track slightly; mulch is softer and cheaper, but needs topping up more often. Add edging (steel, plastic, or pavers) to keep the path lines crisp and reduce scatter.
3) Install Solar Path Lights to Highlight Landscaping at Night
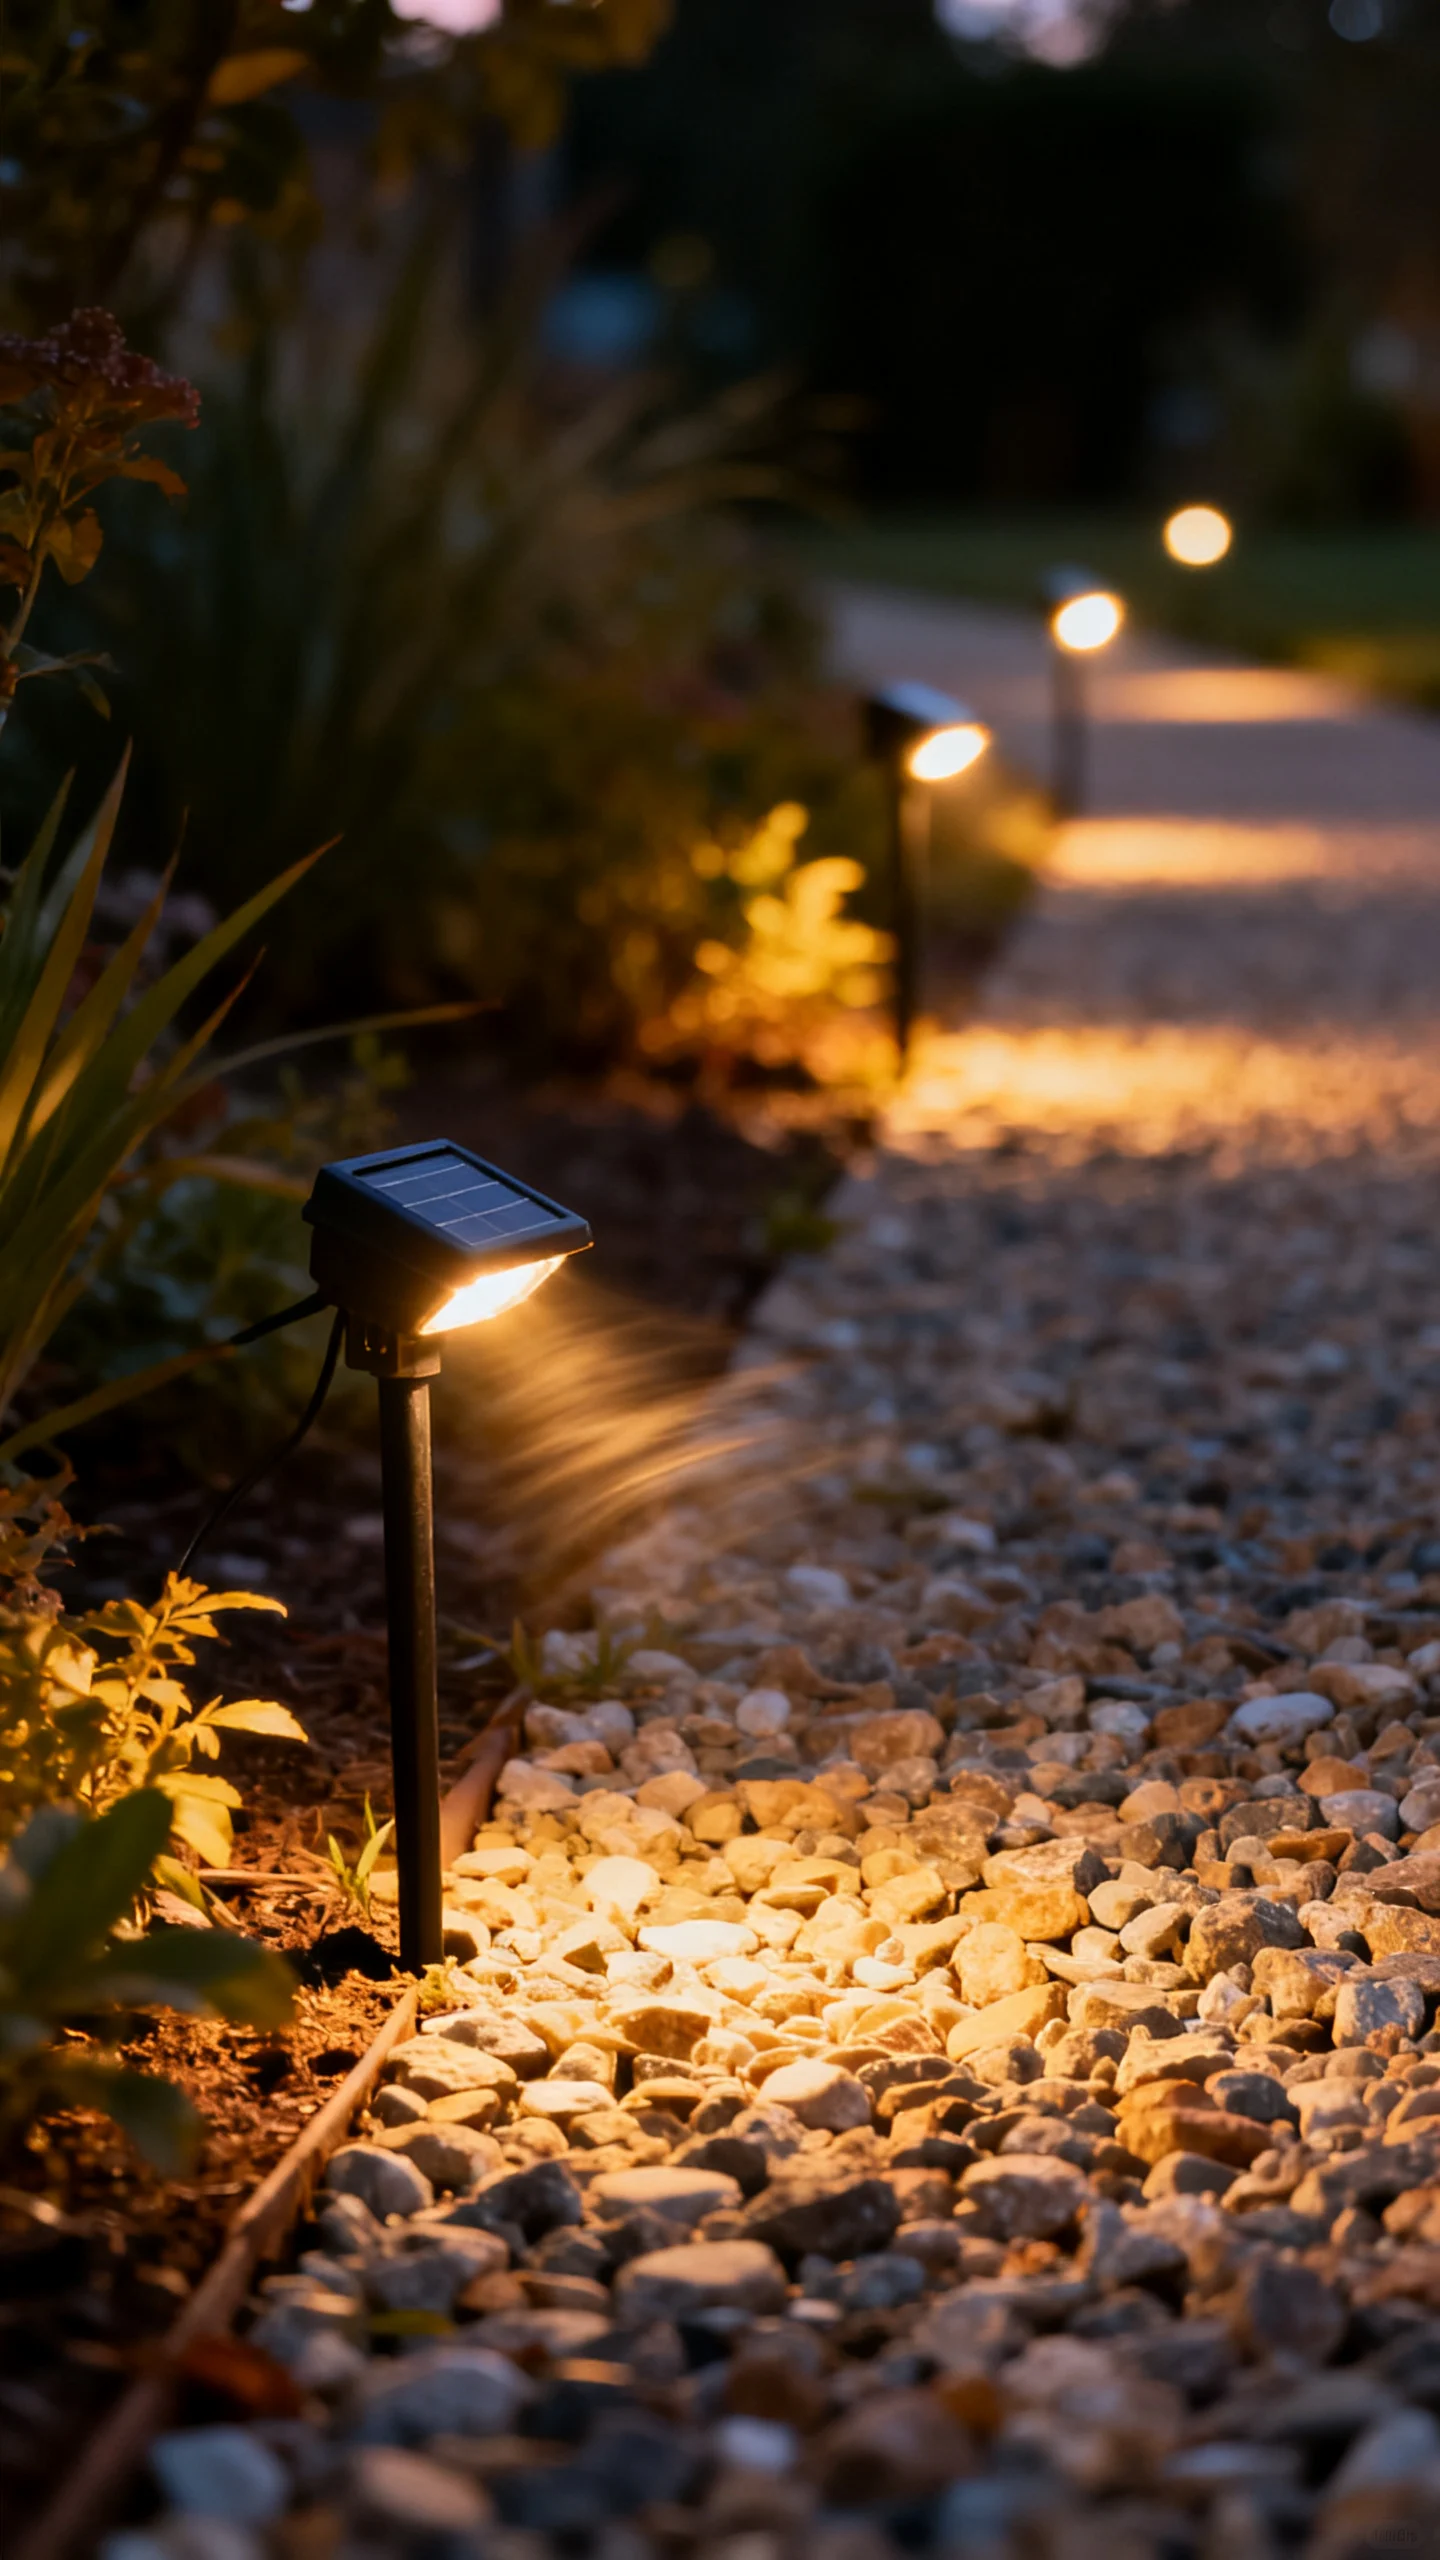
Solar lights are one of the lowest-cost ways to make a backyard feel upgraded, especially after dusk. Place path lights about 6–8 feet apart for a consistent glow, and keep them set back 6–12 inches from the path edge so they don’t feel like obstacles.
Placement tip: Avoid shady spots under dense trees; solar panels need daily sun to perform well. Mix a few taller stake lights with shorter ones for a more layered look, and wipe the panels clean every couple of weeks for brighter output.
4) Add a Defined Patio Border with Pavers or Brick (No Full Patio Needed)
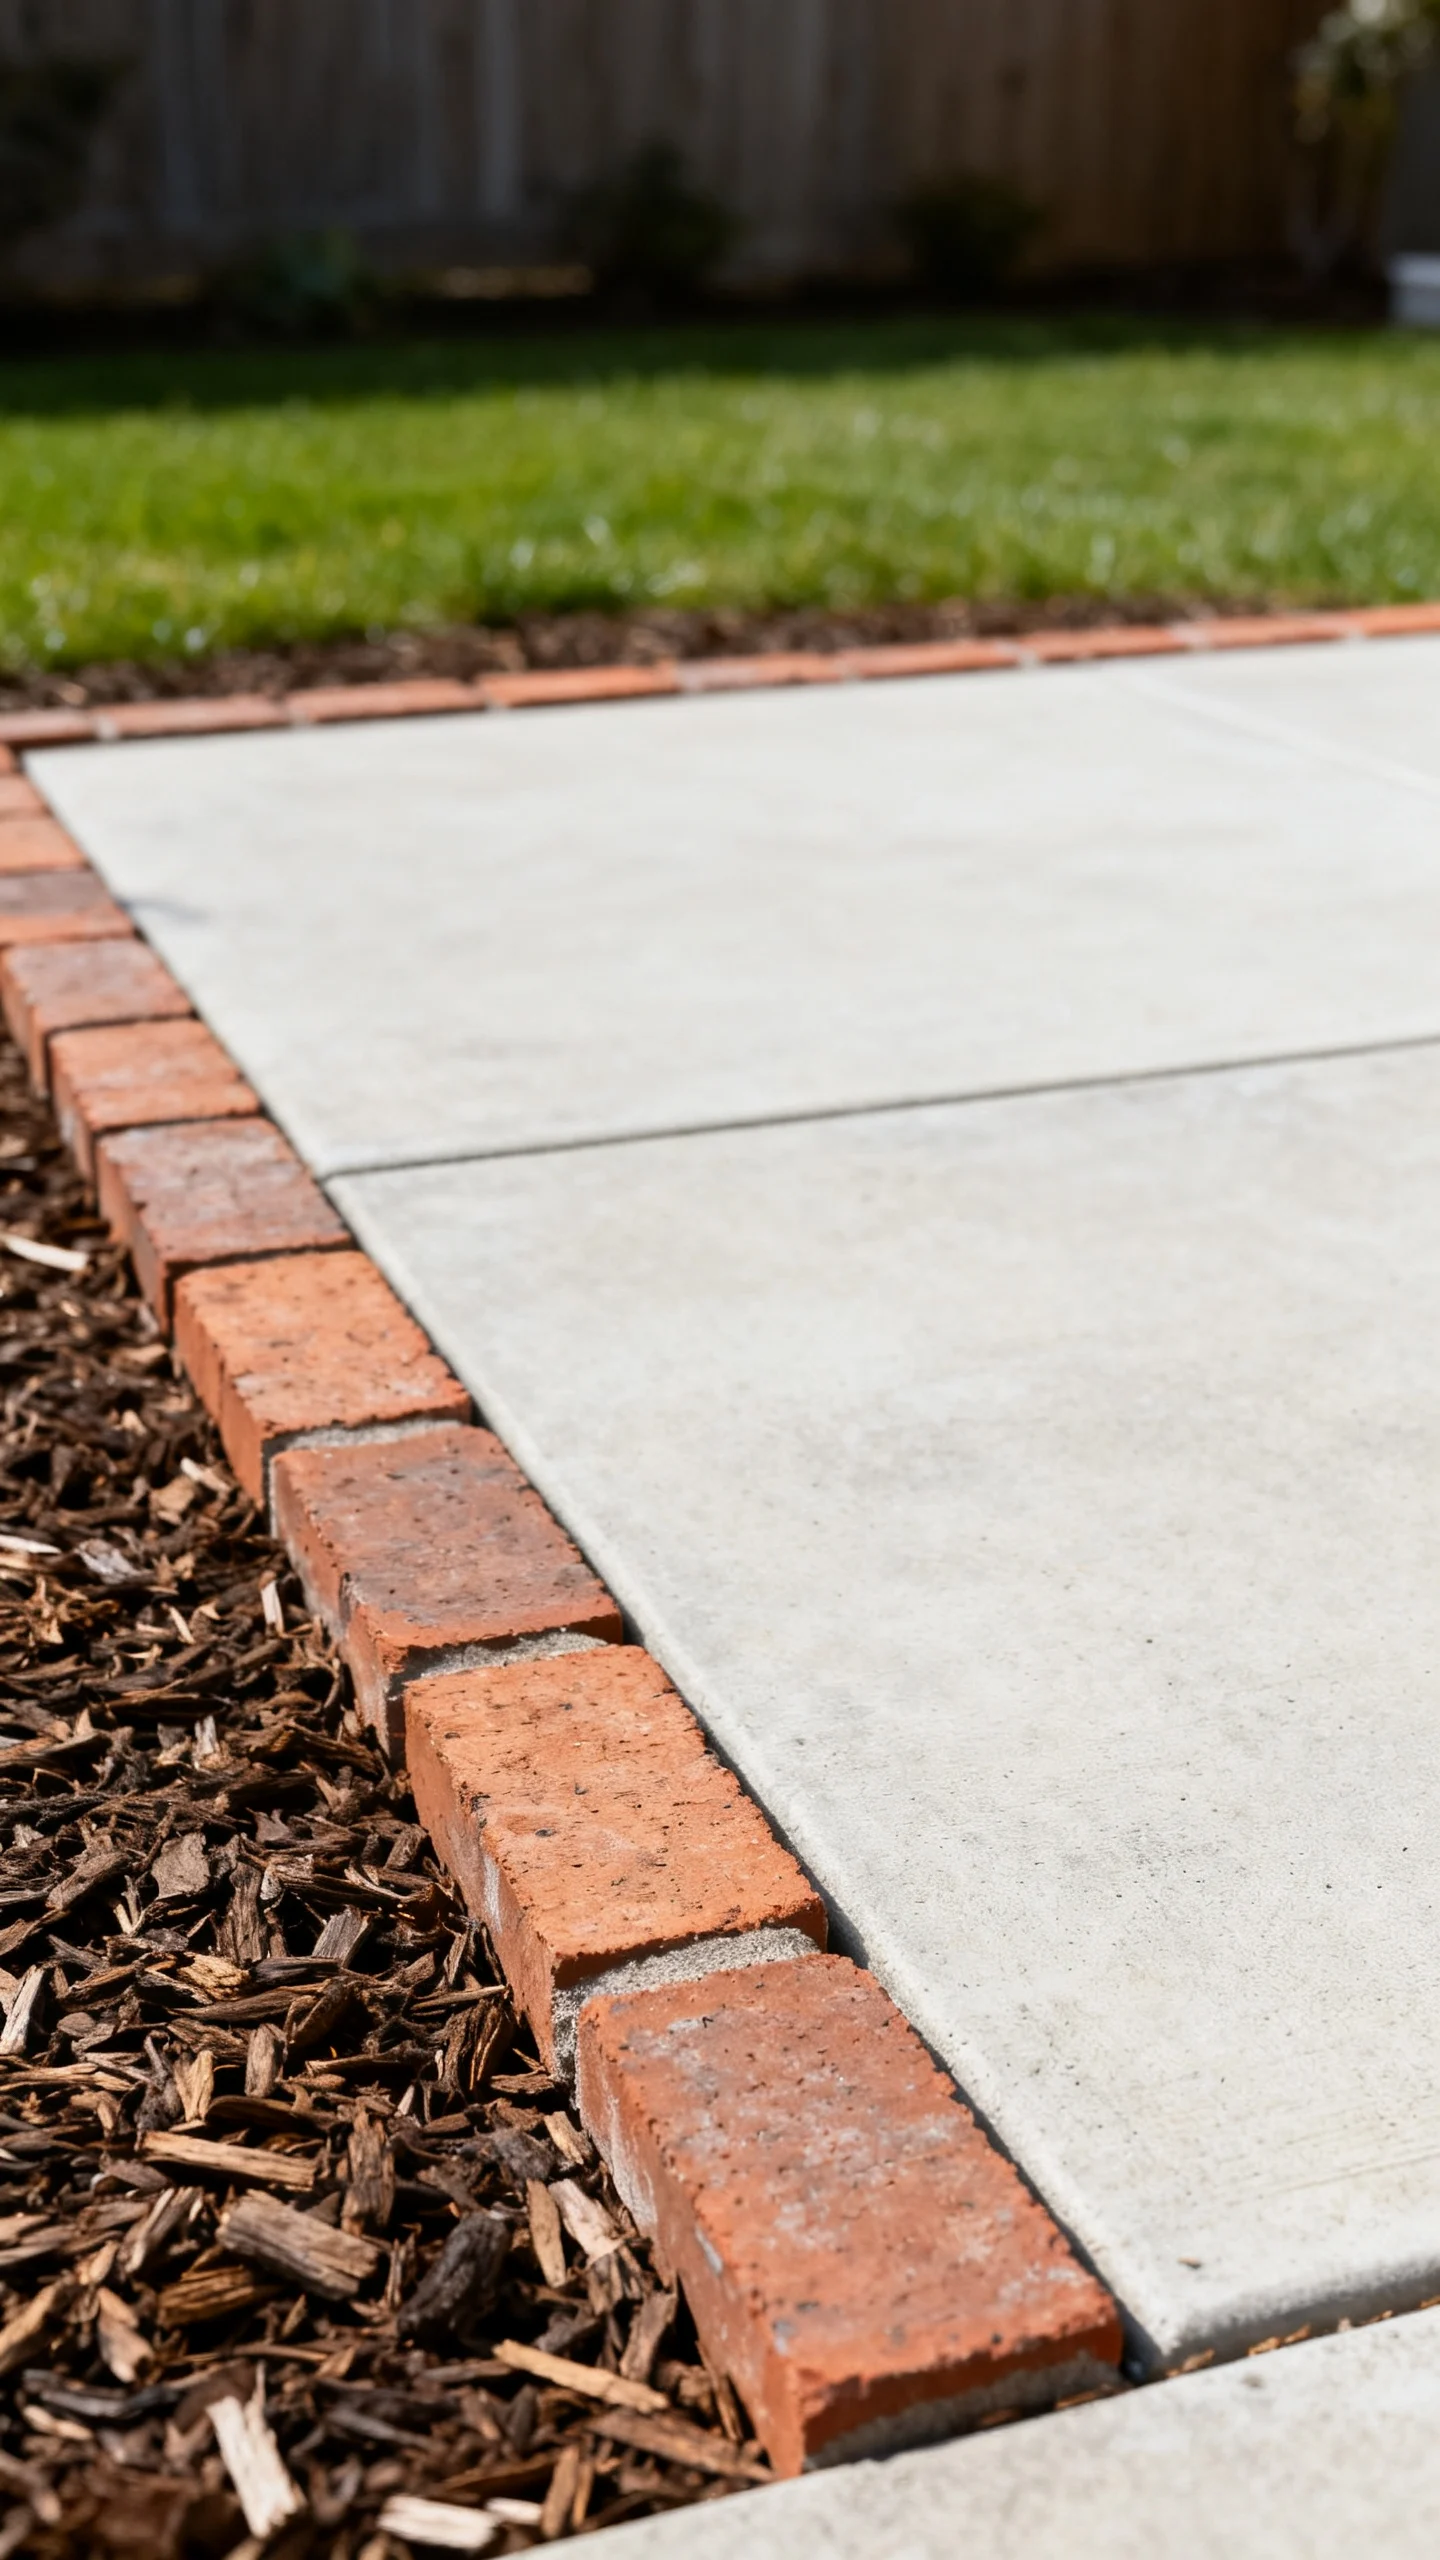
If you already have a small patio or a patch of compacted gravel, a border can make it look finished without the cost of expanding the hardscape. Lay pavers or bricks in a simple soldier course (single row) around the perimeter. For stability, set them on 1–2 inches of leveling sand over compacted soil, and keep the top surface flush with the surrounding grade to prevent tripping.
Budget approach: Border just the front-facing edge that’s most visible from the house. Material notes: Reclaimed brick often costs less and adds character; concrete pavers are typically the most consistent and easiest to level.
5) Replace Patchy Lawn Spots with a “No-Mow” Ground Cover Zone
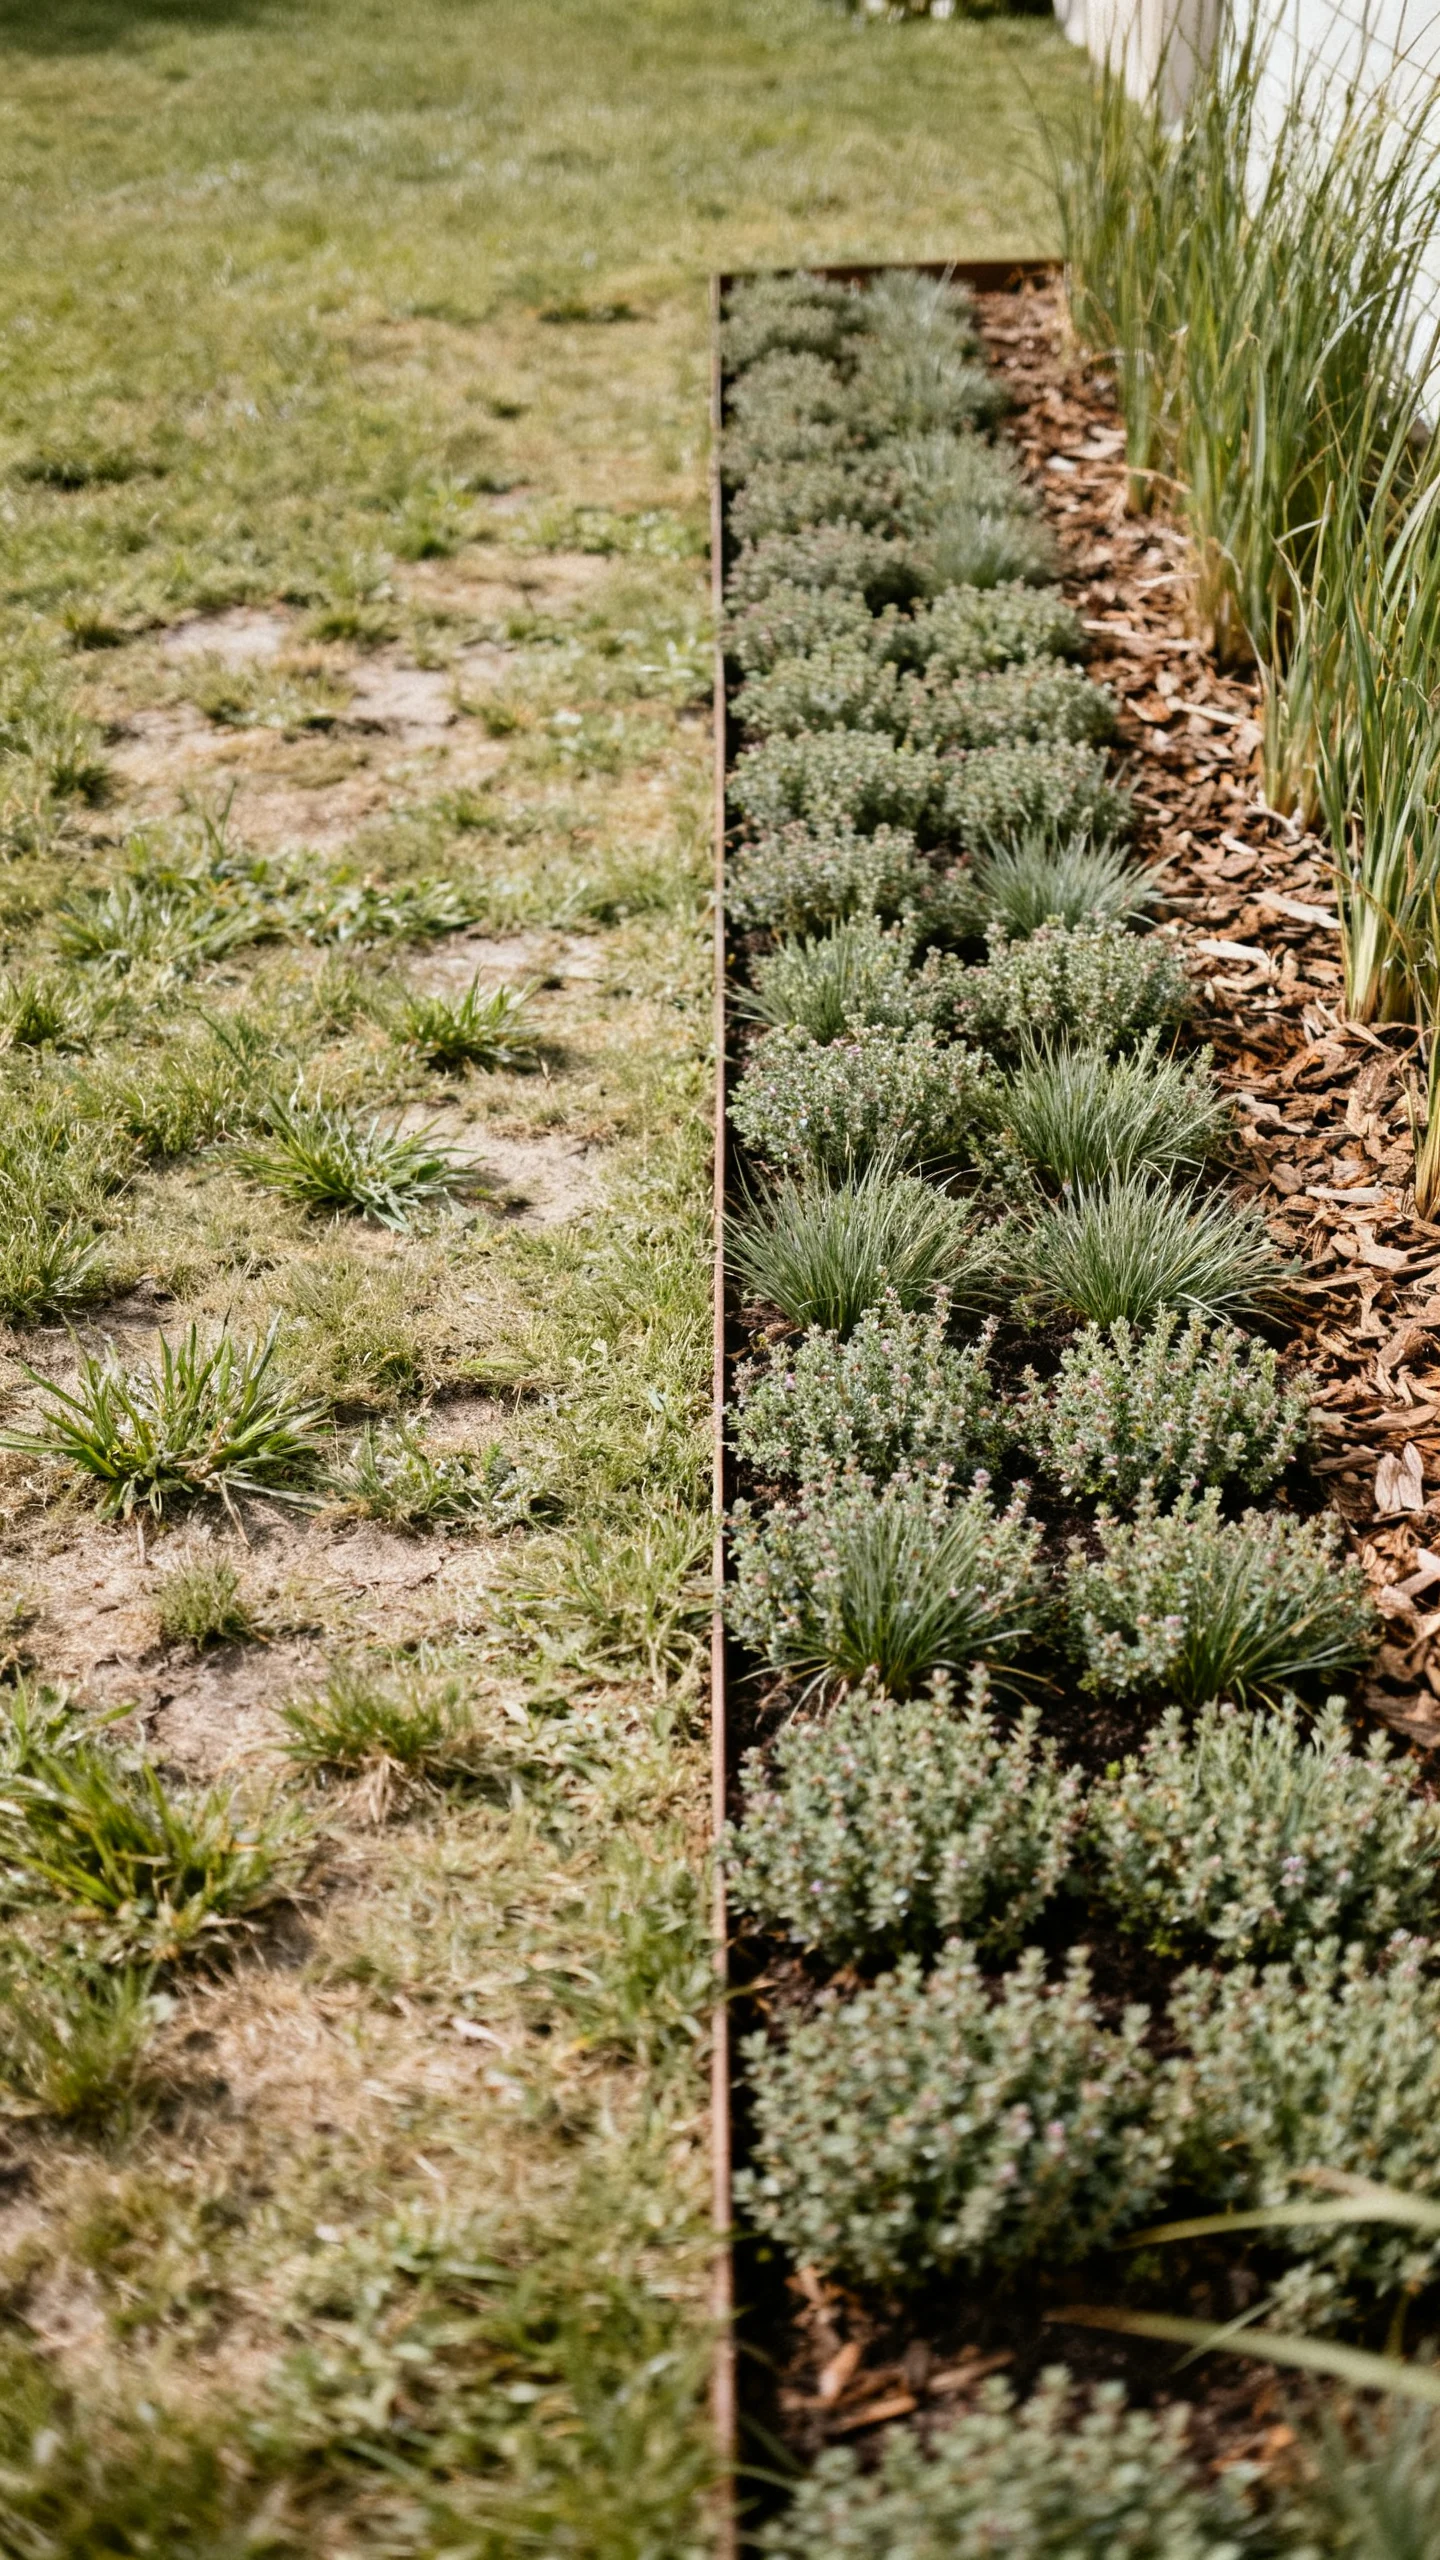
Patchy grass can make an entire backyard look tired. Instead of constantly reseeding, convert the worst areas into a deliberate ground cover bed. Options like creeping thyme (sun), ajuga (part shade), or native sedges (varies) can look lush with less mowing. Start with a defined edge, remove the struggling turf, and plant 6–12 inches on center depending on the plant’s spread for quicker fill-in.
Practical tip: For the cleanest look, top the planting area with a thin mulch layer (about 1 inch) between plants—just until they knit together. Check your local climate and choose ground covers that match your sun exposure and foot traffic needs.
6) Plant in “Repeat Groups” for a Designer Look (Even with Small Plants)
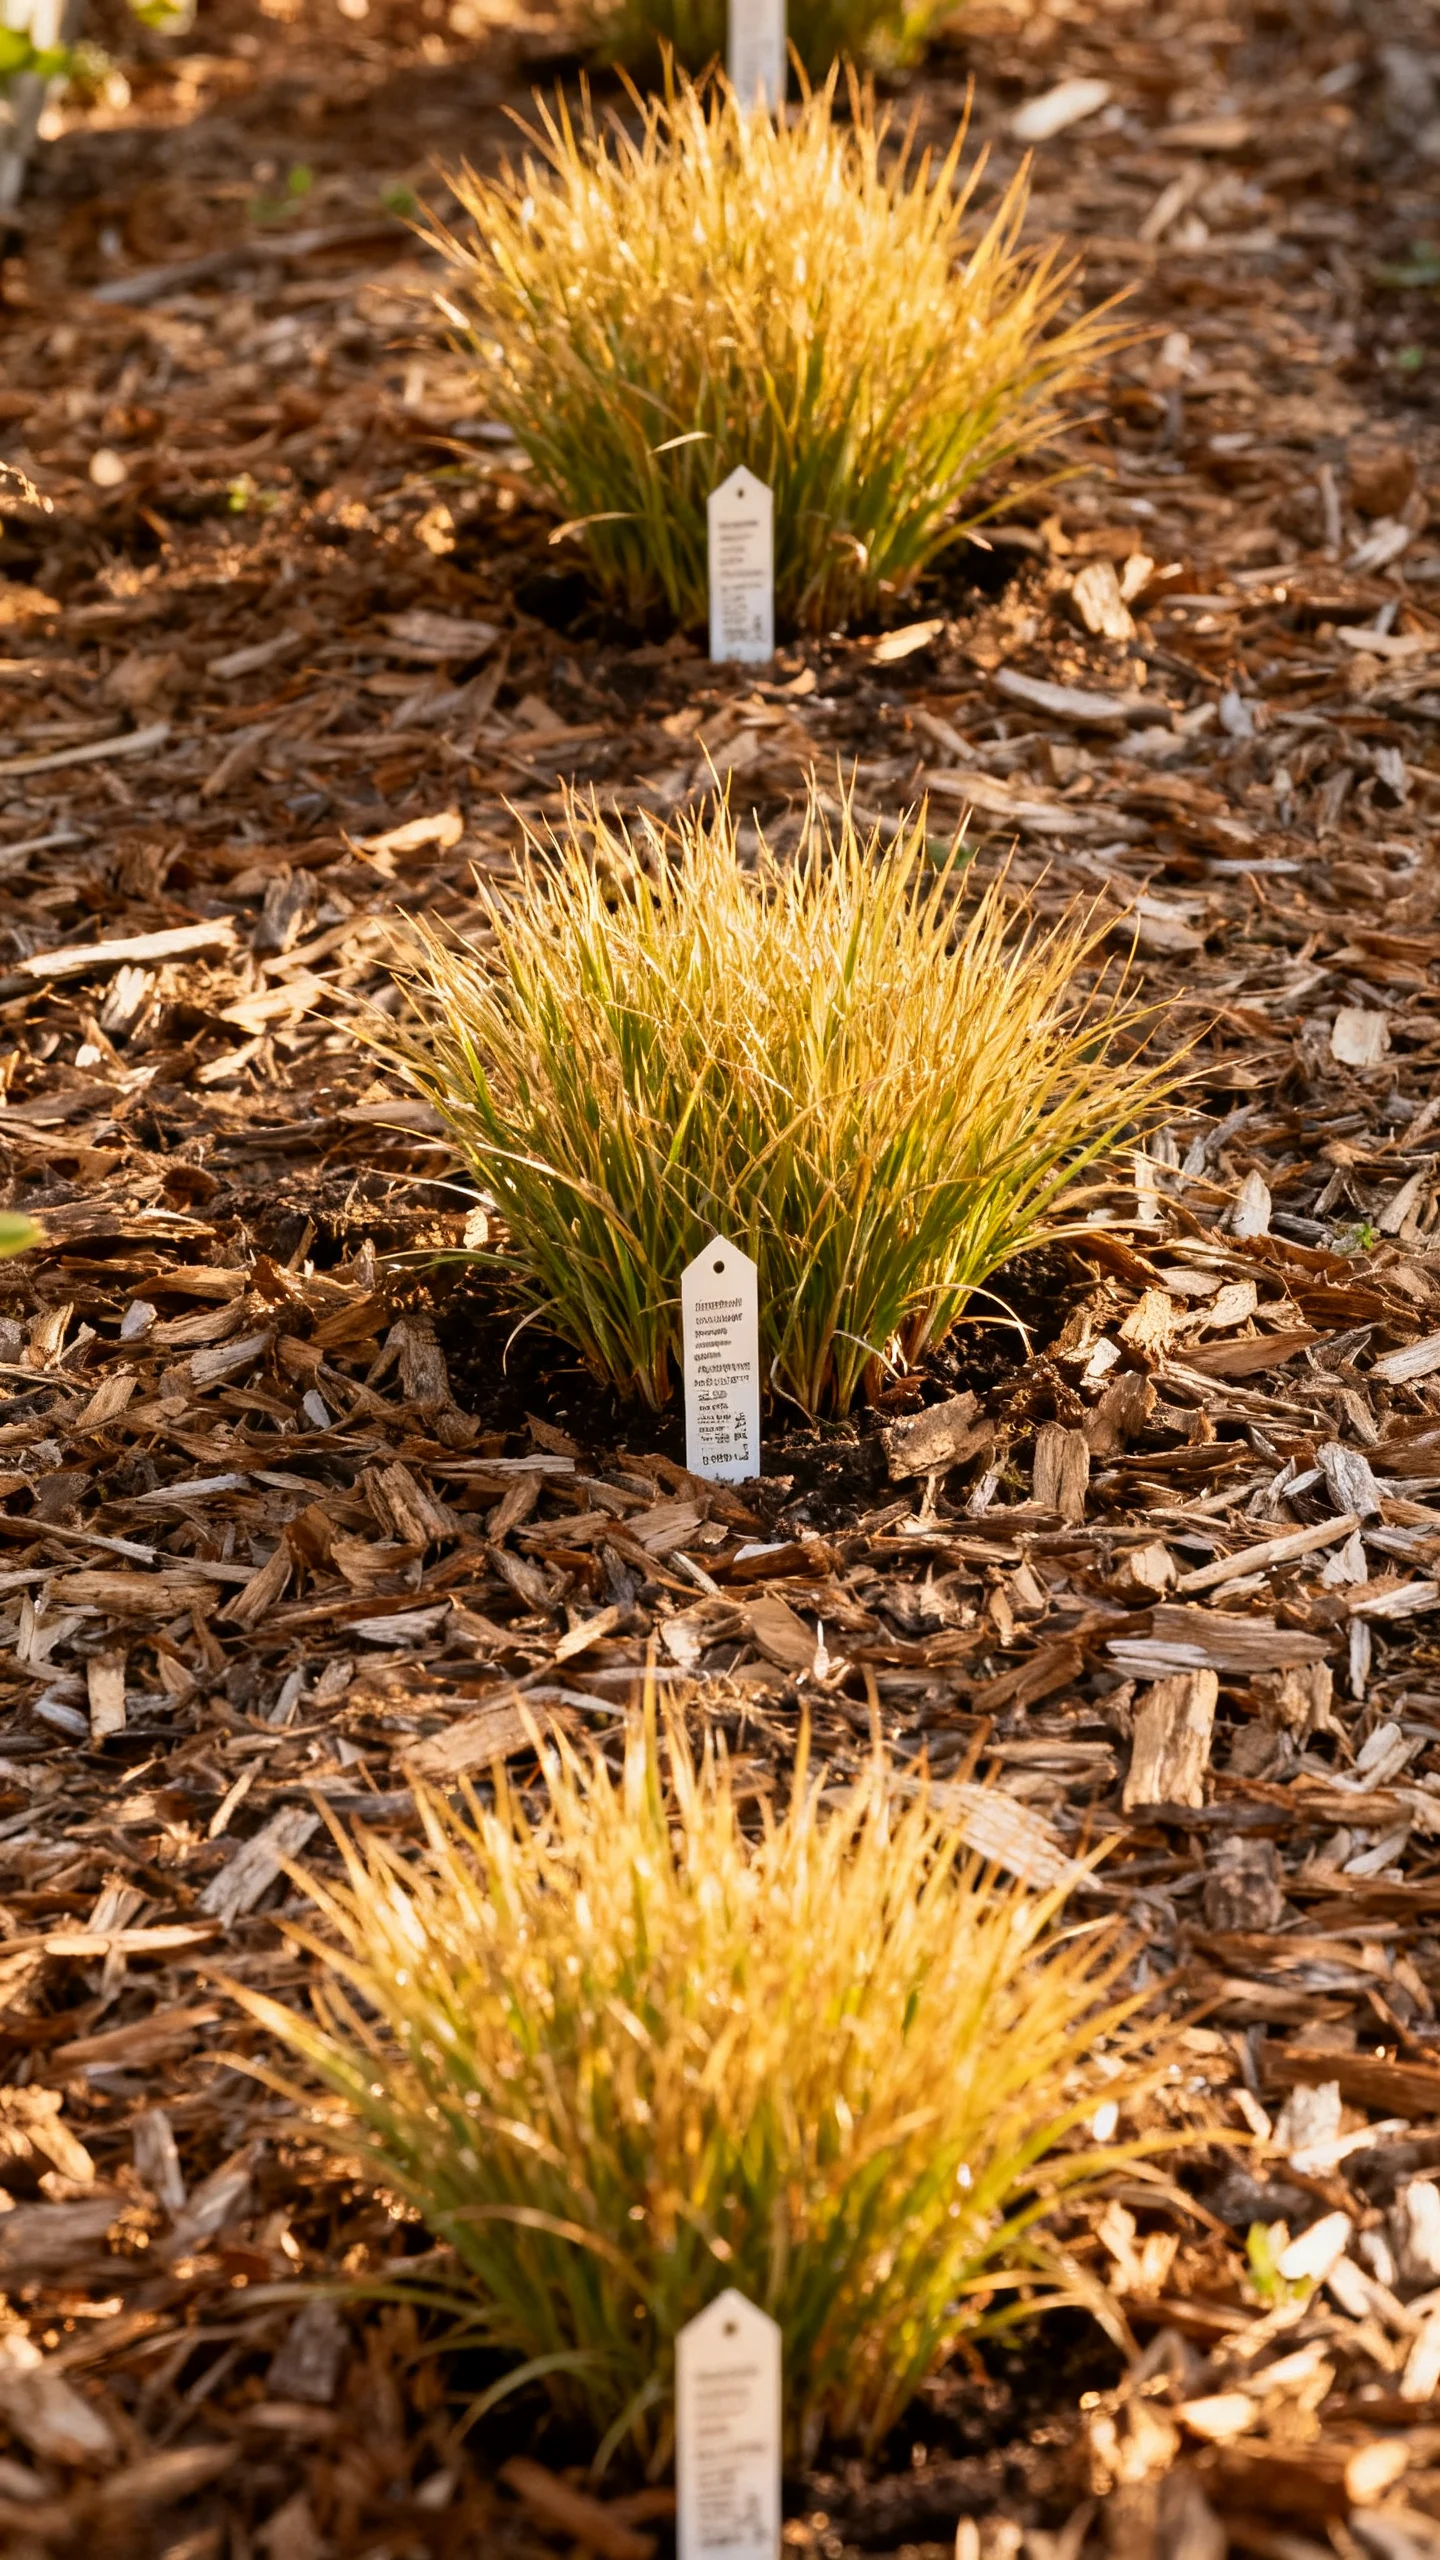
One of the cheapest ways to make landscaping look professionally planned is repetition. Instead of buying many different plants, choose 1–3 hardy varieties and plant them in groups of 3, 5, or 7. Space per plant tag recommendations, but as a general guide: smaller perennials often sit 12–18 inches apart; medium shrubs may need 3–5 feet.
Big-impact formula: Repeat the same plant group along a fence line, around a patio, or in front of existing shrubs. This creates rhythm and makes the backyard feel cohesive, even if you’re planting small starter sizes.
7) Upgrade the Fence Line with a Narrow Planting Strip
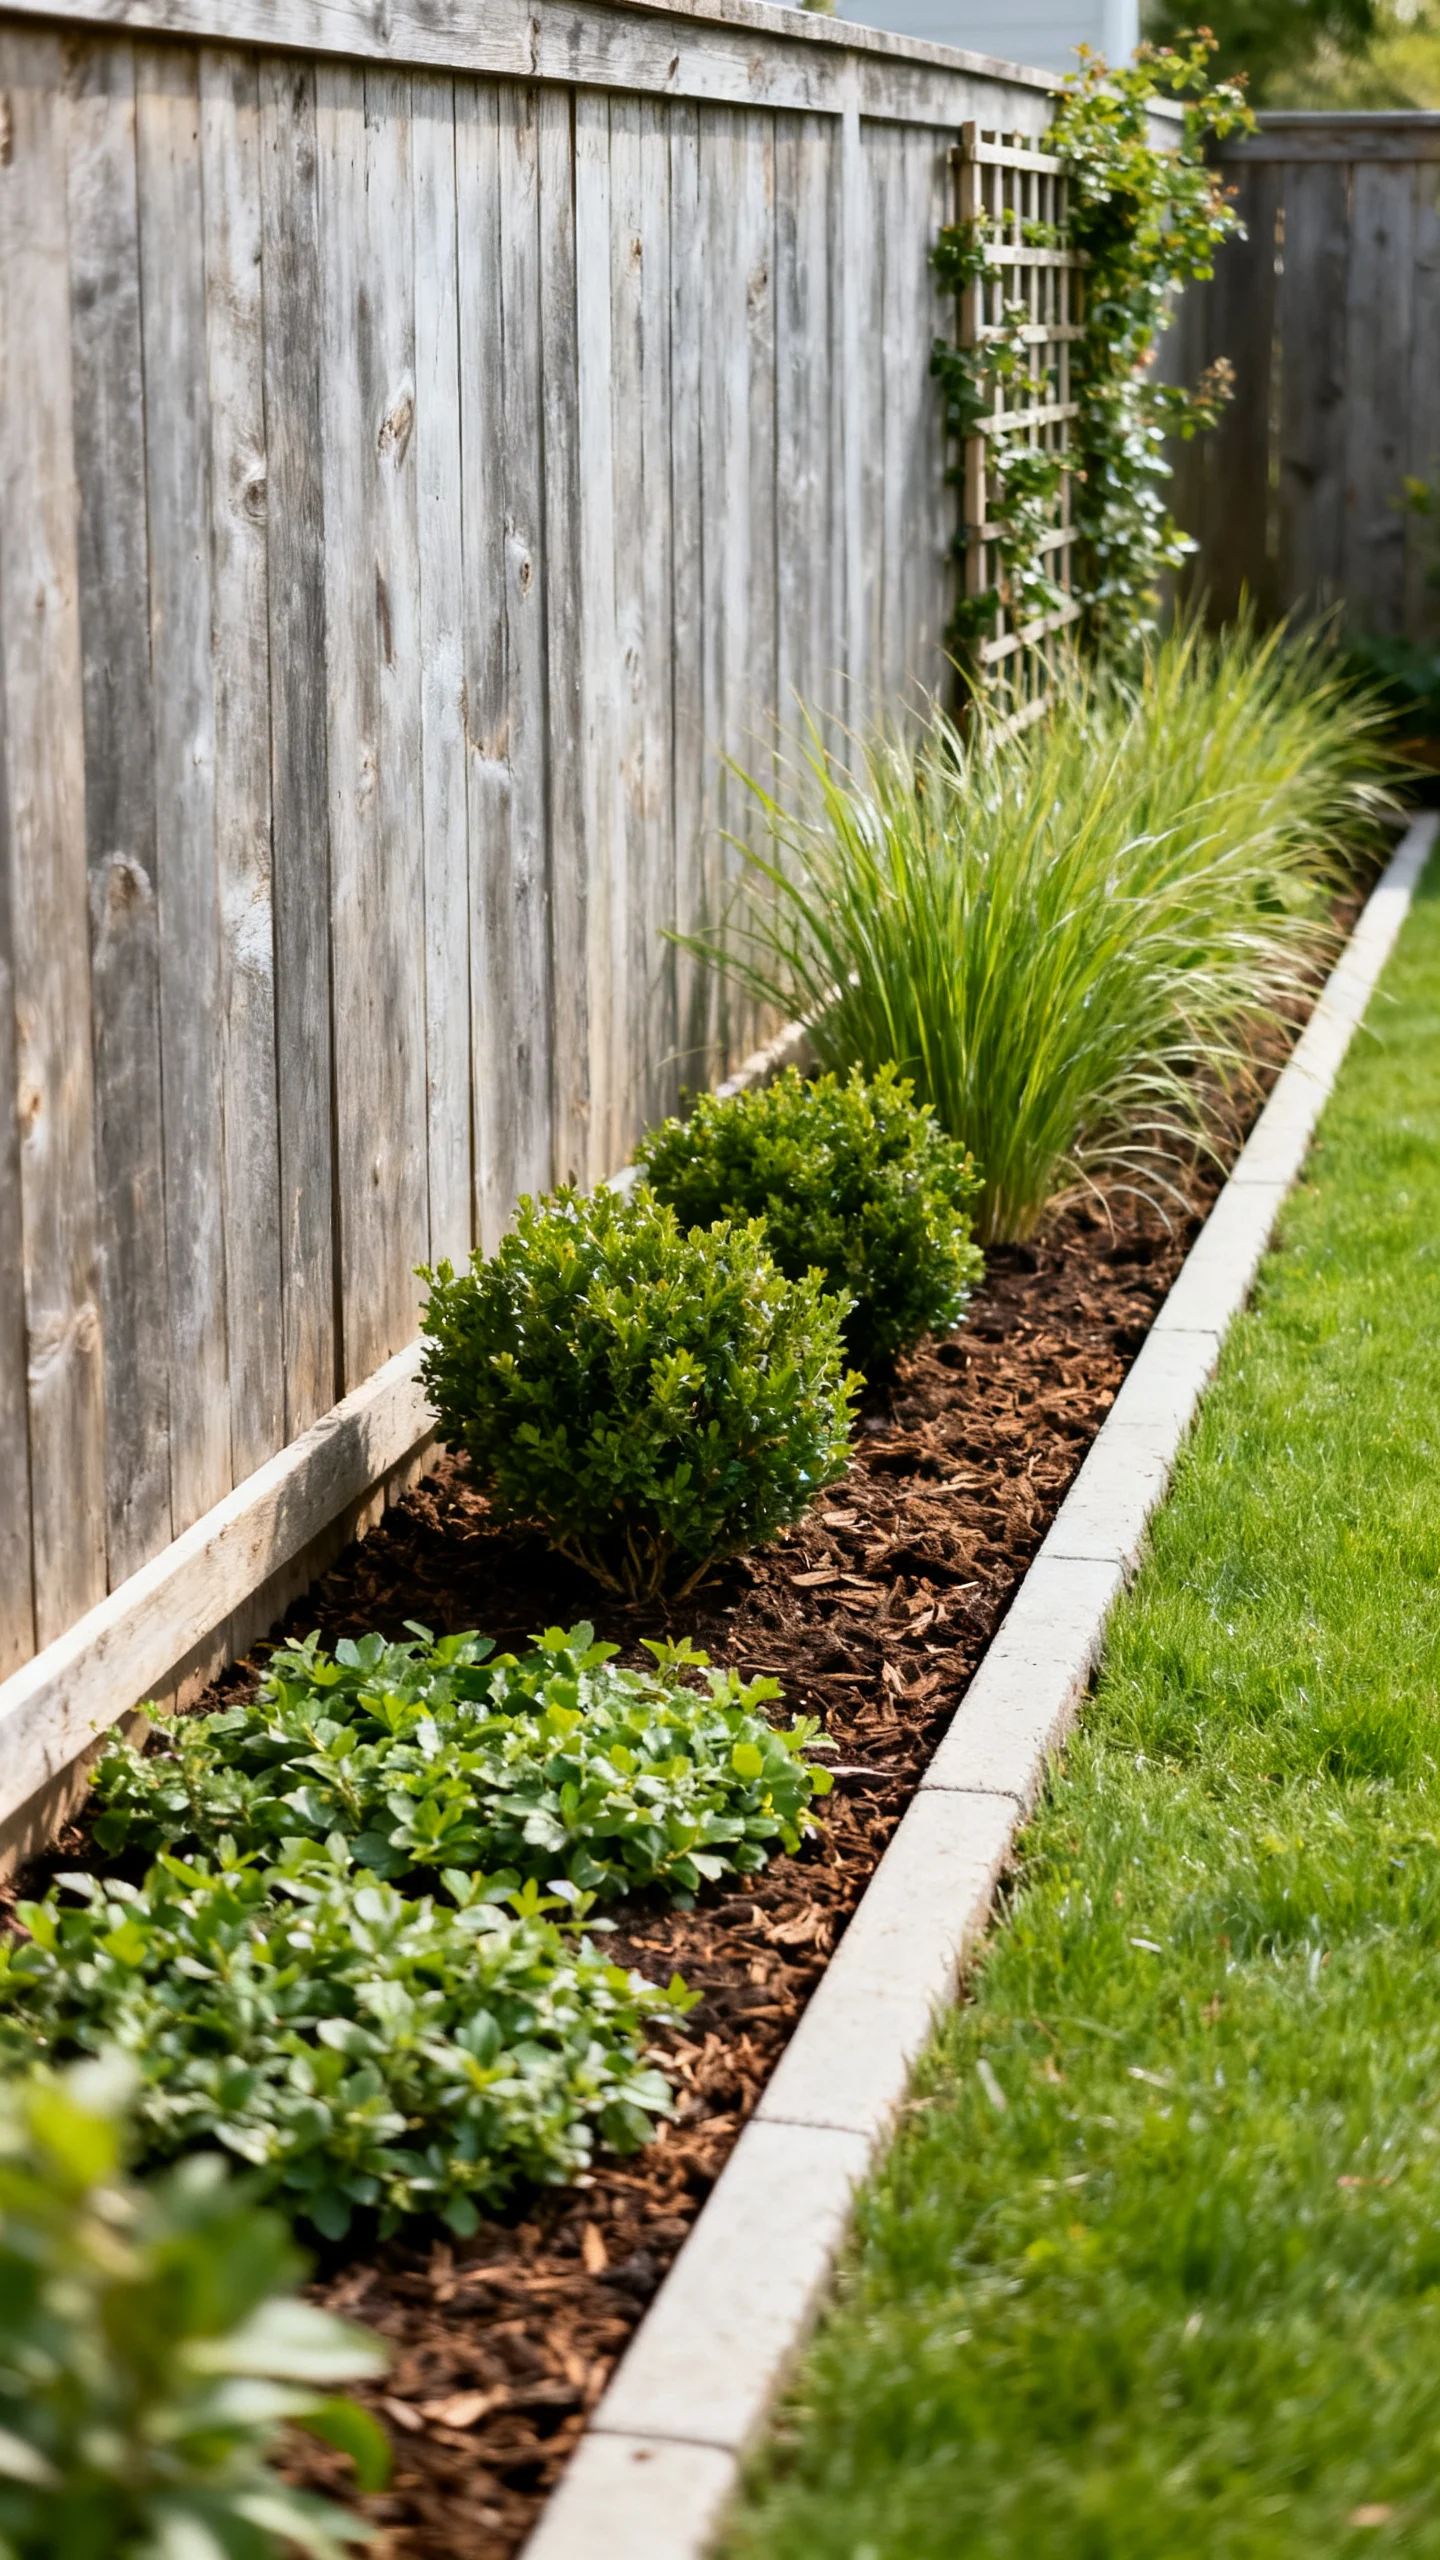
A bare fence can make a backyard feel flat. A simple planting strip softens the boundary and makes the whole yard feel landscaped. Aim for a bed depth of 24–36 inches if space allows—enough for layered planting without crowding. Keep plantings at least 12–18 inches off the fence for airflow and easier maintenance, and leave a narrow access gap if you need to reach gates or latch hardware.
Low-cost picks: Mix fast fillers (ornamental grasses or tough perennials) with a few anchor shrubs. If you can’t plant in-ground, add a line of large planters spaced evenly to mimic the same effect.
8) Add a Simple Tree Ring (But Keep It Wide and Healthy)
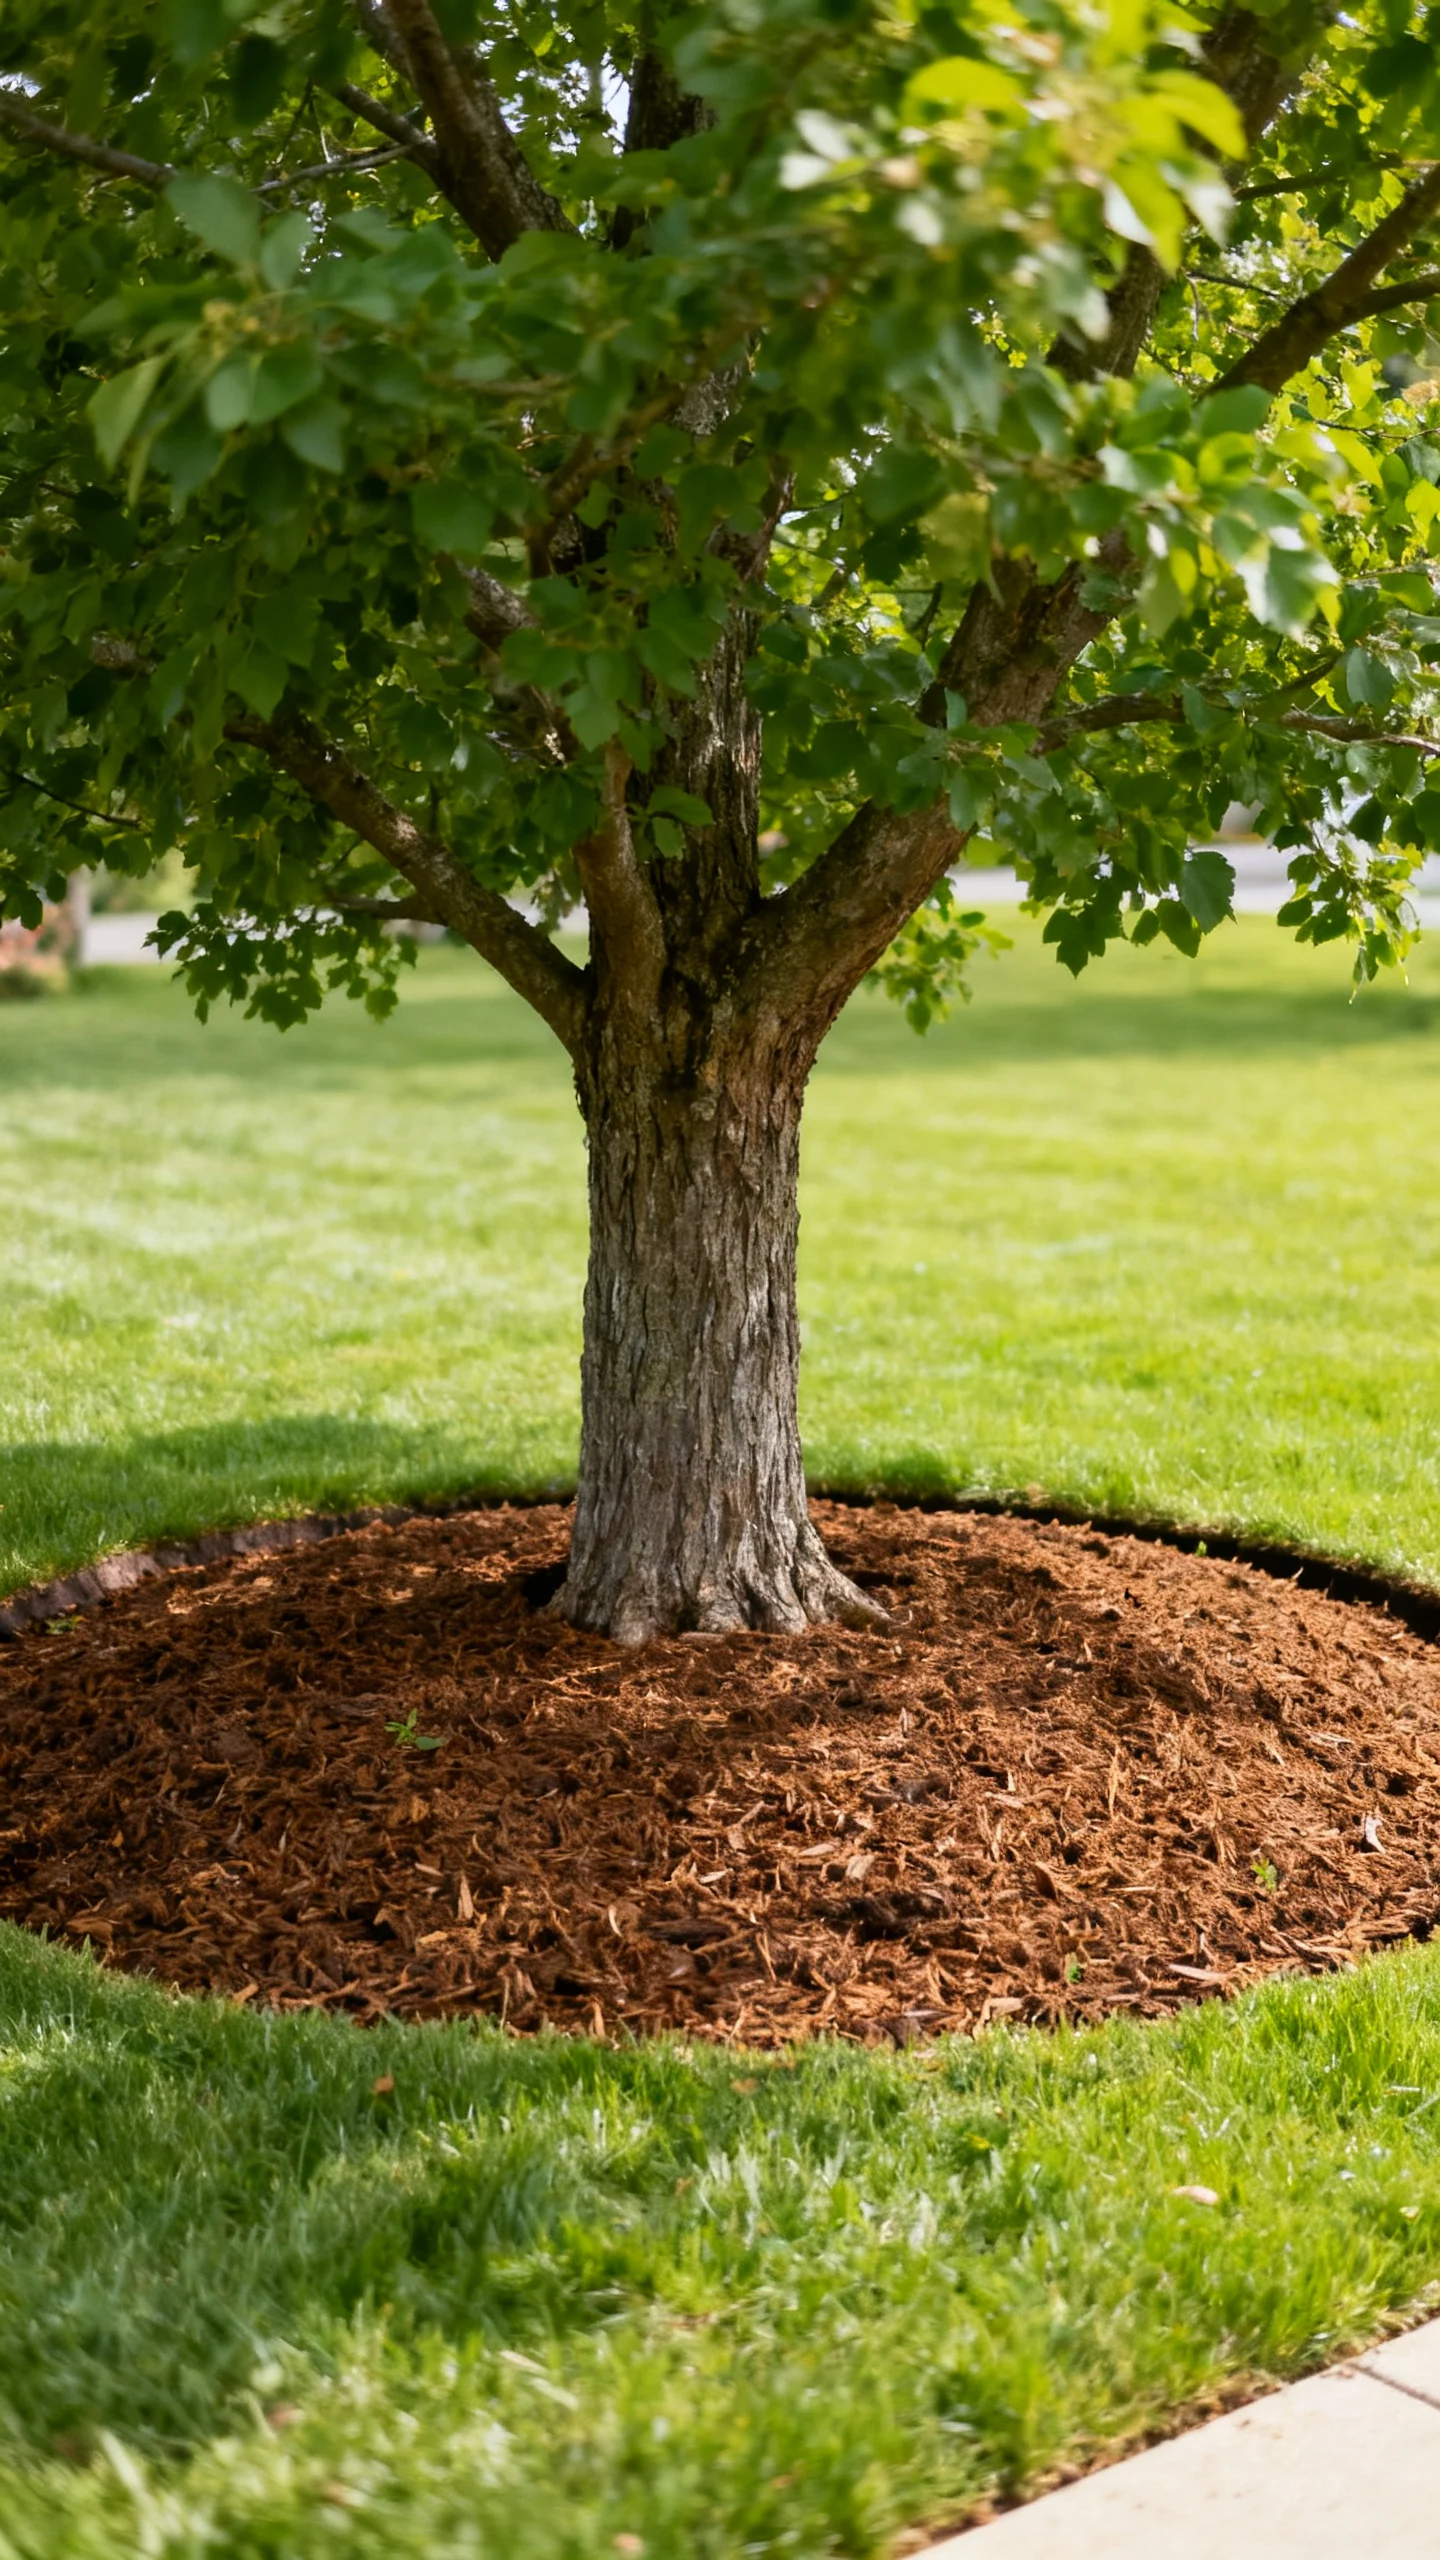
A tree ring instantly looks “finished,” but it needs the right proportions. Make the ring wide—at least 3 feet out from the trunk for small trees, and 4–6 feet for larger trees if you have space. Use mulch, not soil piled against the trunk. Keep mulch pulled 3–6 inches away from the trunk to avoid rot and pests.
Edging options: A clean spade-cut edge is free and modern. If you want a more defined border, use a single row of brick or stone—but avoid building a tall mound that buries roots. The goal is a flat, tidy bed that frames the tree.
9) Build a Budget “Outdoor Room” with Pea Gravel and a Fire-Safe Zone
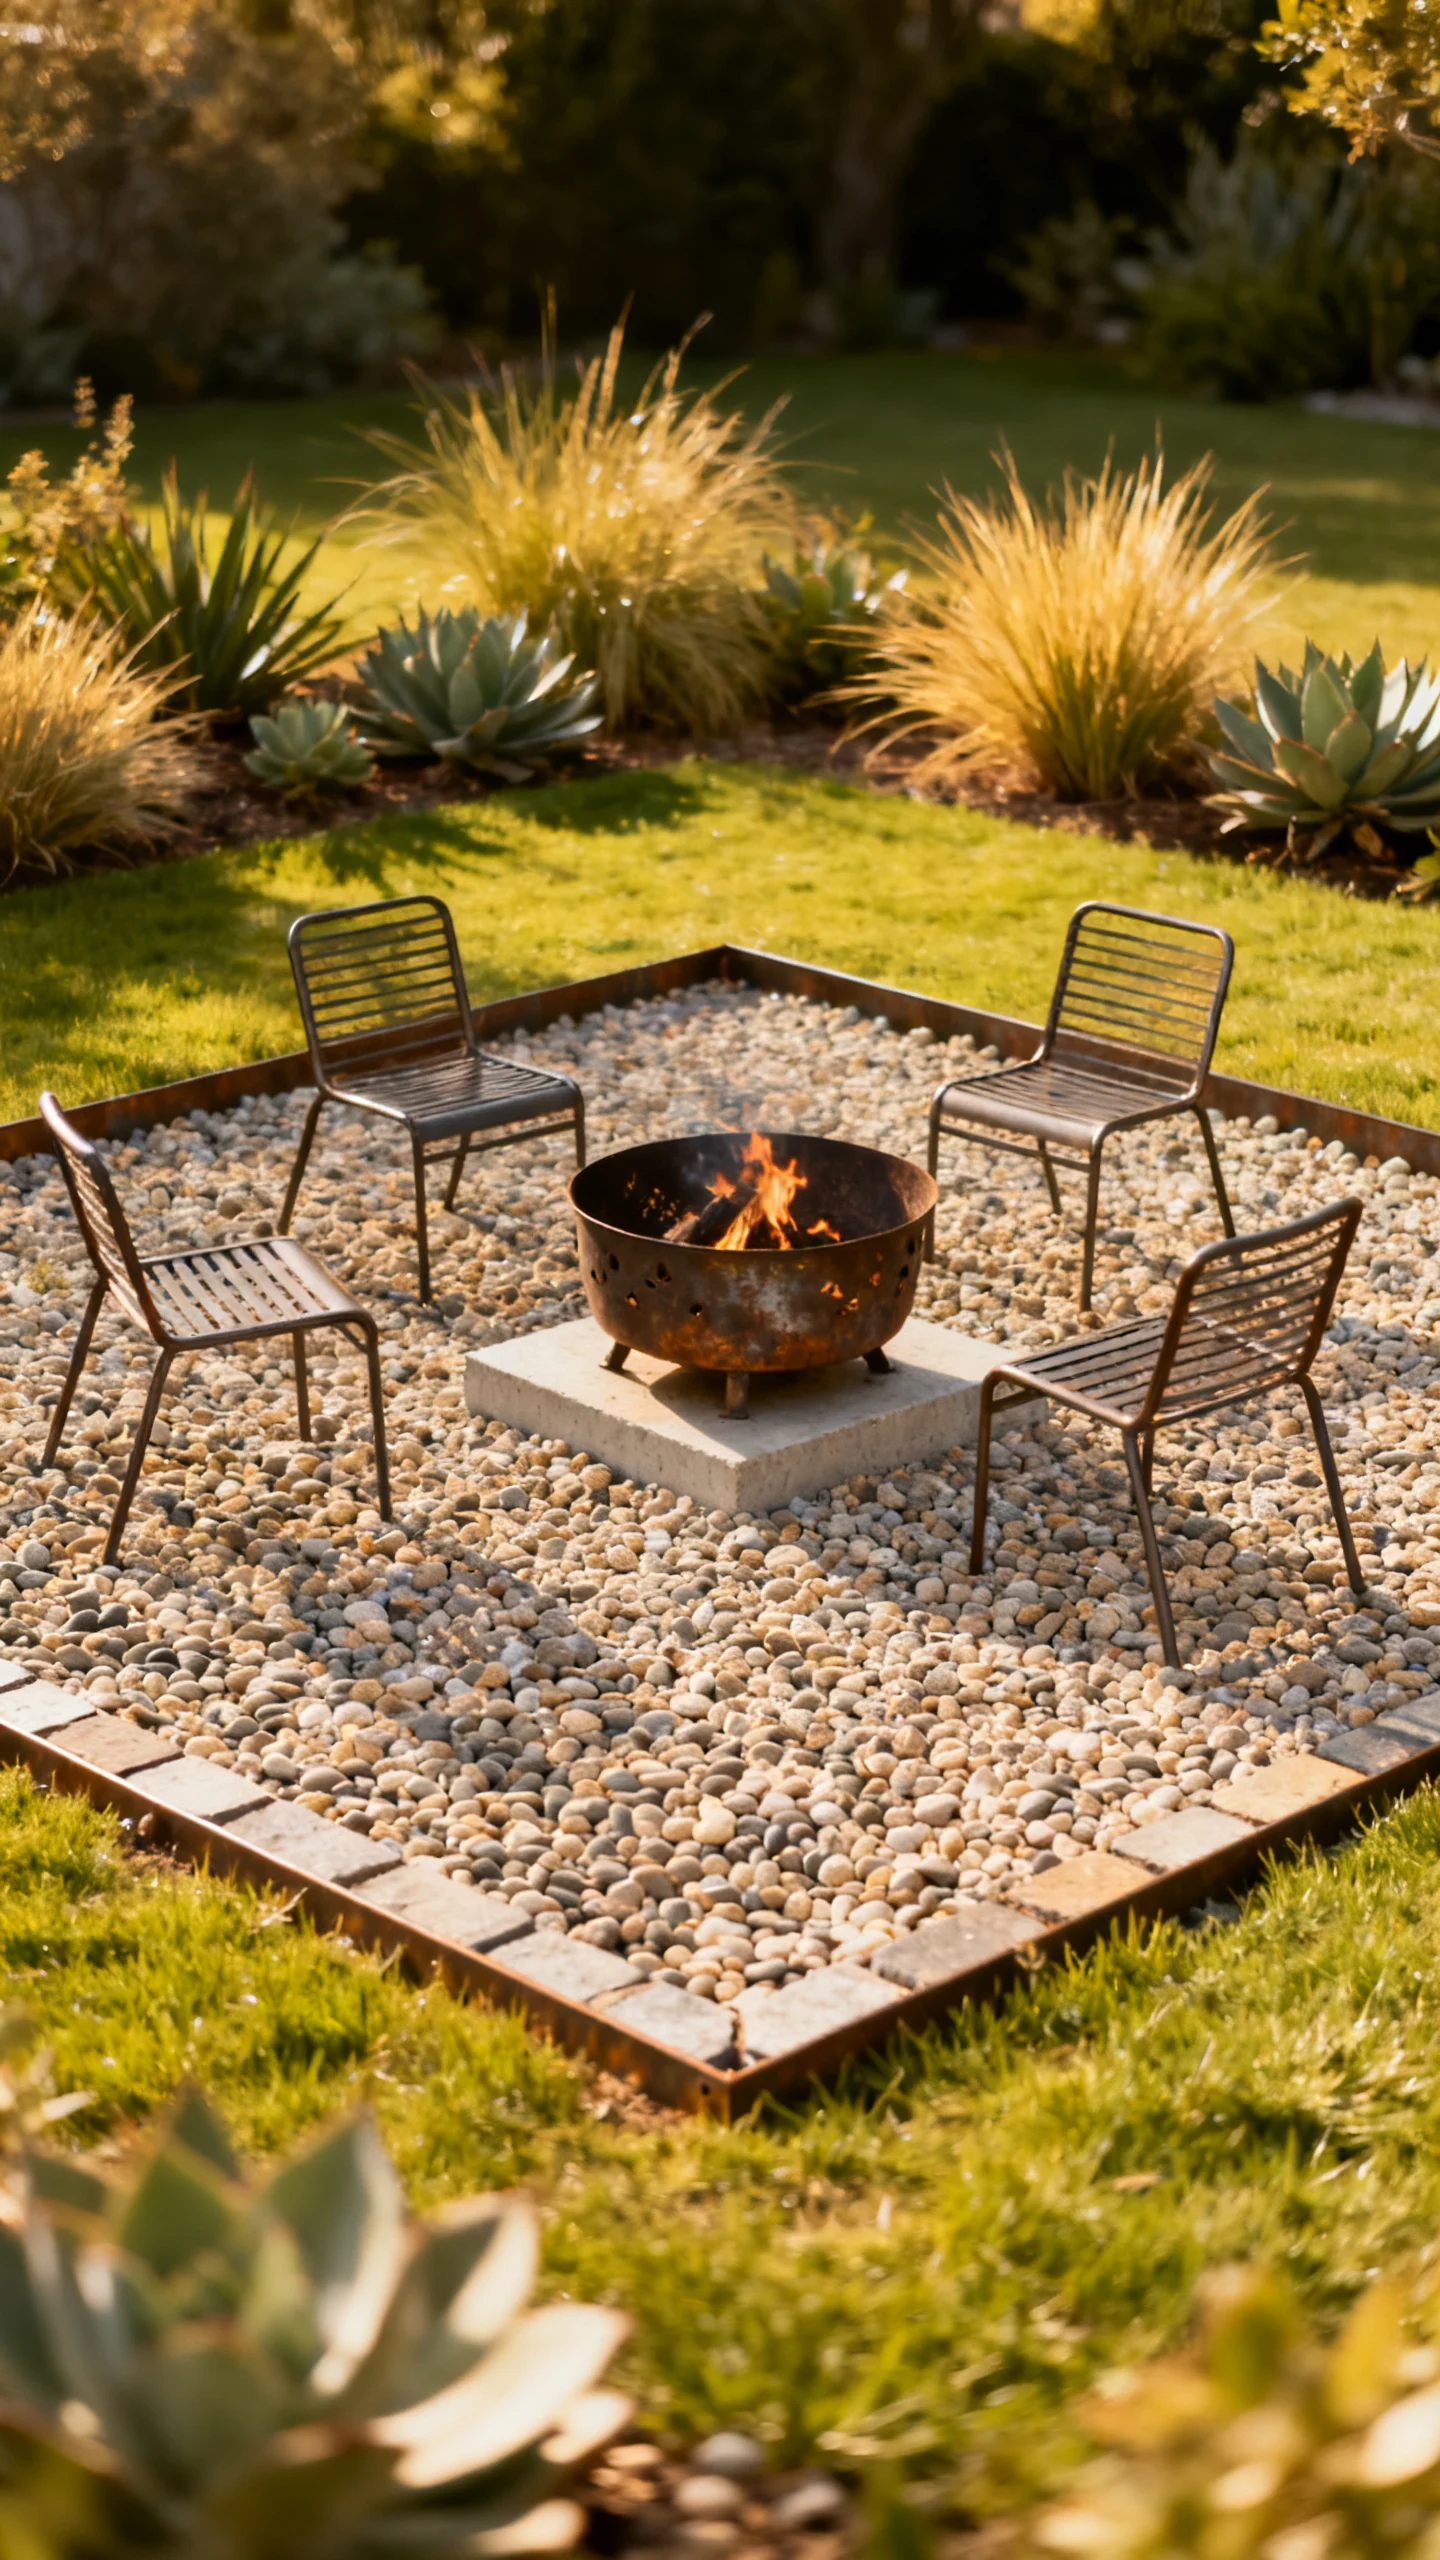
If your backyard feels like “just grass,” carve out a small gravel zone to create a destination. A 10′ x 10′ or 12′ x 12′ square can fit a compact seating arrangement and immediately changes how the yard functions. Excavate 3–4 inches, add landscape fabric, then install 2–3 inches of compactable base rock topped with 1–2 inches of pea gravel for a smoother surface.
Fire safety note: If you plan to place a fire pit, check local rules and keep it away from overhanging branches and structures. Use a non-combustible surface (gravel or pavers), and maintain clear space around it—often 6–10 feet is recommended depending on the pit and local guidelines.
10) Fix the “Little Messes”: Weed, Rake, Prune, and Clean Edges
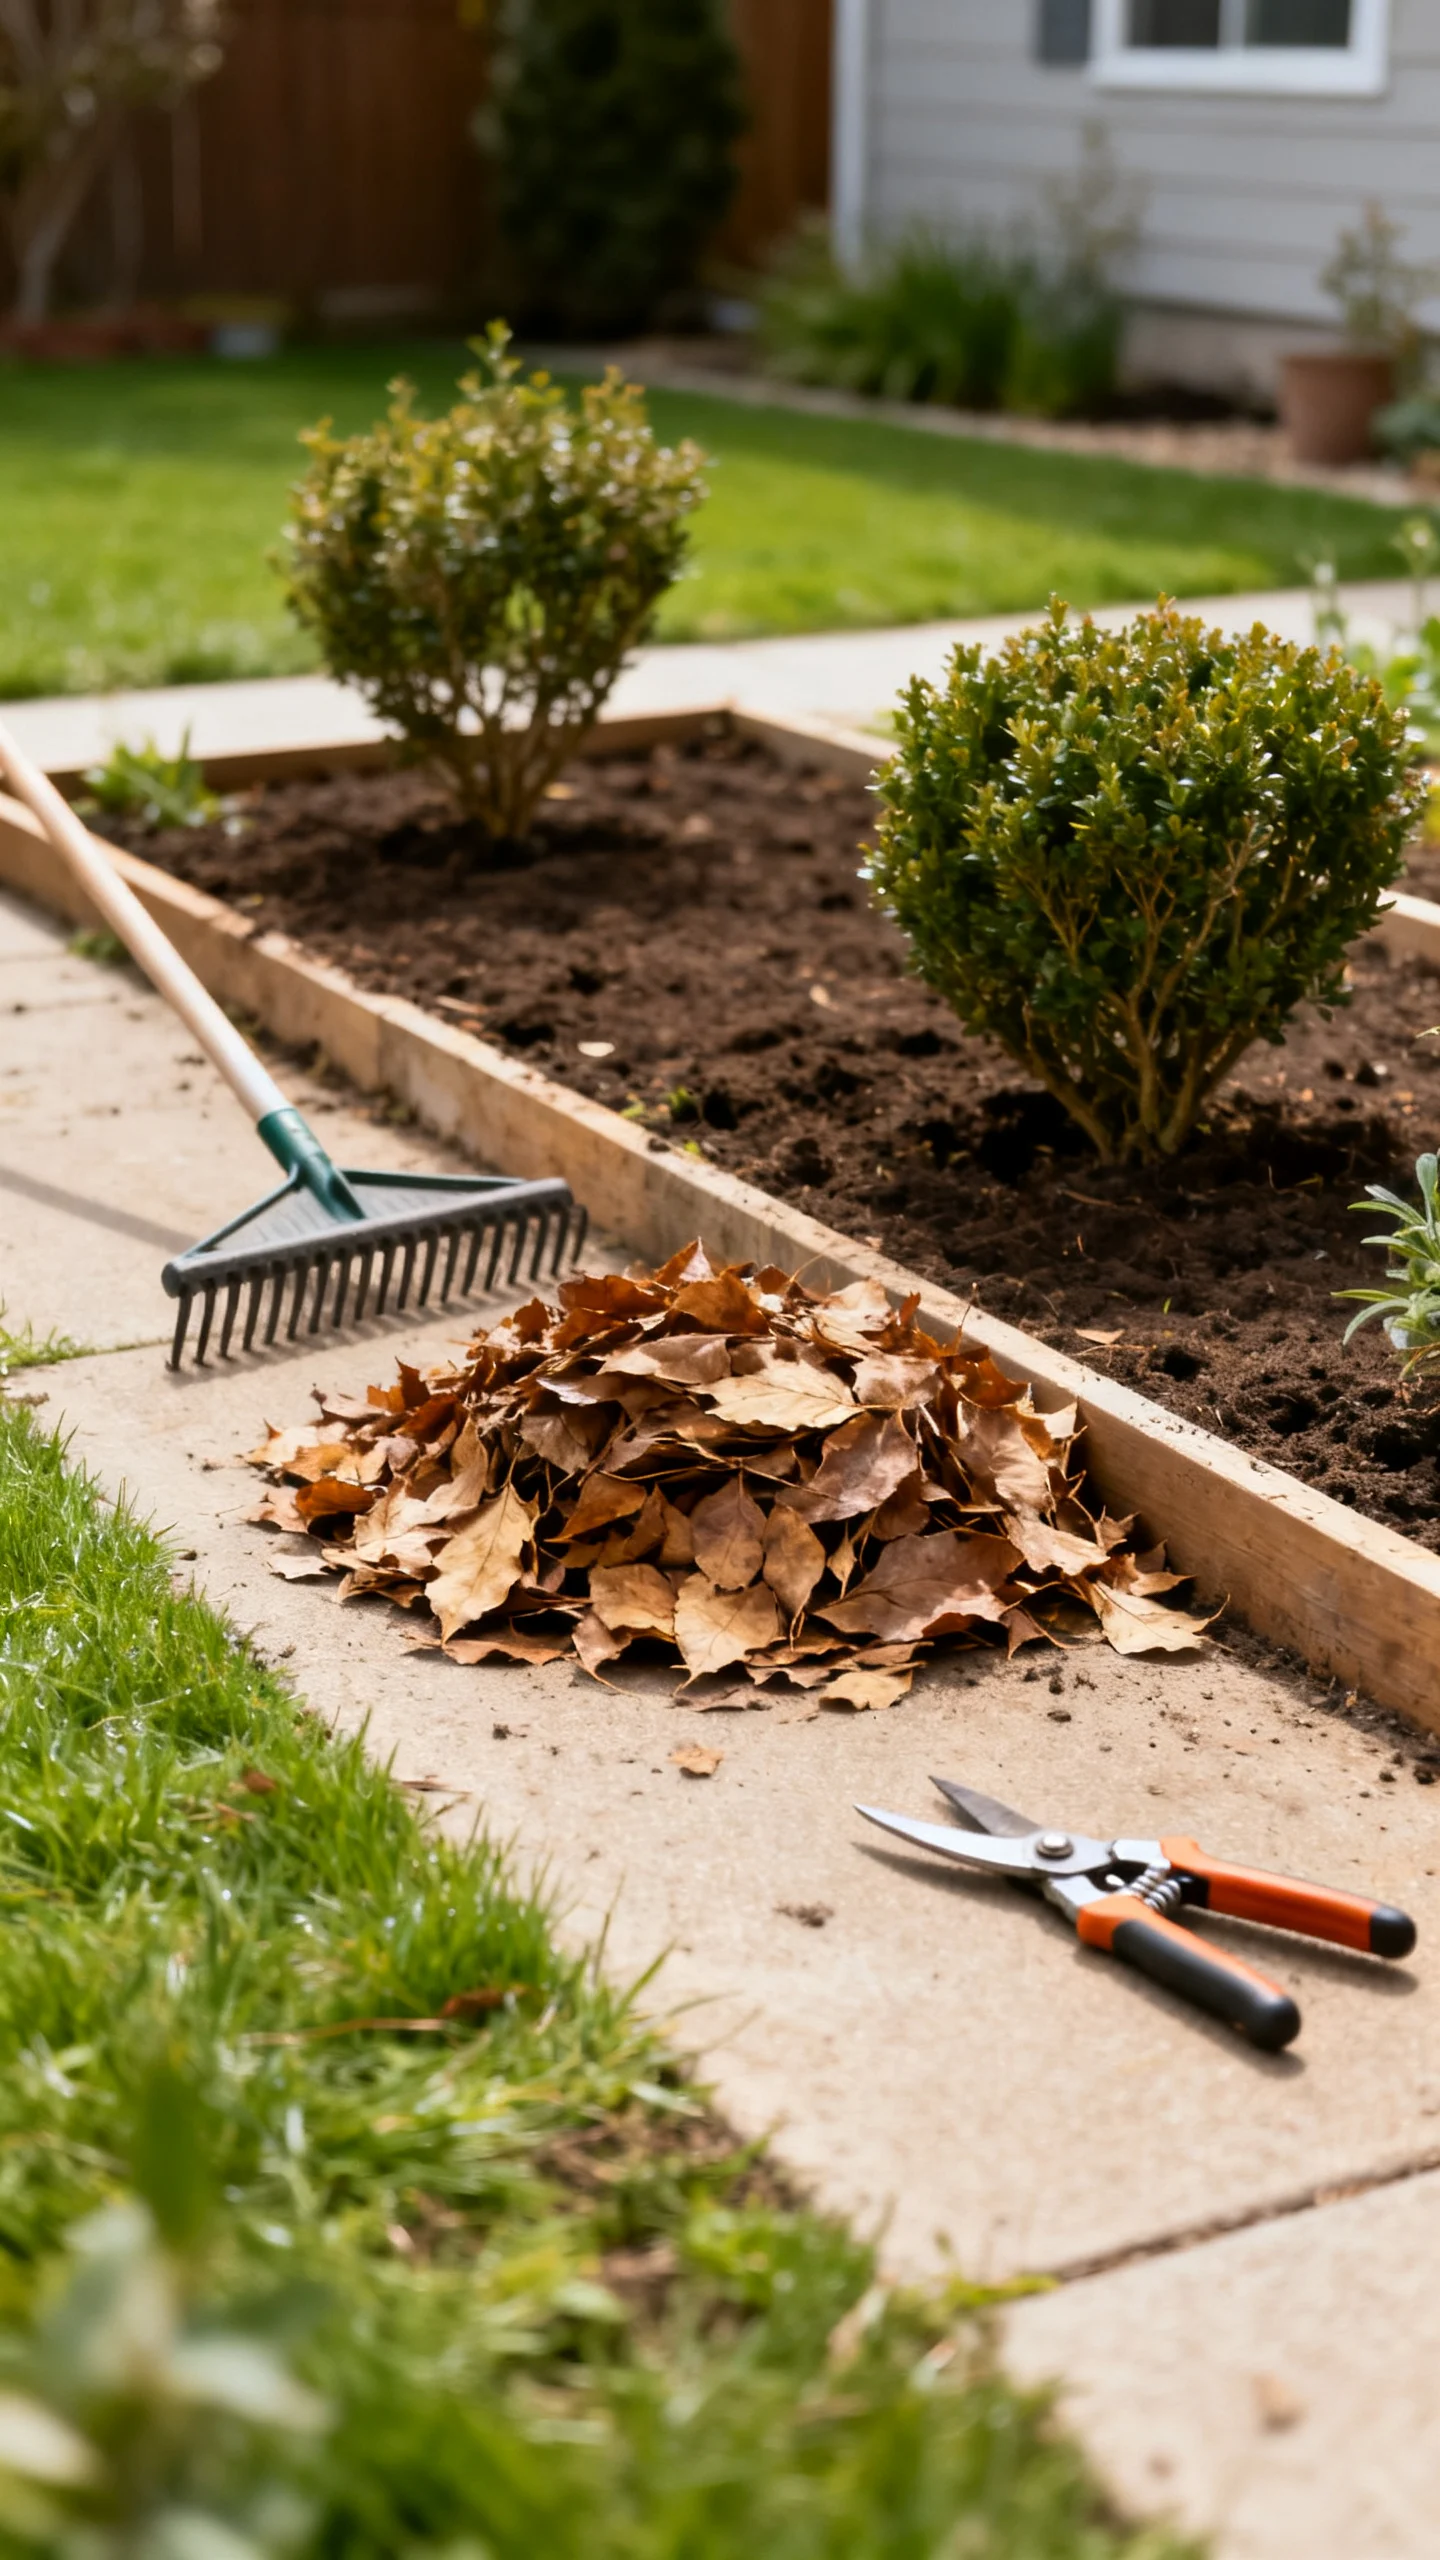
The cheapest landscaping upgrade is often the most overlooked: cleanup and simple maintenance that makes everything read as cared-for. Weed beds thoroughly, rake out old leaves, and prune shrubs lightly to reveal clean shapes. Keep shrub branches from resting on the ground, and remove dead wood to open up the plant and improve airflow.
Quick curb-to-backyard checklist: Straighten stepping stones, sweep patios, trim grass along borders, and refresh any bare soil spots with a thin mulch layer. These small “finish work” moves amplify every other upgrade you make.
FAQ
What’s the cheapest landscaping upgrade that looks professional?
Fresh mulch with crisp edging is usually the fastest, lowest-cost upgrade with the biggest visible payoff. Focus on defining the bed lines first, then apply 2–3 inches of mulch for a clean, high-contrast look.
How do I make a small backyard feel more “designed” on a budget?
Add one clear destination (a small gravel seating zone or a defined path) and repeat the same plant variety in groups. Simple structure plus repetition makes even a tiny yard feel intentional.
Should I use landscape fabric under mulch or gravel?
For gravel paths and gravel patios, fabric can help keep stone from sinking into soil and reduce weeds. Under mulch beds, it’s optional—mulch breaks down over time and fabric can make future planting harder. If you do use it, choose a permeable fabric and avoid piling mulch too deep.
How wide should a backyard path be?
For comfortable walking, aim for 30–36 inches wide. A narrower garden path can be around 24 inches, but wider paths look more intentional and are easier to use when carrying trays, tools, or chairs.
What should I prioritize first if my backyard is messy and uneven?
Start with cleanup and structure: weed, rake, prune, then edge beds and define a path or small patio zone. Once the lines and surfaces look tidy, add mulch and a few repeated plant groupings to finish the upgrade.