
Furniture Remodeling on a Budget That Feels Designer
Designer-looking furniture doesn’t have to come with a designer price tag. With the right remodeling moves—paint, hardware, upholstery, and a few pro-level prep steps—you can make thrifted, dated, or builder-basic pieces feel intentional and high-end.
Below are 10 practical, budget-friendly approaches that focus on remodeling what you already have (or can find secondhand) into furniture that looks custom, elevated, and worth a double-take.
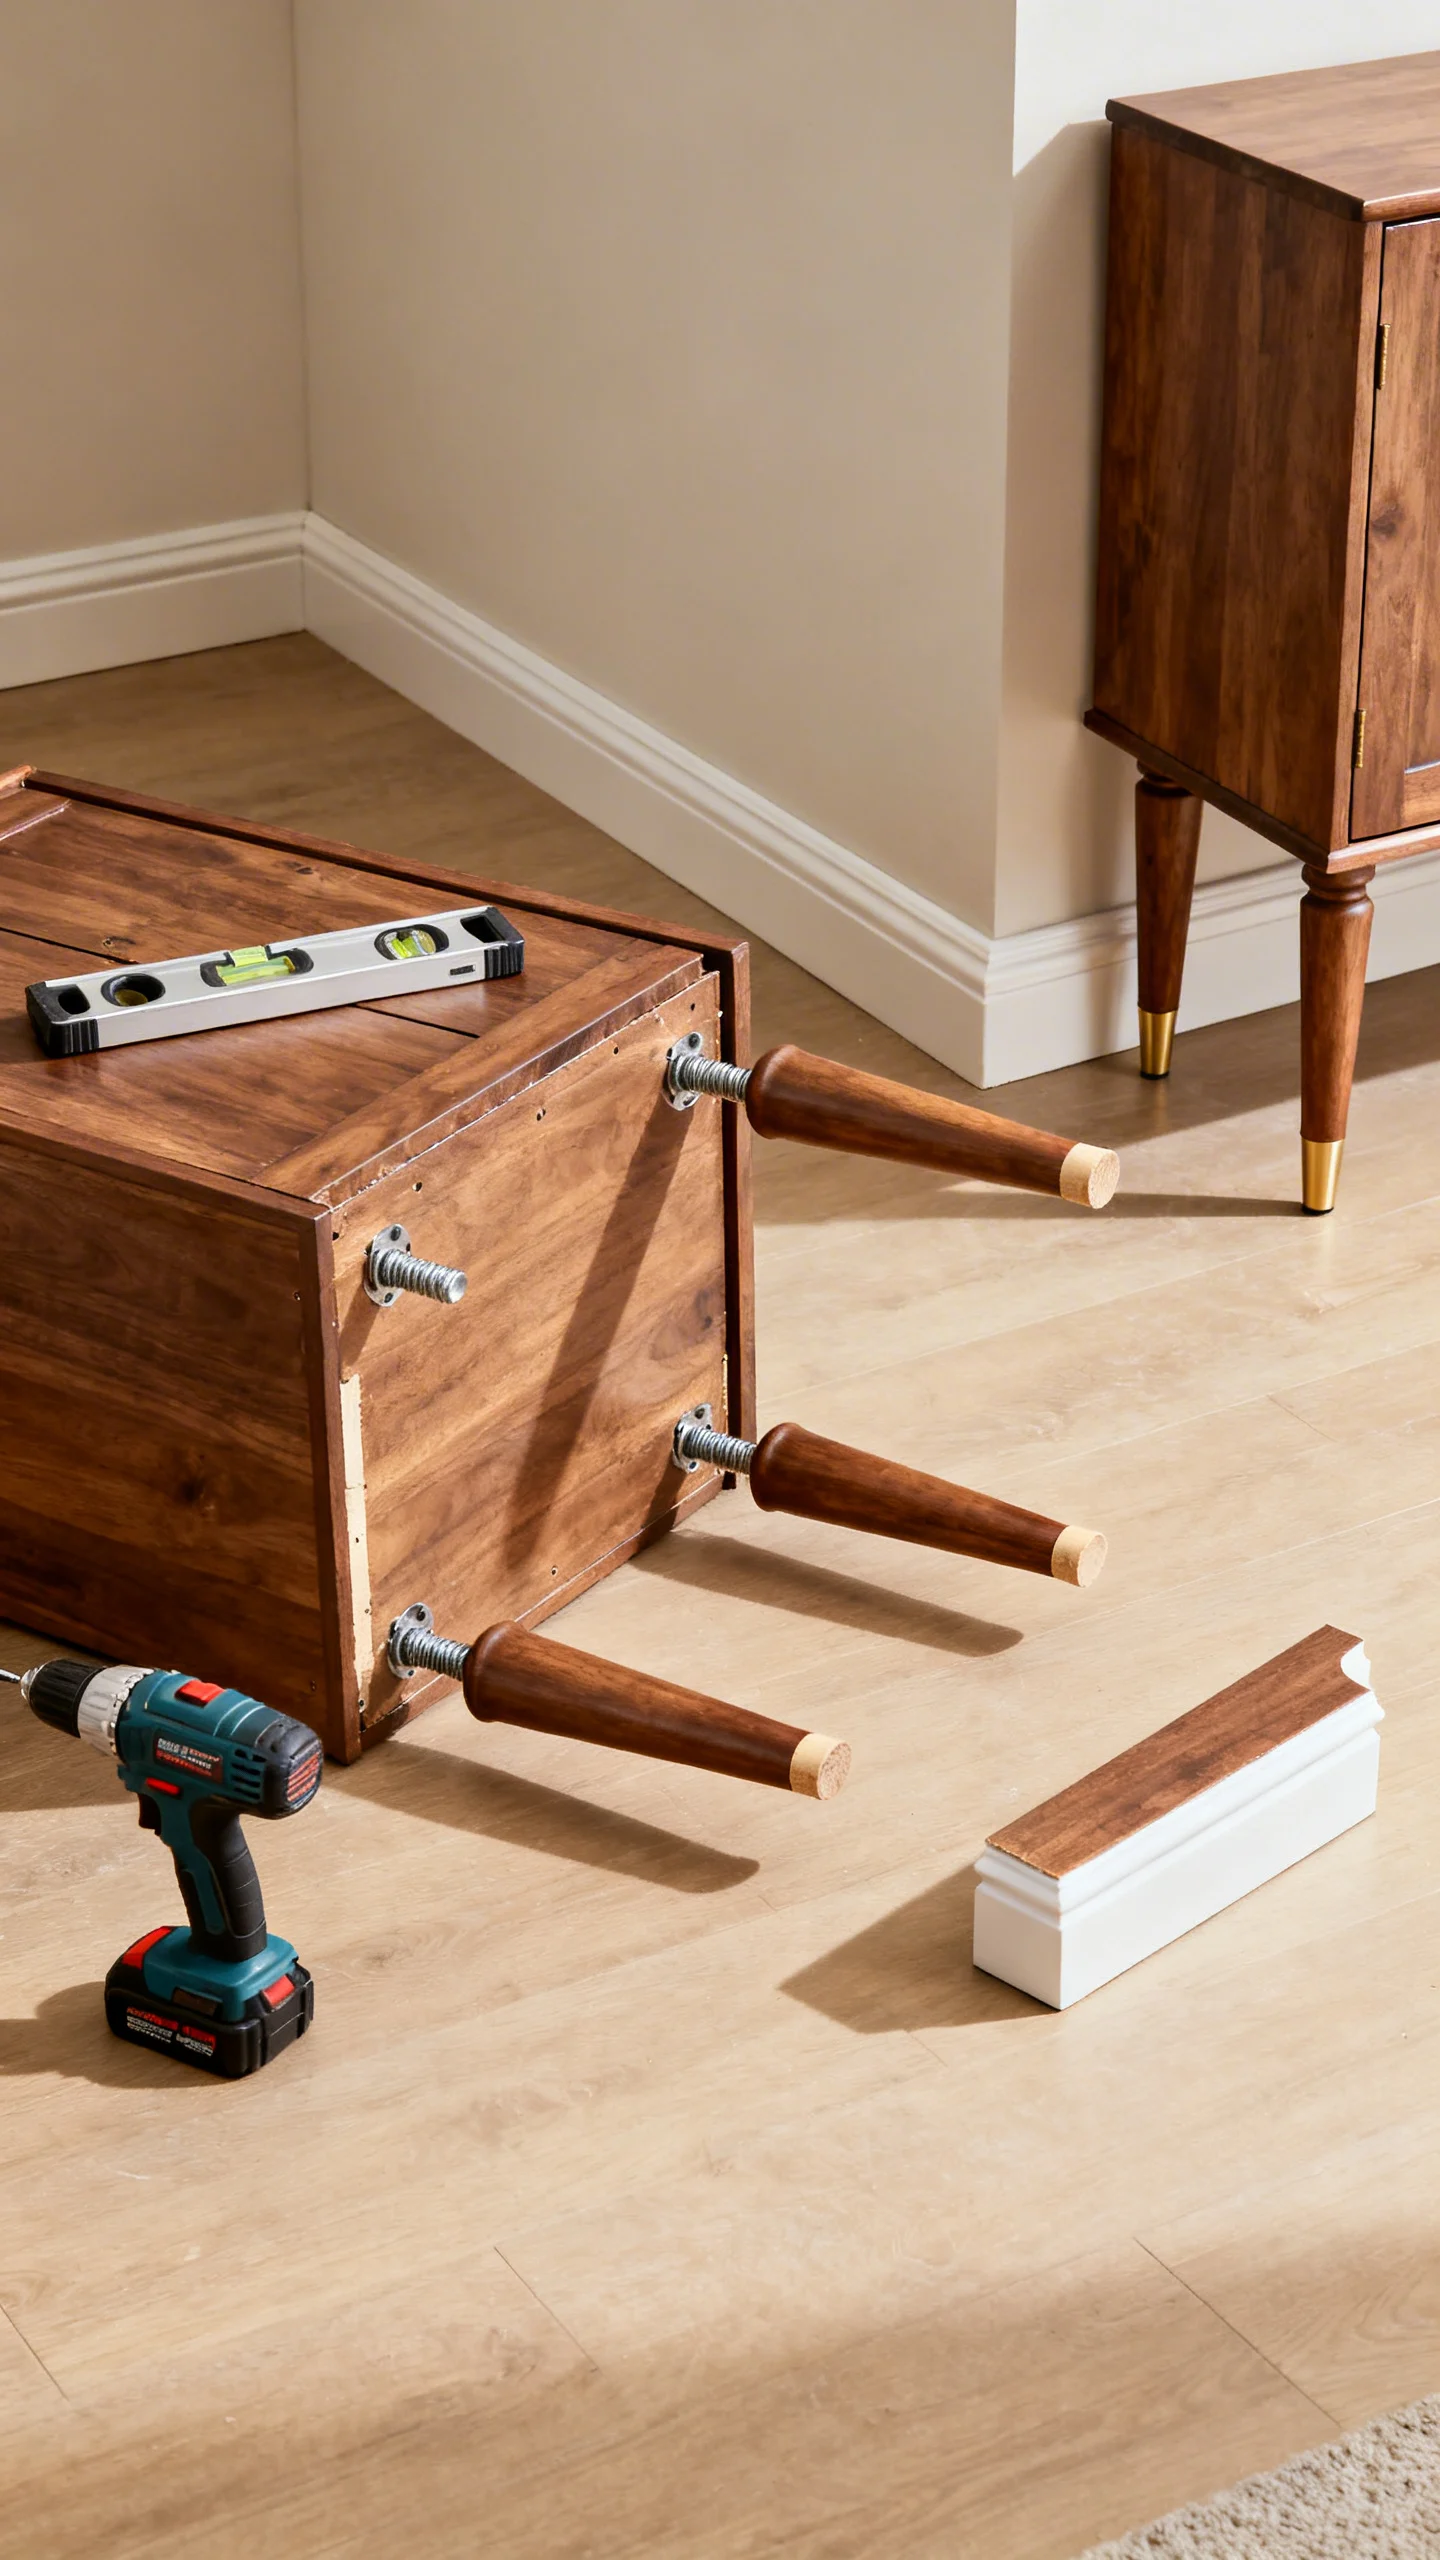
1) Start With a “Good Bones” Checklist Before You Buy (or Begin)
Budget remodeling gets expensive fast if the piece is structurally compromised. Before committing, check: the frame (no wobble), joints (tight, not separating), drawers (slide smoothly), and veneer (not lifting in large sheets). Minor issues are fixable, but major warping or severe water damage can eat your time and materials.
Quick test: place the piece on a flat floor and press opposite corners—if it rocks, you’ll need leveling feet or repairs. For chairs, grip the back and seat and gently twist; any significant flex suggests joint work. If it passes these checks, you’re set up to spend money on finishes that show, not fixes that hide.
2) Do Prep Like a Pro: Clean, Degloss, Sand—In That Order
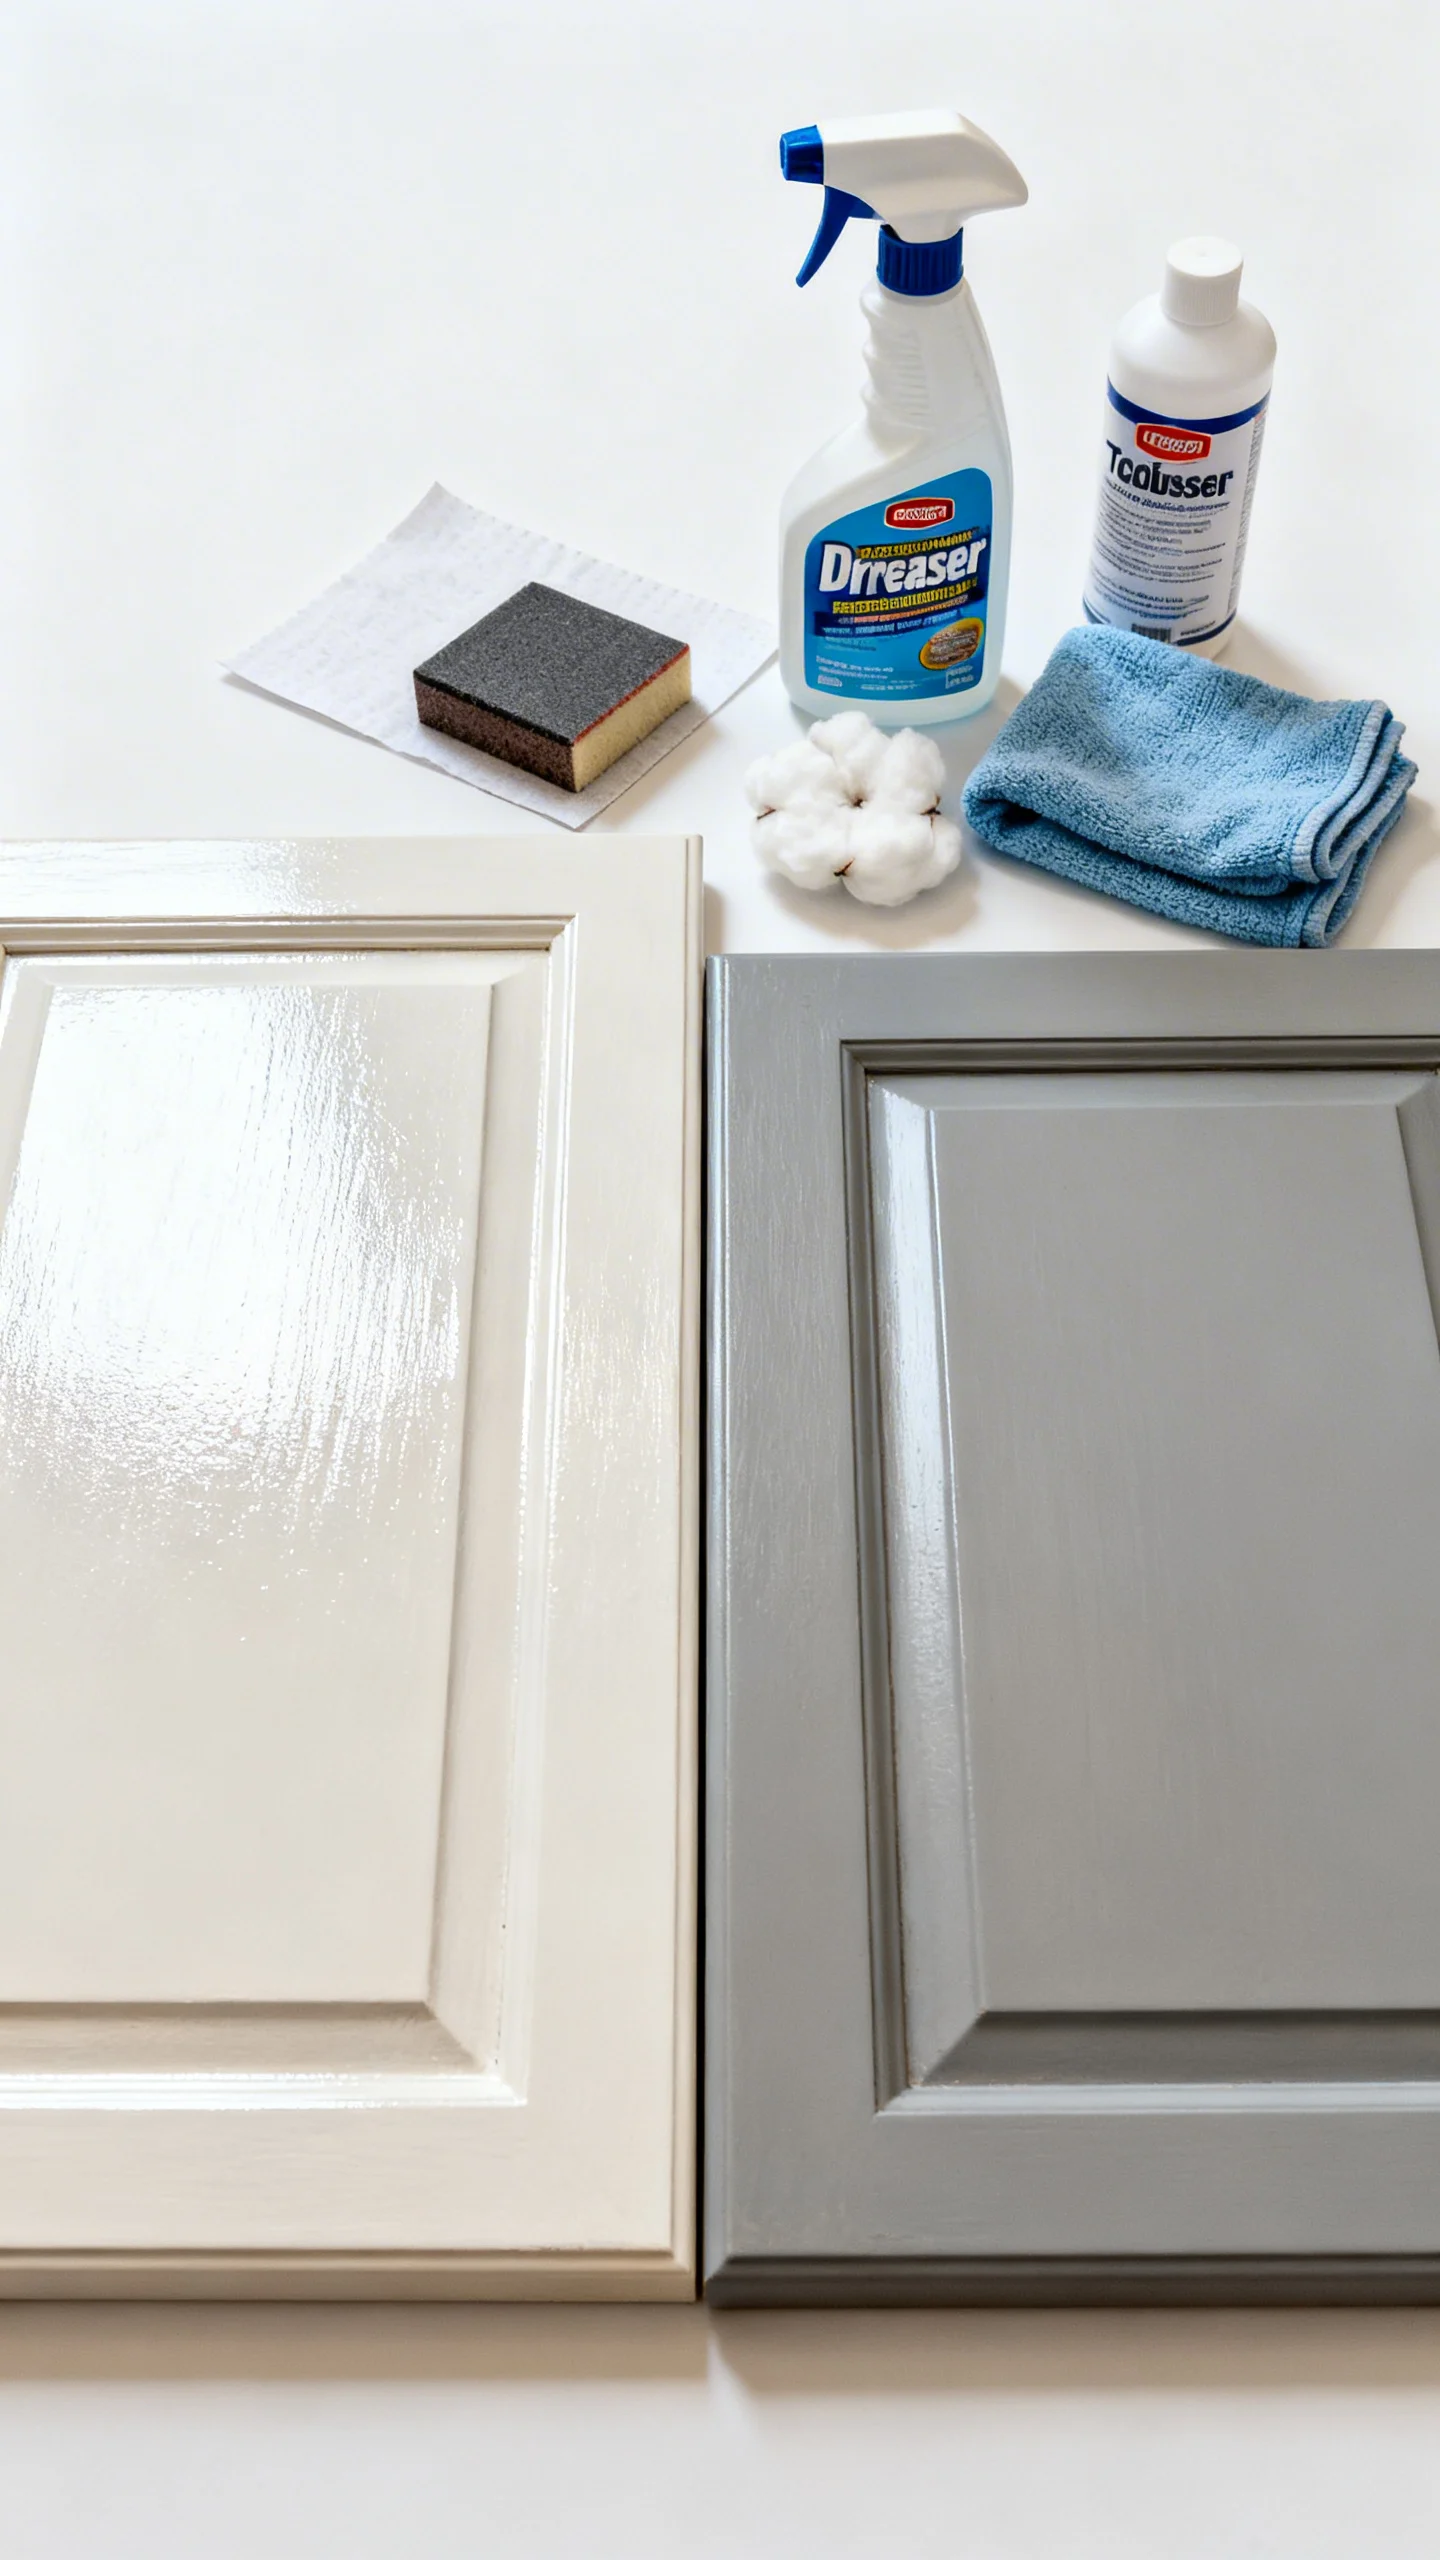
The most “designer” DIYs have one thing in common: the finish looks factory-smooth. Start by degreasing with a strong cleaner (especially on kitchen pieces like stools or hutches). Then degloss with liquid deglosser or a light scuff sand. Finally, sand strategically: 120–150 grit to knock down sheen and flaws, then 220 grit for smoothing before paint.
If you’re painting laminate or slick lacquer, don’t skip bonding primer. It’s often cheaper than repainting later. Fill dings with wood filler, let it fully cure, then sand flush. Wipe dust with a tack cloth or damp microfiber before priming.
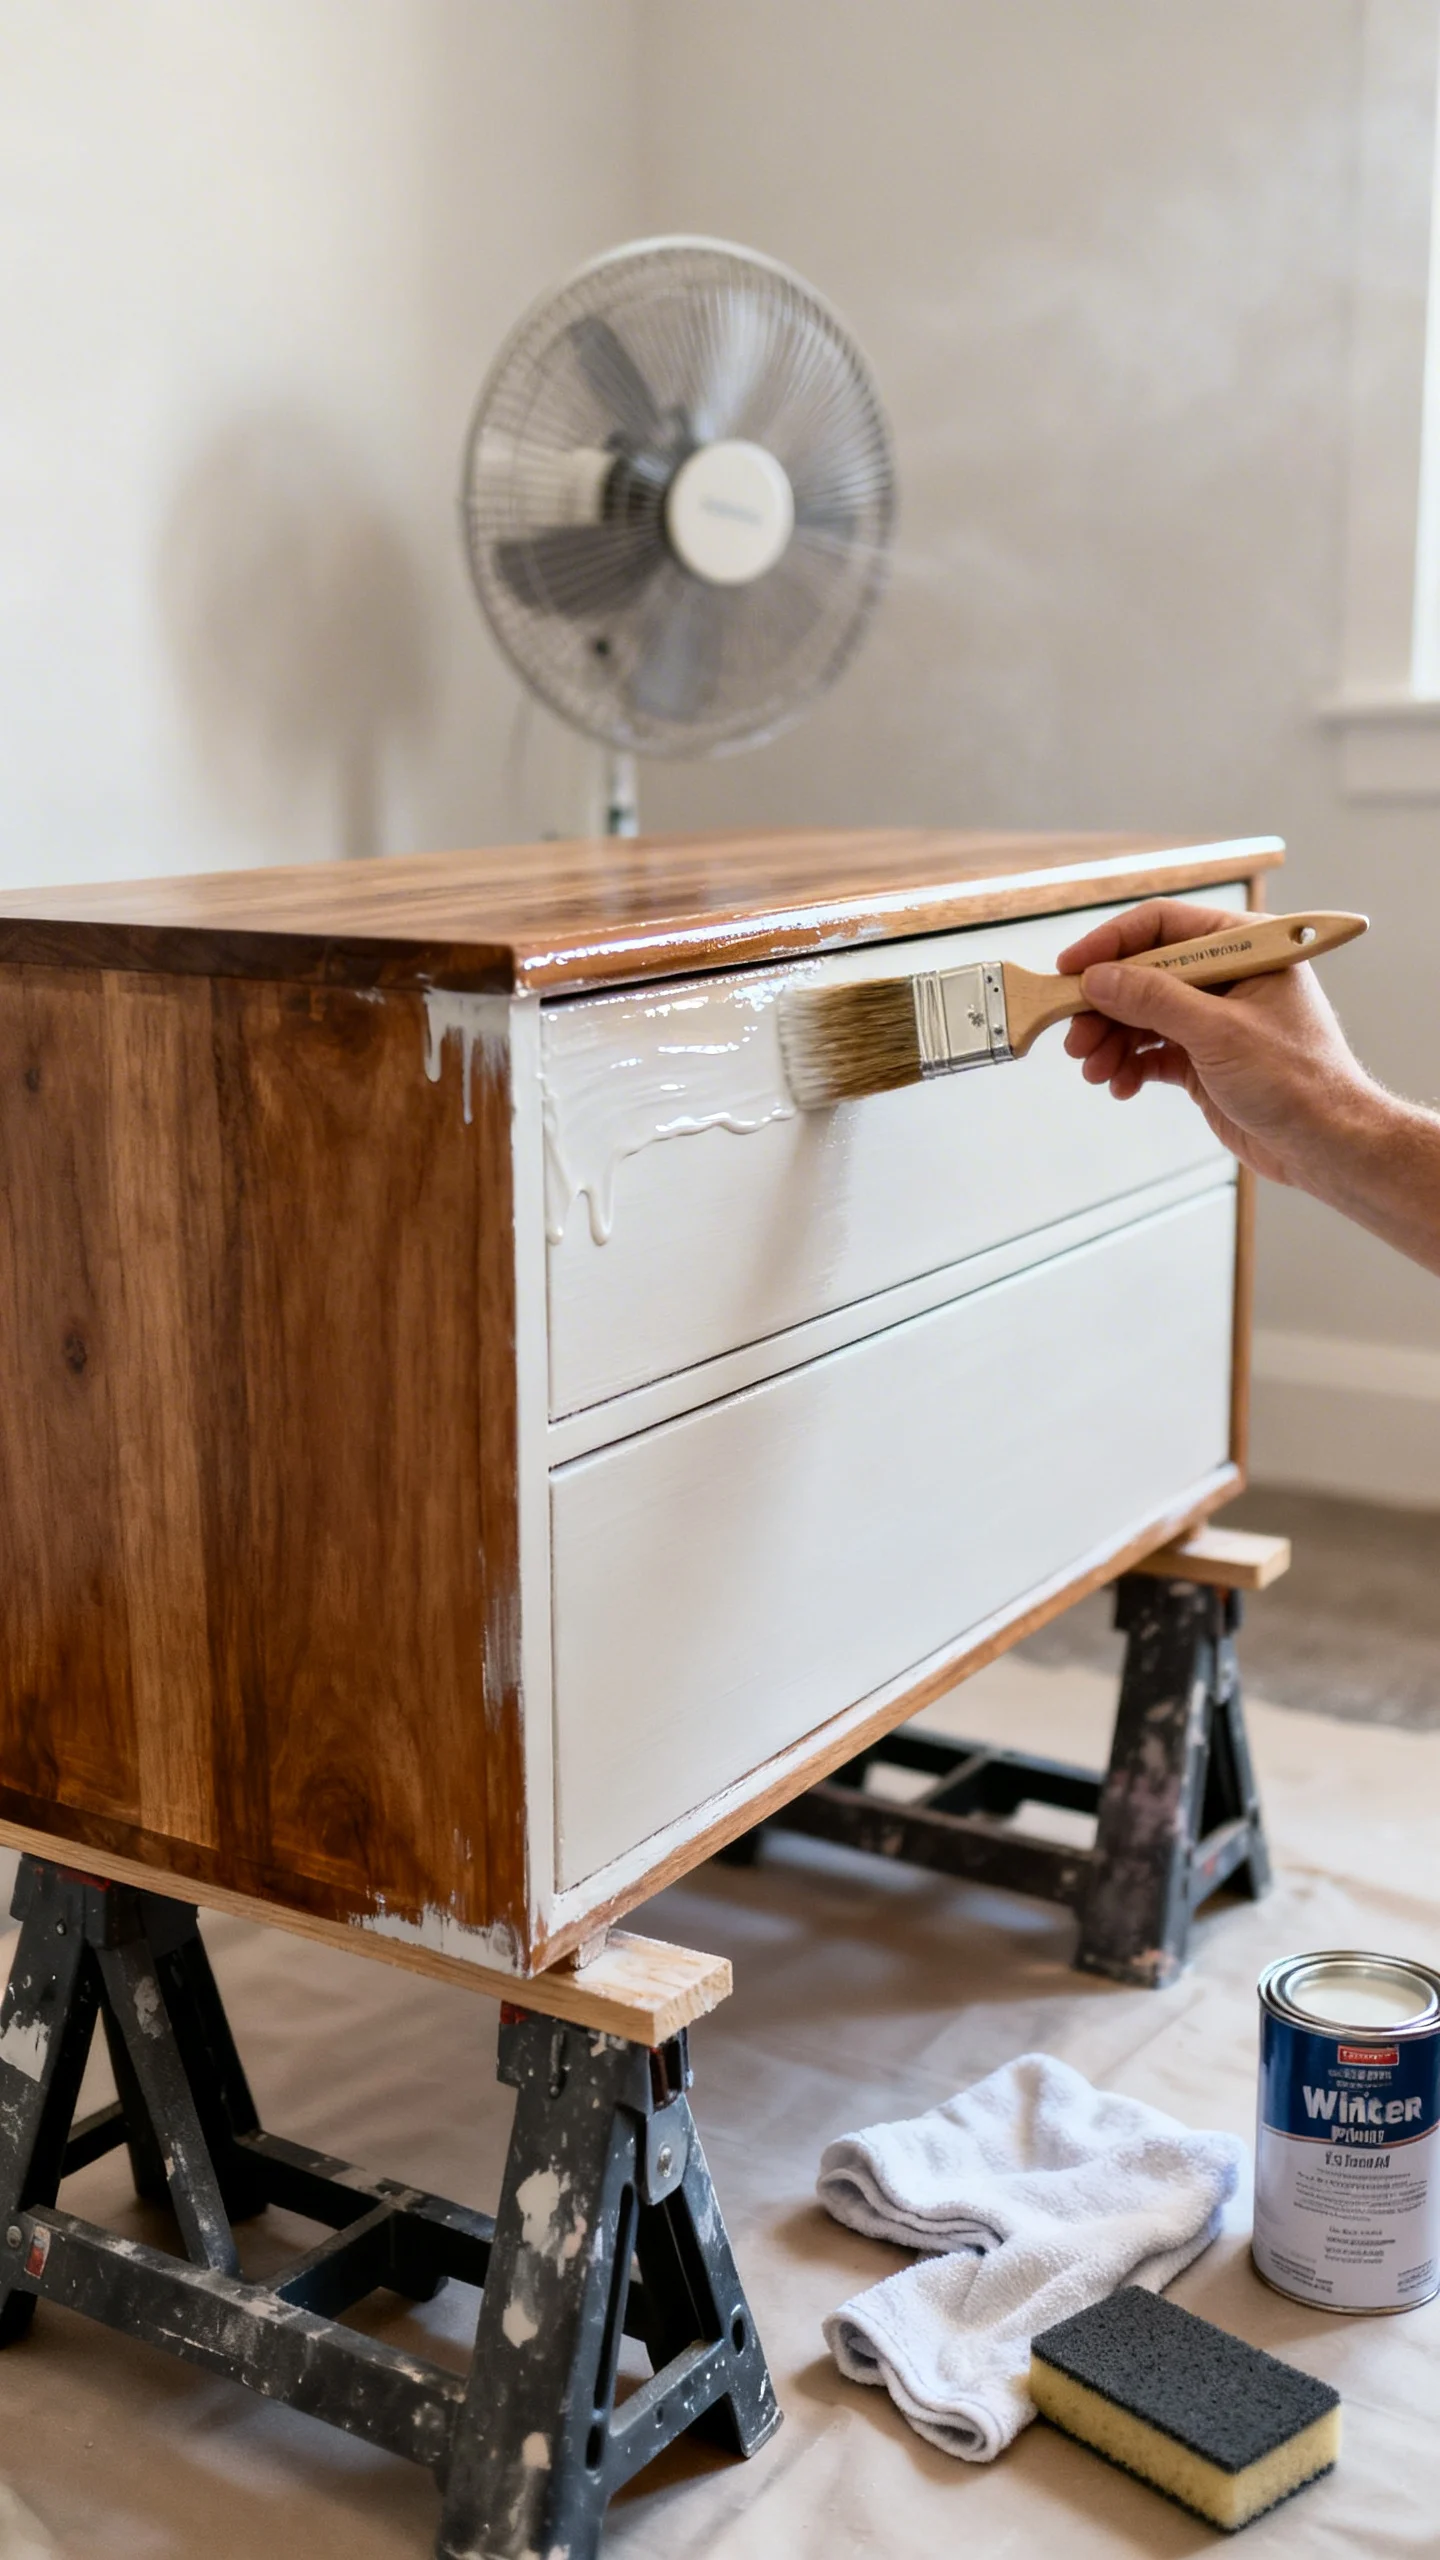
3) Upgrade With Paint + Sheen Strategy (Not Just a New Color)
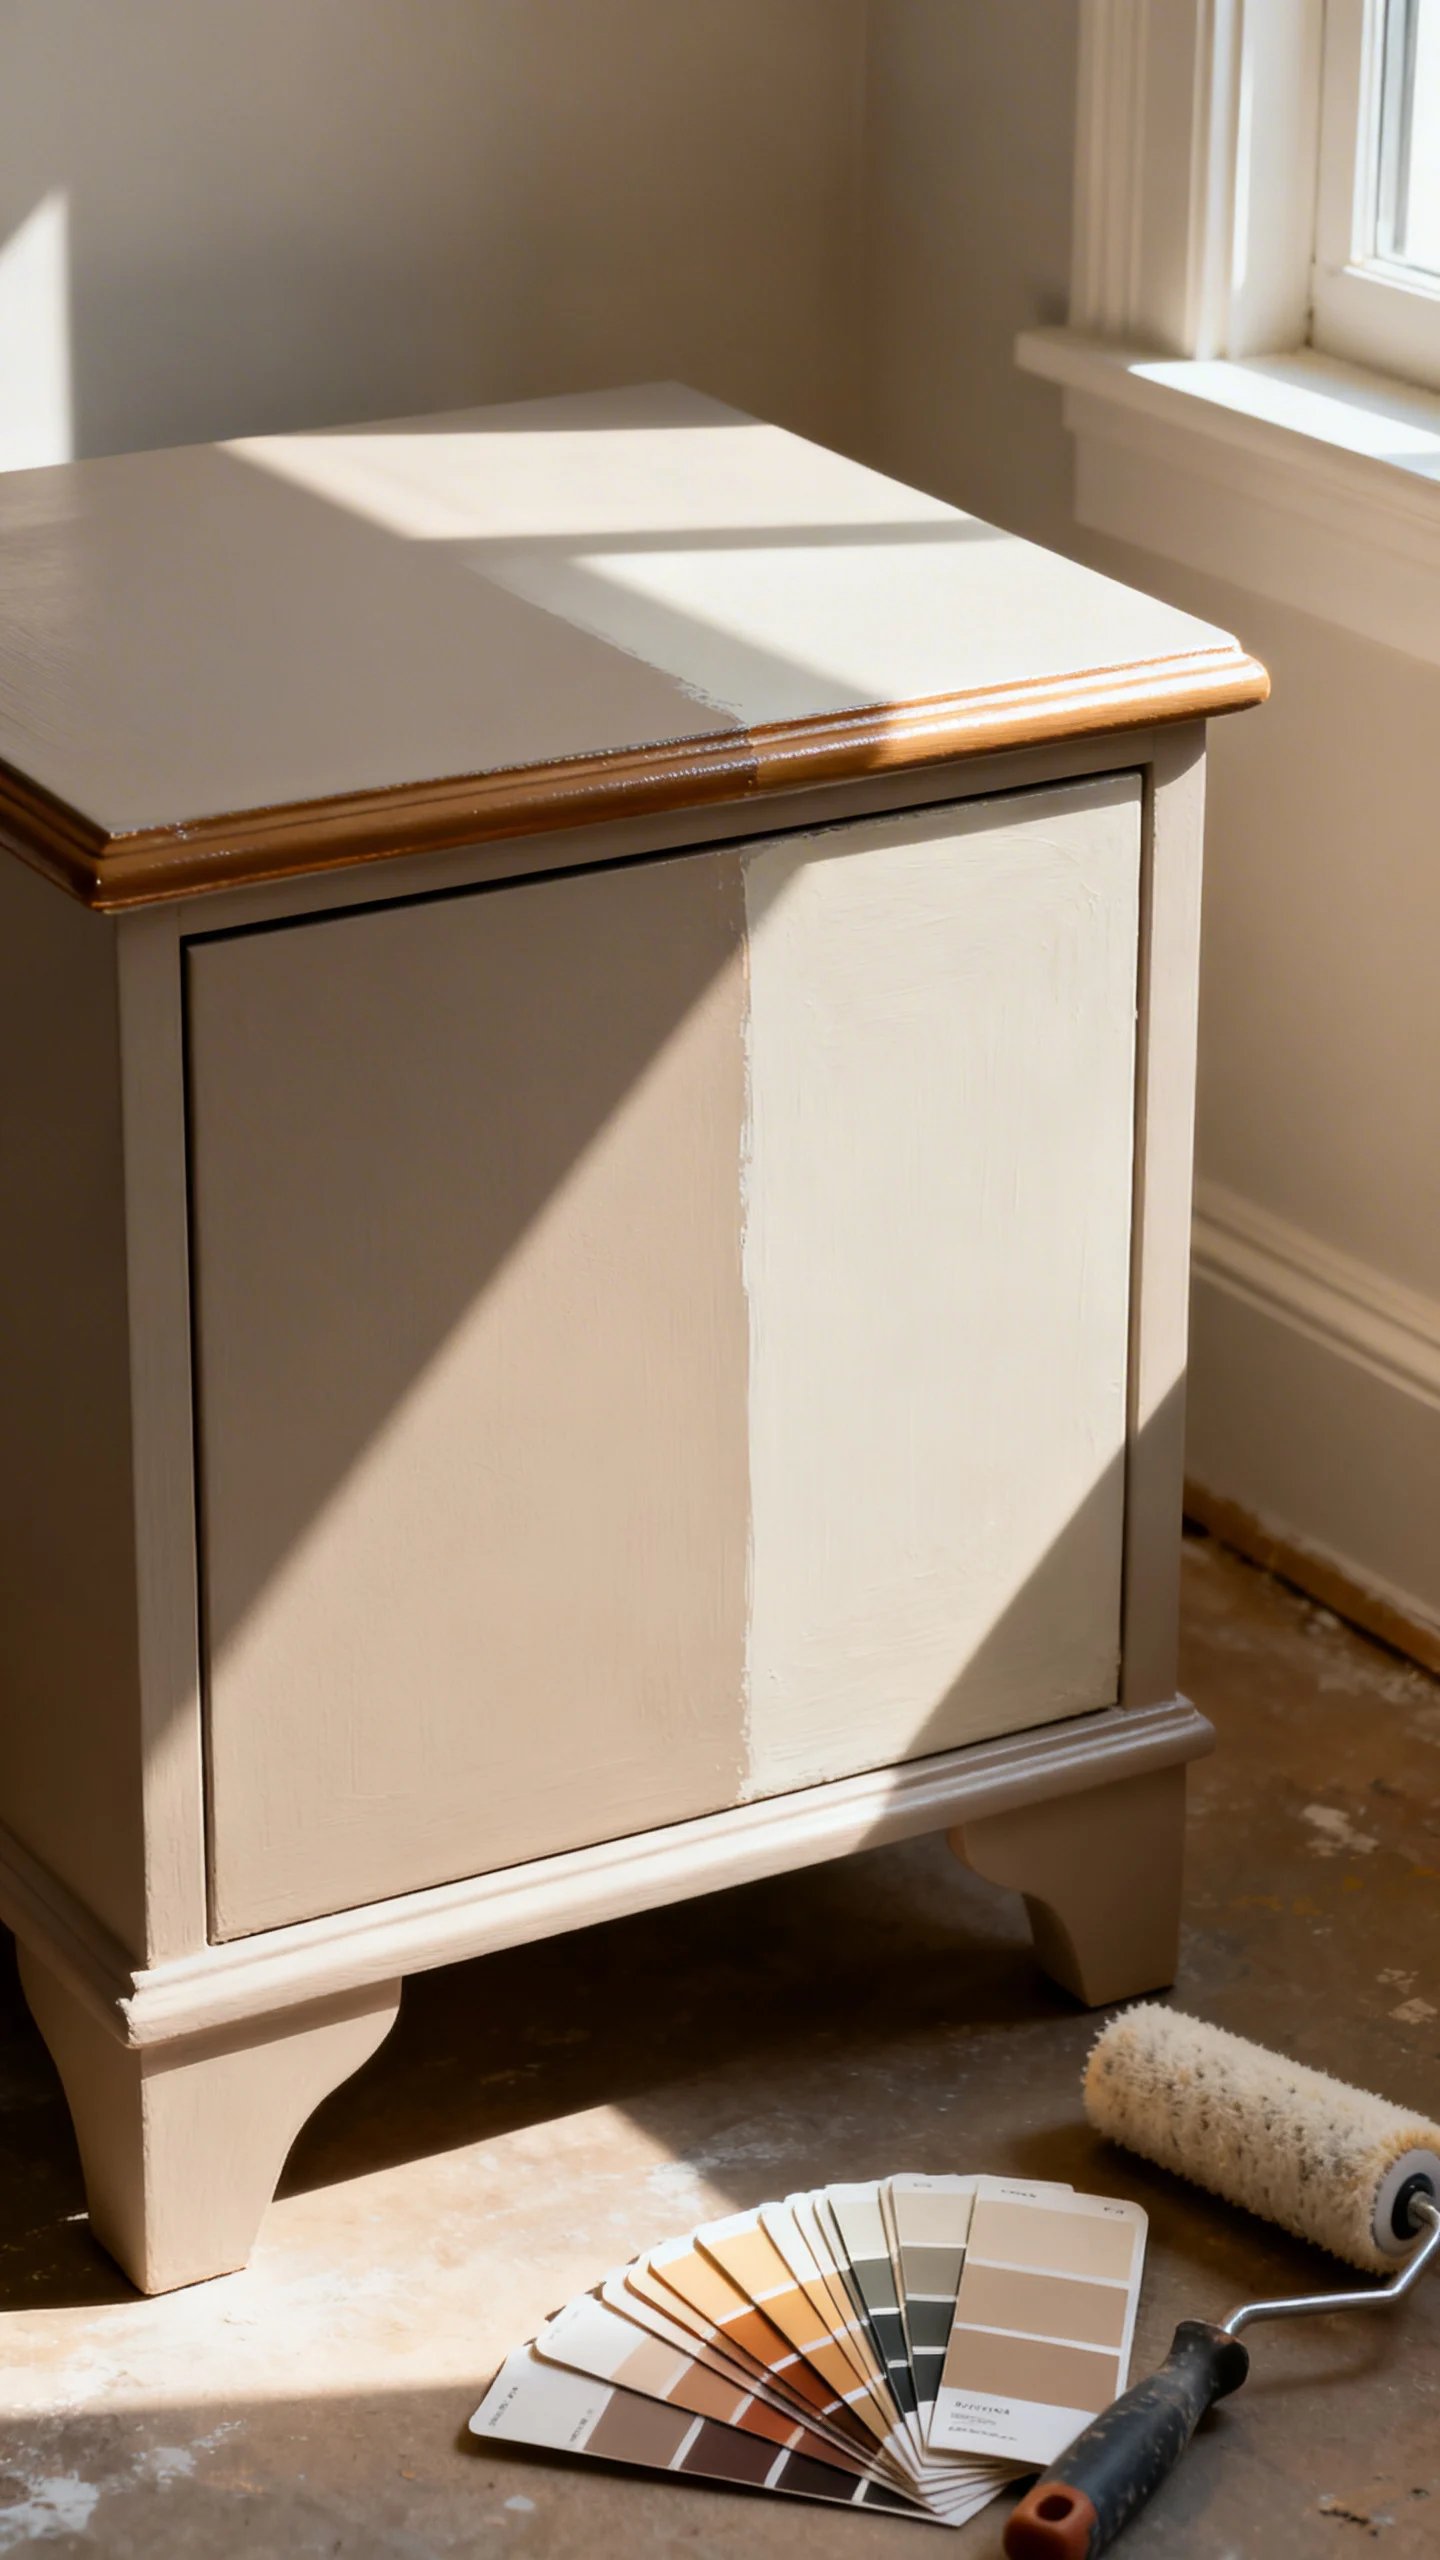
Paint is the budget remodeler’s power tool, but sheen is what makes it look designer. Use a satin or matte enamel for most furniture bodies to hide minor imperfections, and reserve semi-gloss for trim or details where you want subtle definition. If you’re going for a modern look, consider color-drenching the entire piece—frame, drawers, and even the inside of open shelving.
For the smoothest finish on a budget: use a foam roller for flat surfaces and a high-quality angled brush for edges. Apply thin coats (usually 2–3), sanding lightly with 320 grit between coats once fully dry. Finish with a durable water-based topcoat if the piece will take daily wear (desks, coffee tables, dining chairs).
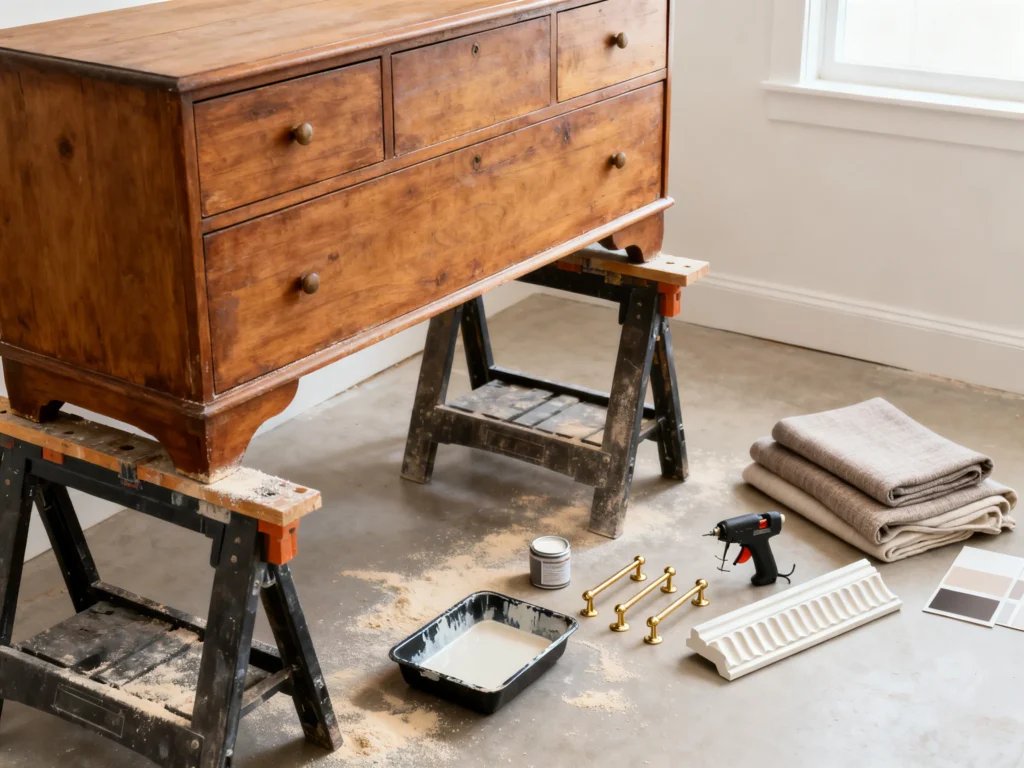
4) Replace Hardware for Instant “Custom Built” Impact
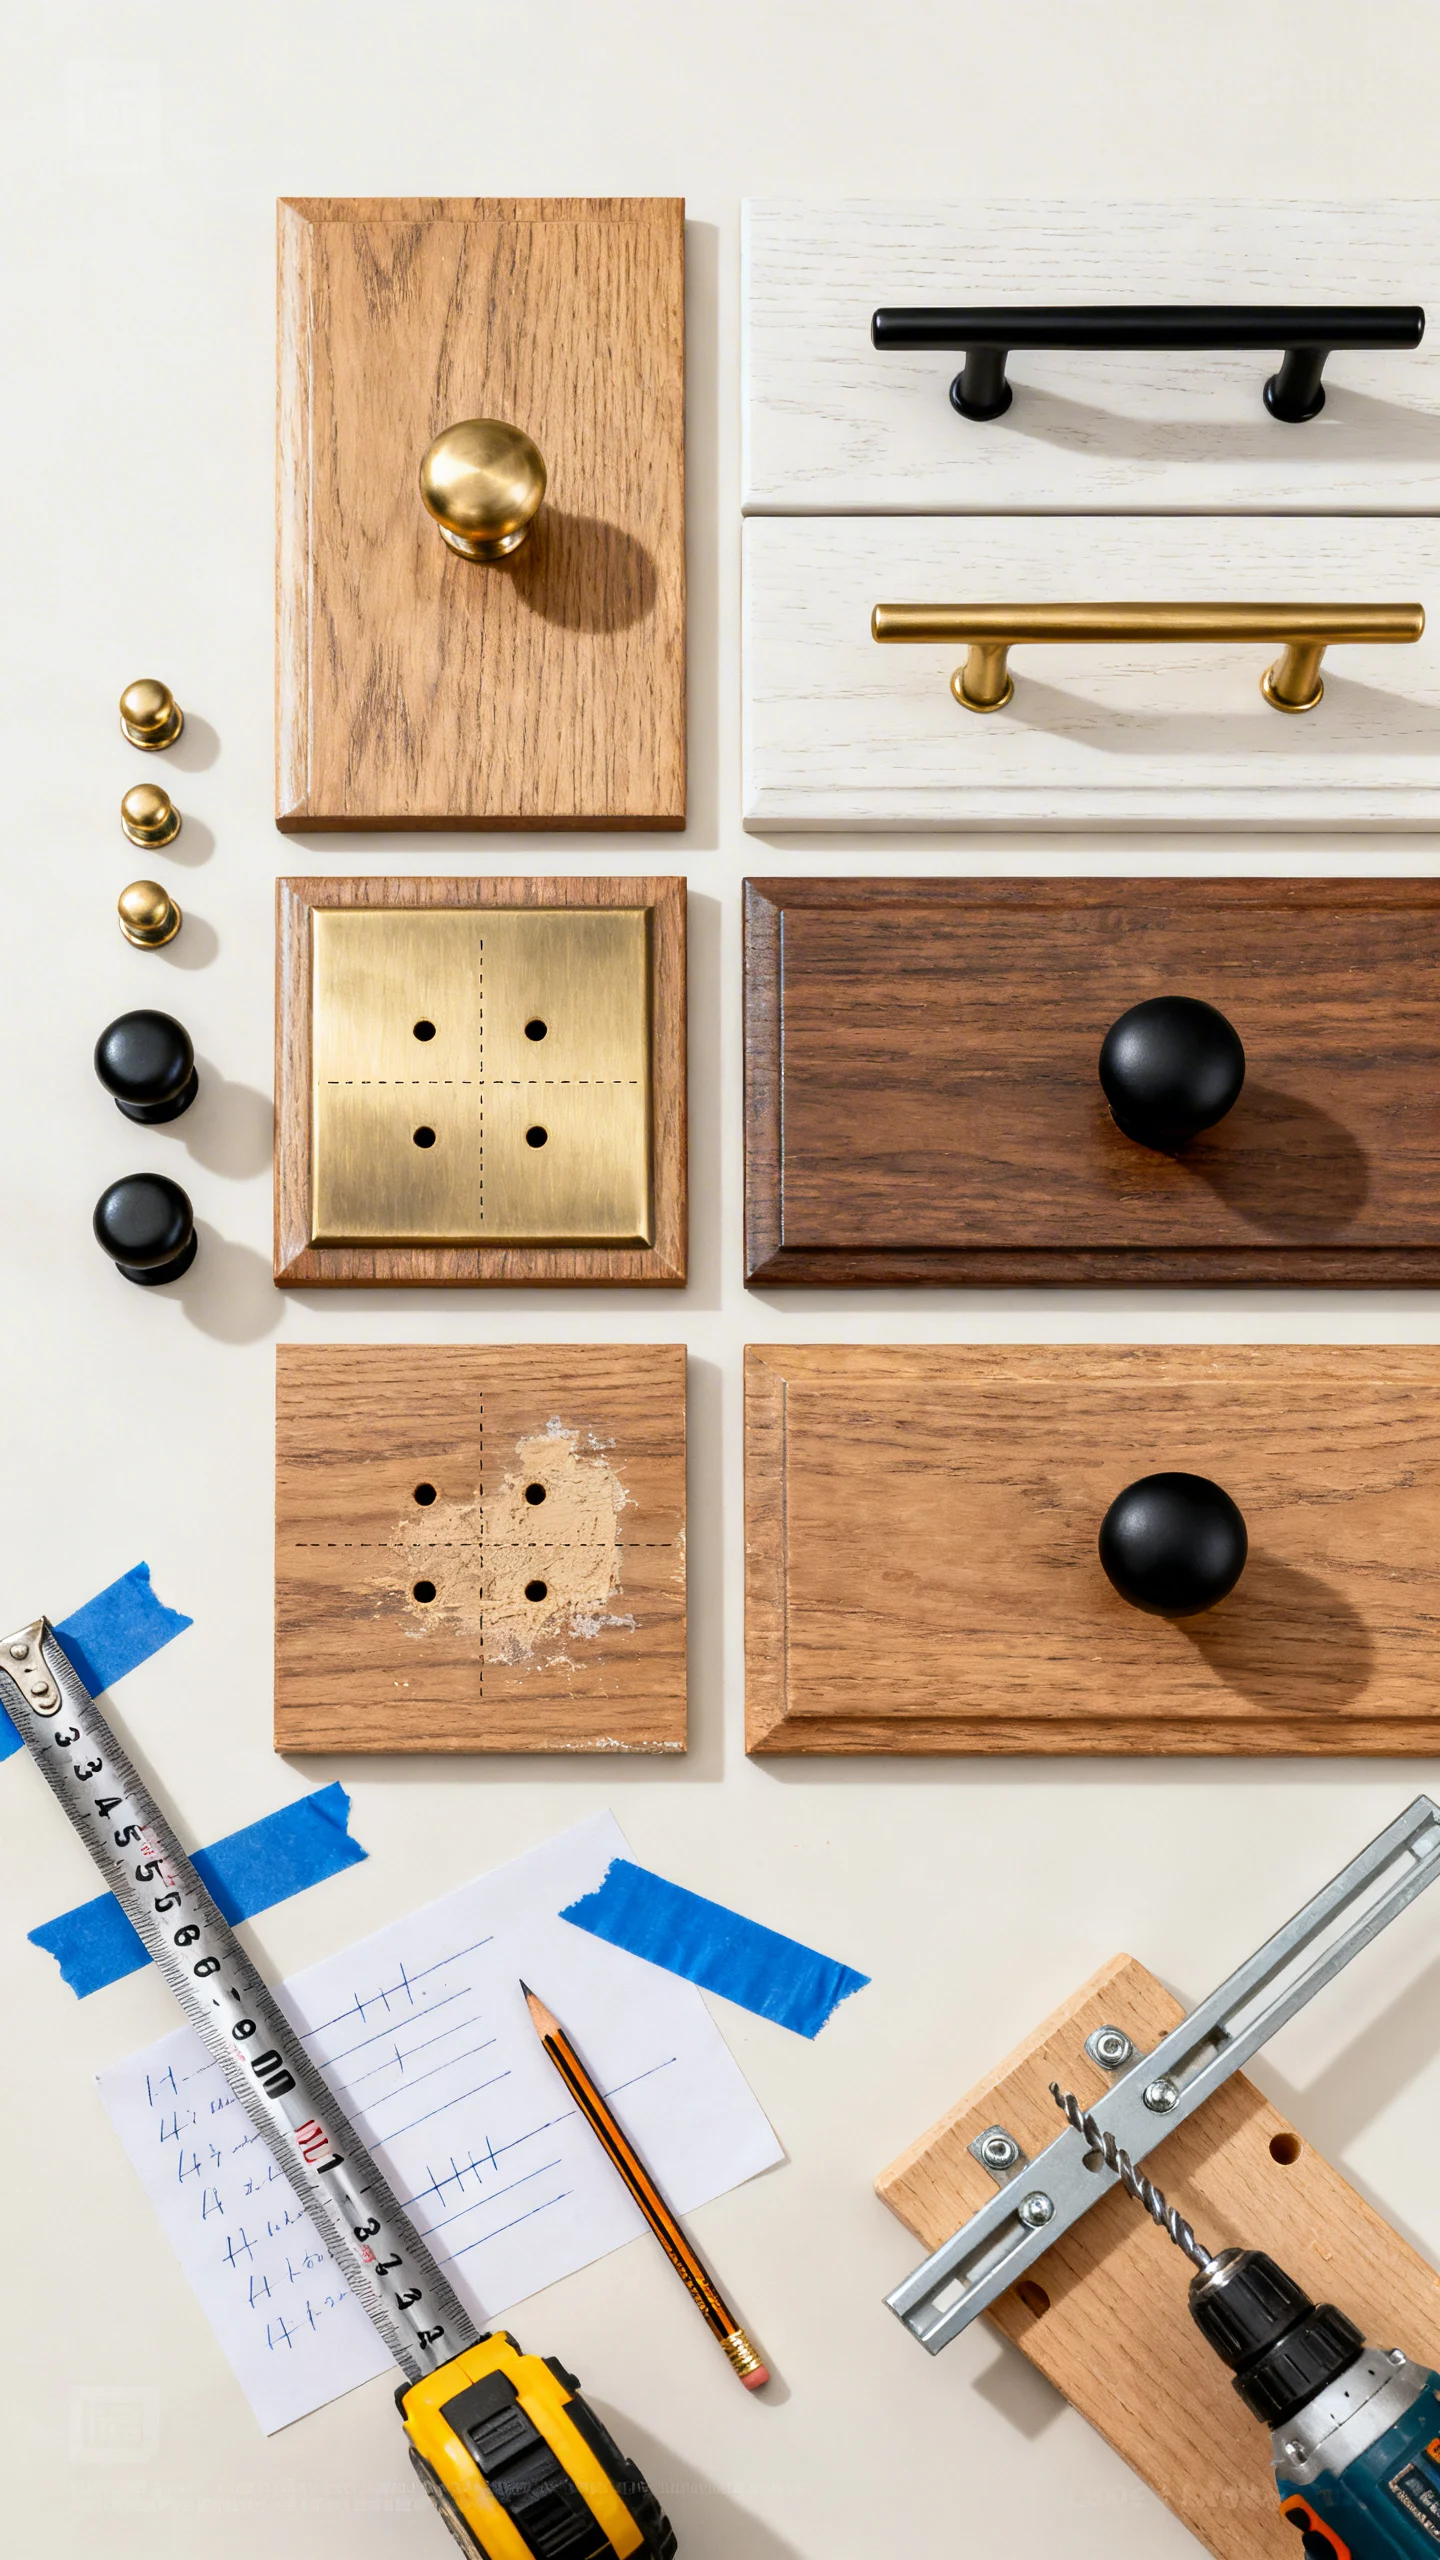
New hardware is one of the fastest ways to move a piece from “hand-me-down” to “designer.” The key is scale and alignment. As a rule of thumb, pulls should be about 1/3 the drawer width (or longer for a modern, streamlined look). Keep finishes consistent across a piece—mixing metals can work, but only when it’s intentional and limited.
Measure existing hole spacing (center-to-center) before you buy. If you want to change spacing, fill old holes with wood filler or dowels and drill new ones using a template or painter’s tape guide to keep everything perfectly level. Consider adding backplates if you’re covering old marks without refinishing the entire face.
5) Add Trim, Fluting, or Molding to “Architecturally” Upgrade Flat Faces

Flat drawer fronts and plain cabinet doors can look high-end with added dimension. Thin lattice trim, picture-frame molding, or vertical half-round dowels (for a fluted look) create that boutique-furniture feel—often for less than the price of a single new drawer pull.
Plan spacing before you glue: for fluting, keep dowels evenly spaced (a small gap reads modern; tight spacing reads more classic). Use wood glue and a brad nailer or clamps. After it cures, fill nail holes, sand, then prime thoroughly to prevent wood grain from telegraphing through paint. This tip works especially well on dressers, nightstands, and sideboards.
6) Reface Table Tops and Shelves With Veneer or Wraps (Budget-Friendly, High-Style)
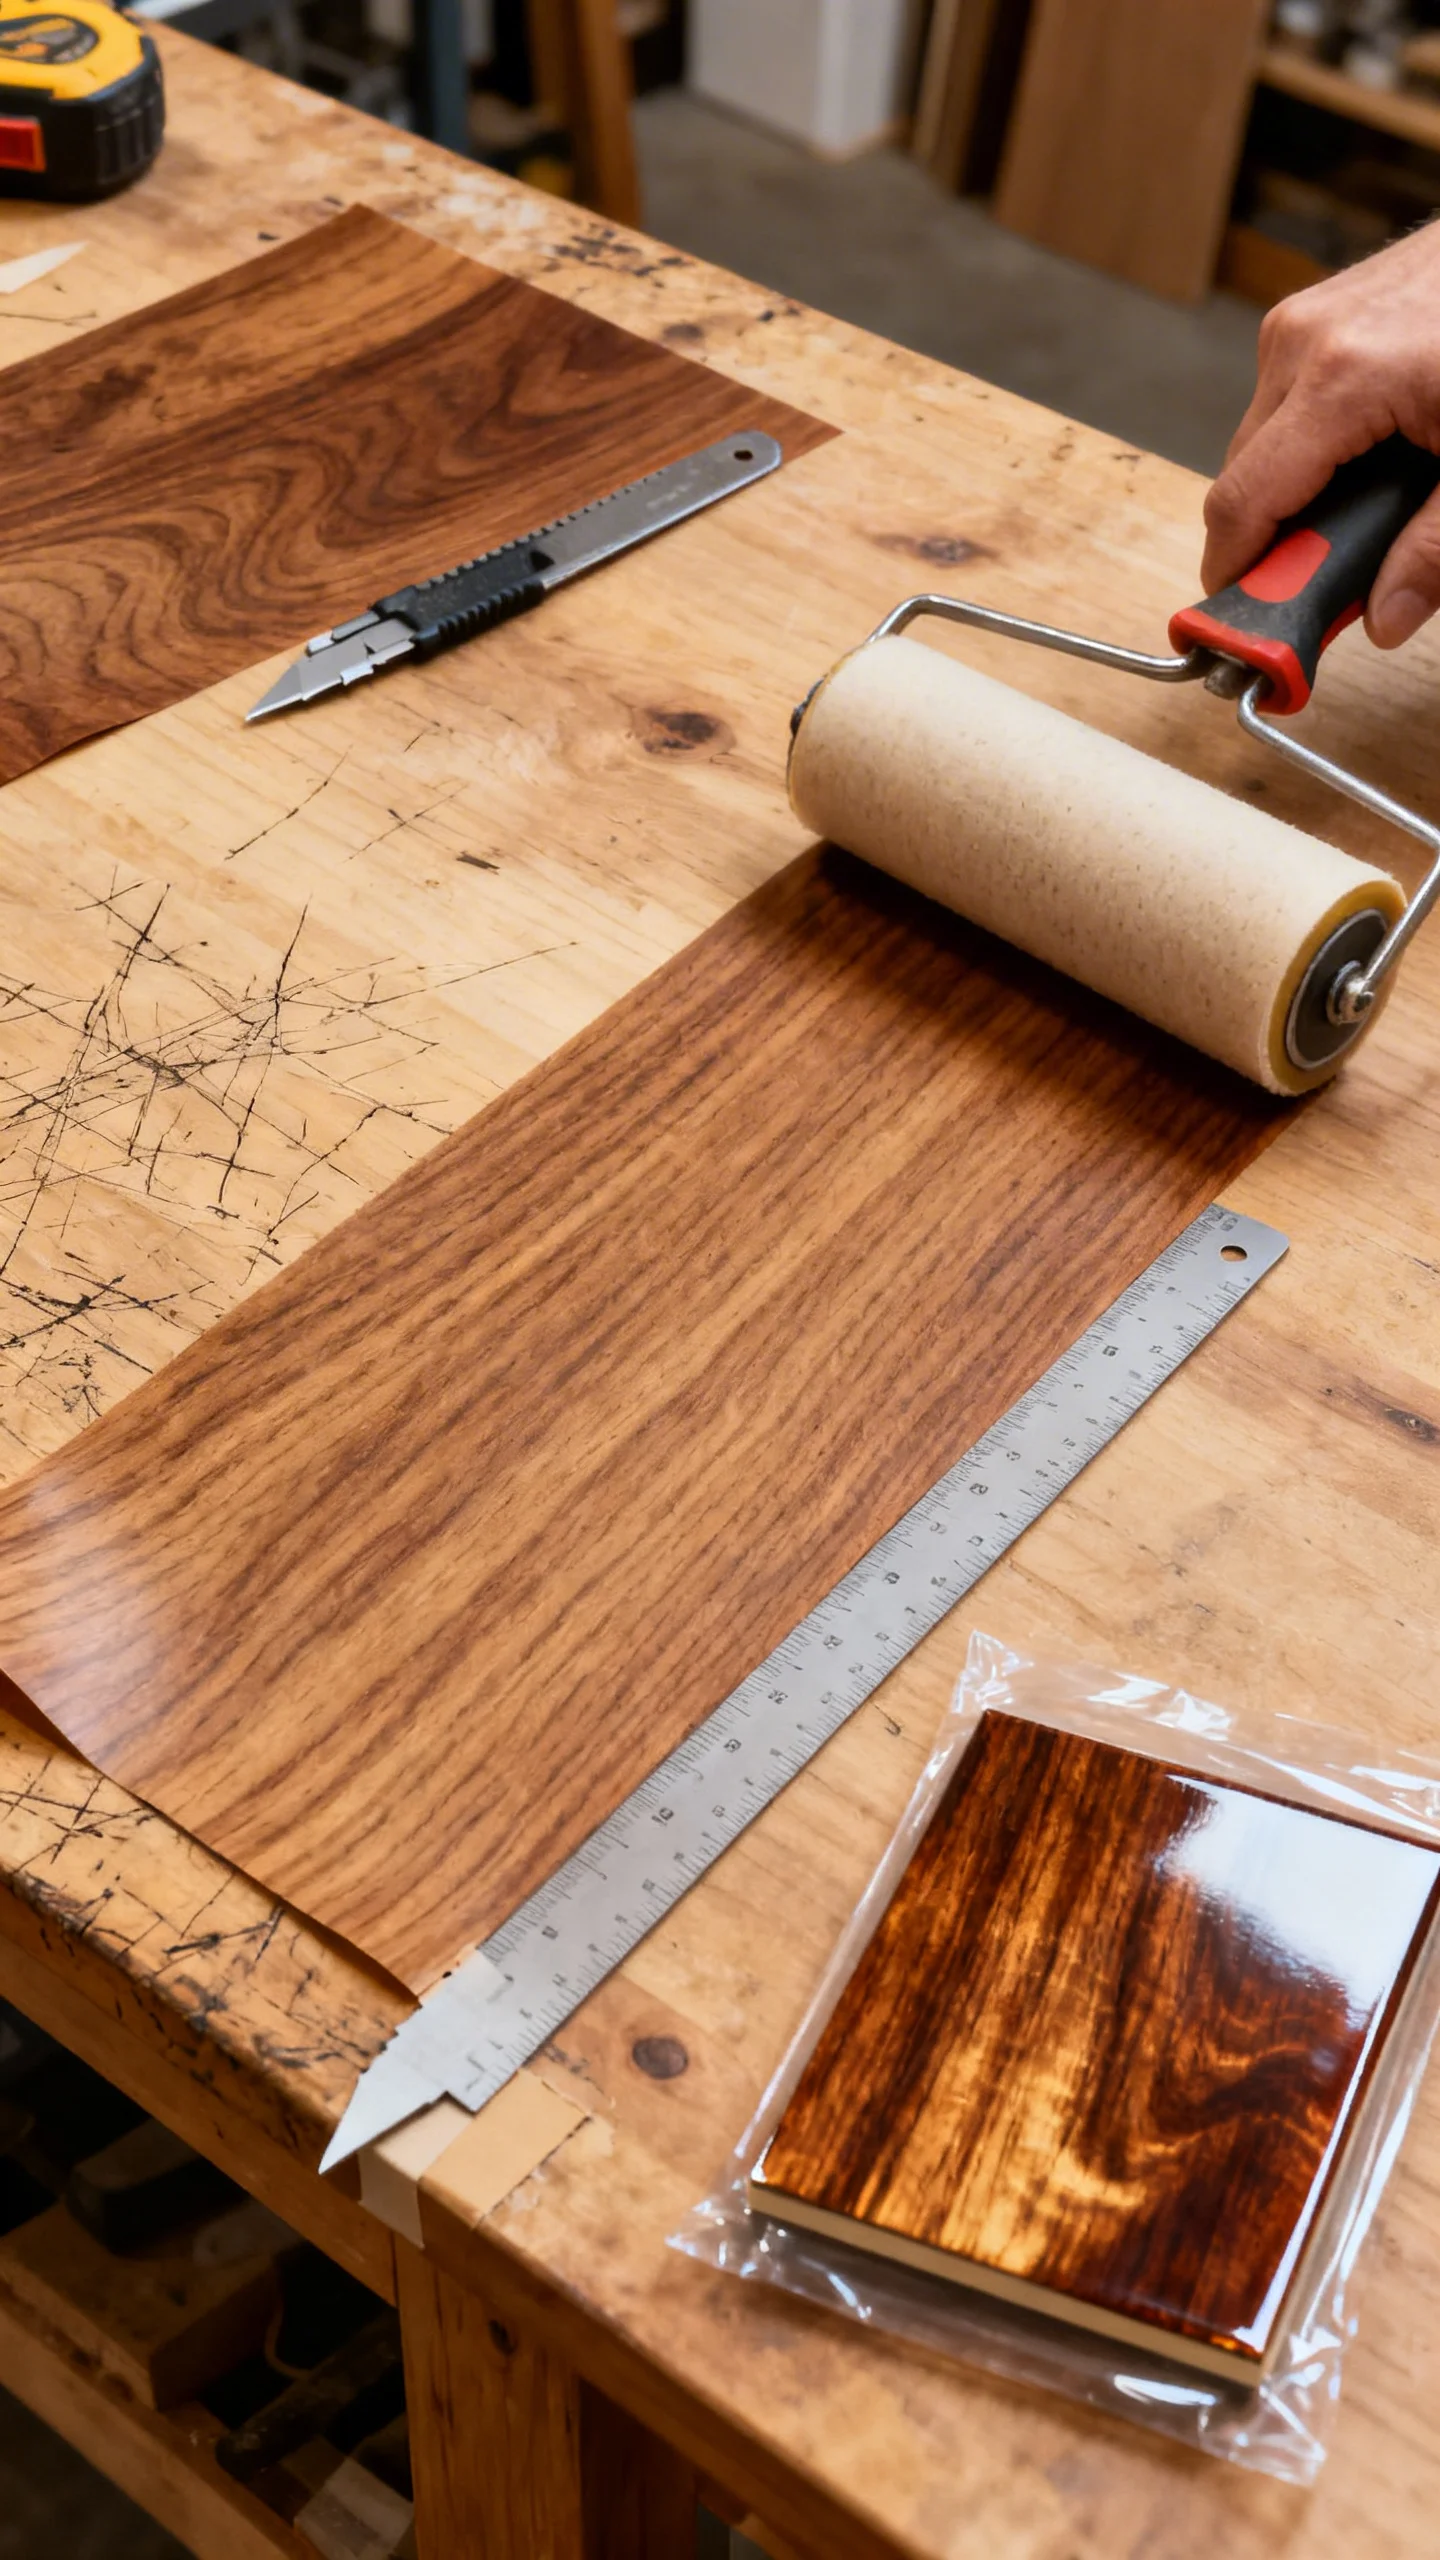
If the base is solid but the top is scratched, stained, or dated, refacing is often cheaper than full replacement. Real wood veneer sheets can create a beautiful, upscale surface when sealed properly. For a quicker option, high-quality adhesive wraps can mimic stone or wood—just be honest about the wear level you need.
Best practices: remove hardware, sand lightly, then apply veneer with the recommended adhesive. Trim with a sharp utility blade and straightedge. Seal with a durable finish (like polyurethane) and respect cure time before heavy use. For dining tables, prioritize real veneer plus a tough topcoat; wraps are better for low-abuse surfaces like console tables or shelving.
7) Reupholster the “Right Way”: New Foam, Crisp Edges, Designer Fabric Placement
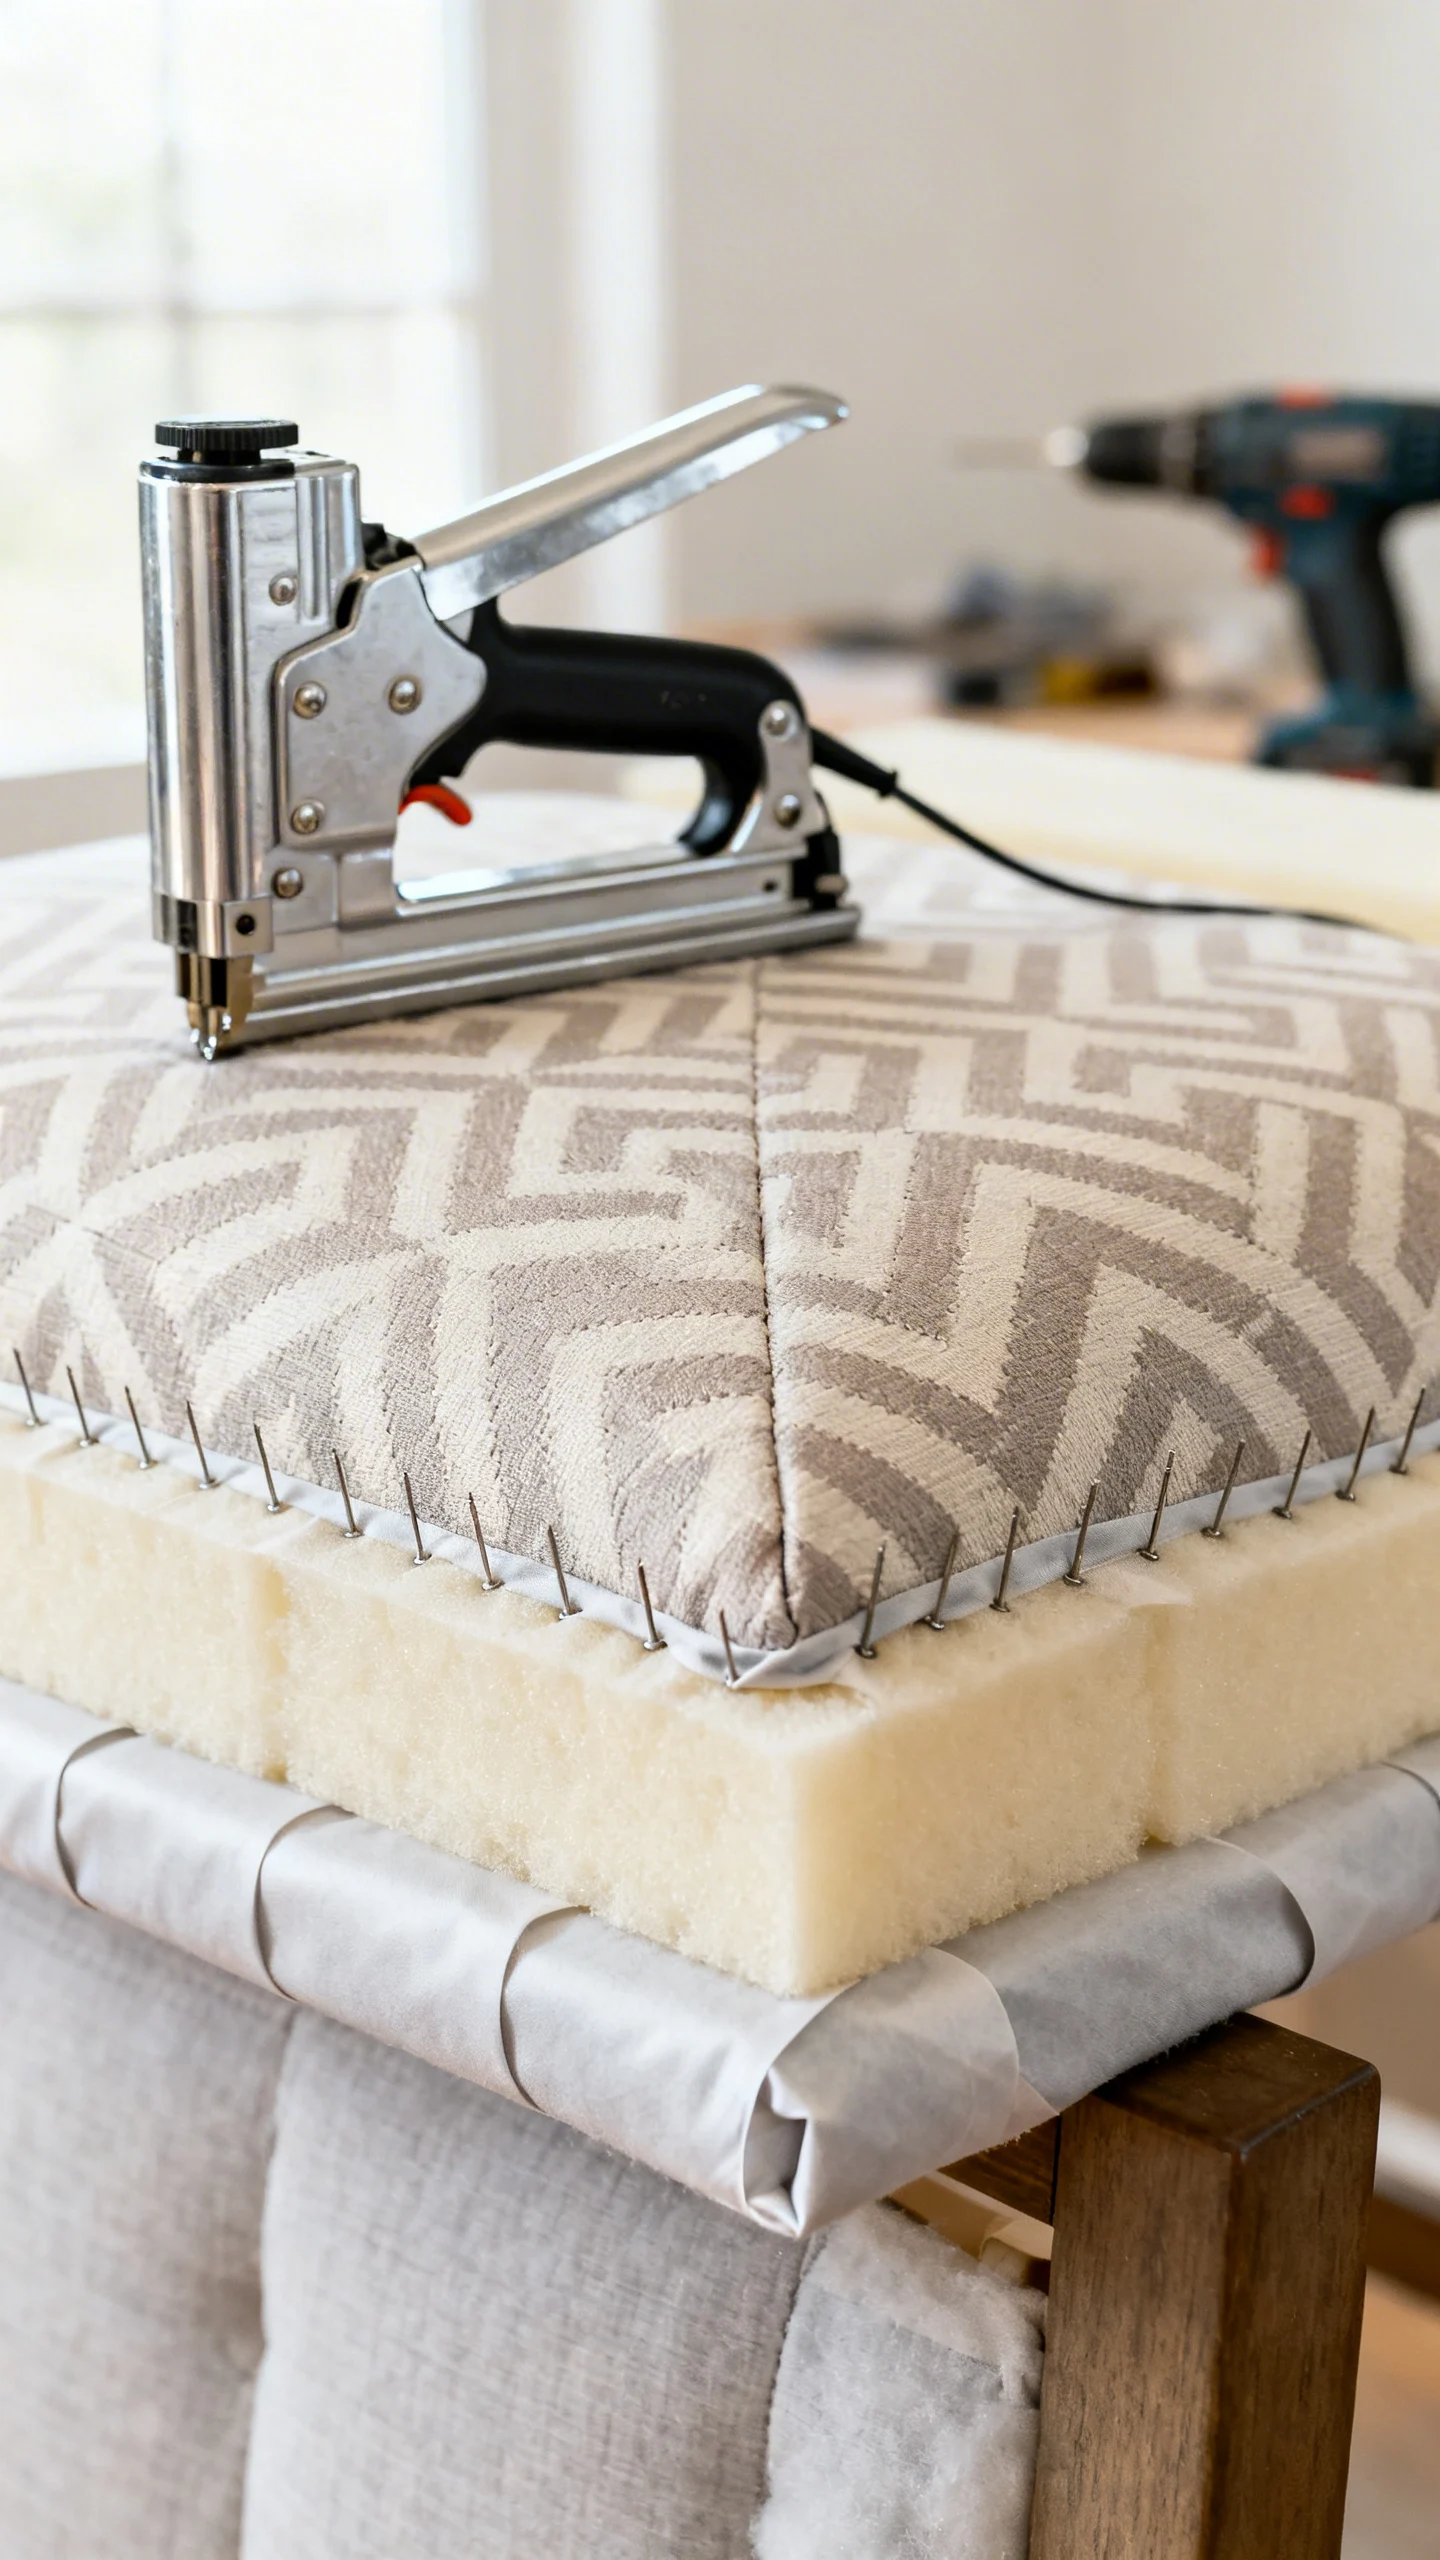
Upholstery is where budget projects can look truly custom—if you rebuild what’s under the fabric. If a chair seat feels flat, replace foam (common thickness: 1–3 inches depending on the profile). Wrap foam with batting for soft edges and a professional silhouette.
Choose upholstery-weight fabric (look for higher durability ratings when possible). Keep patterns centered and aligned—misaligned stripes instantly read DIY. Pull fabric taut, staple opposite sides first, then work toward the corners. For a tailored corner, fold like hospital corners and trim bulk. Add a dust cover underneath for a clean, finished look.
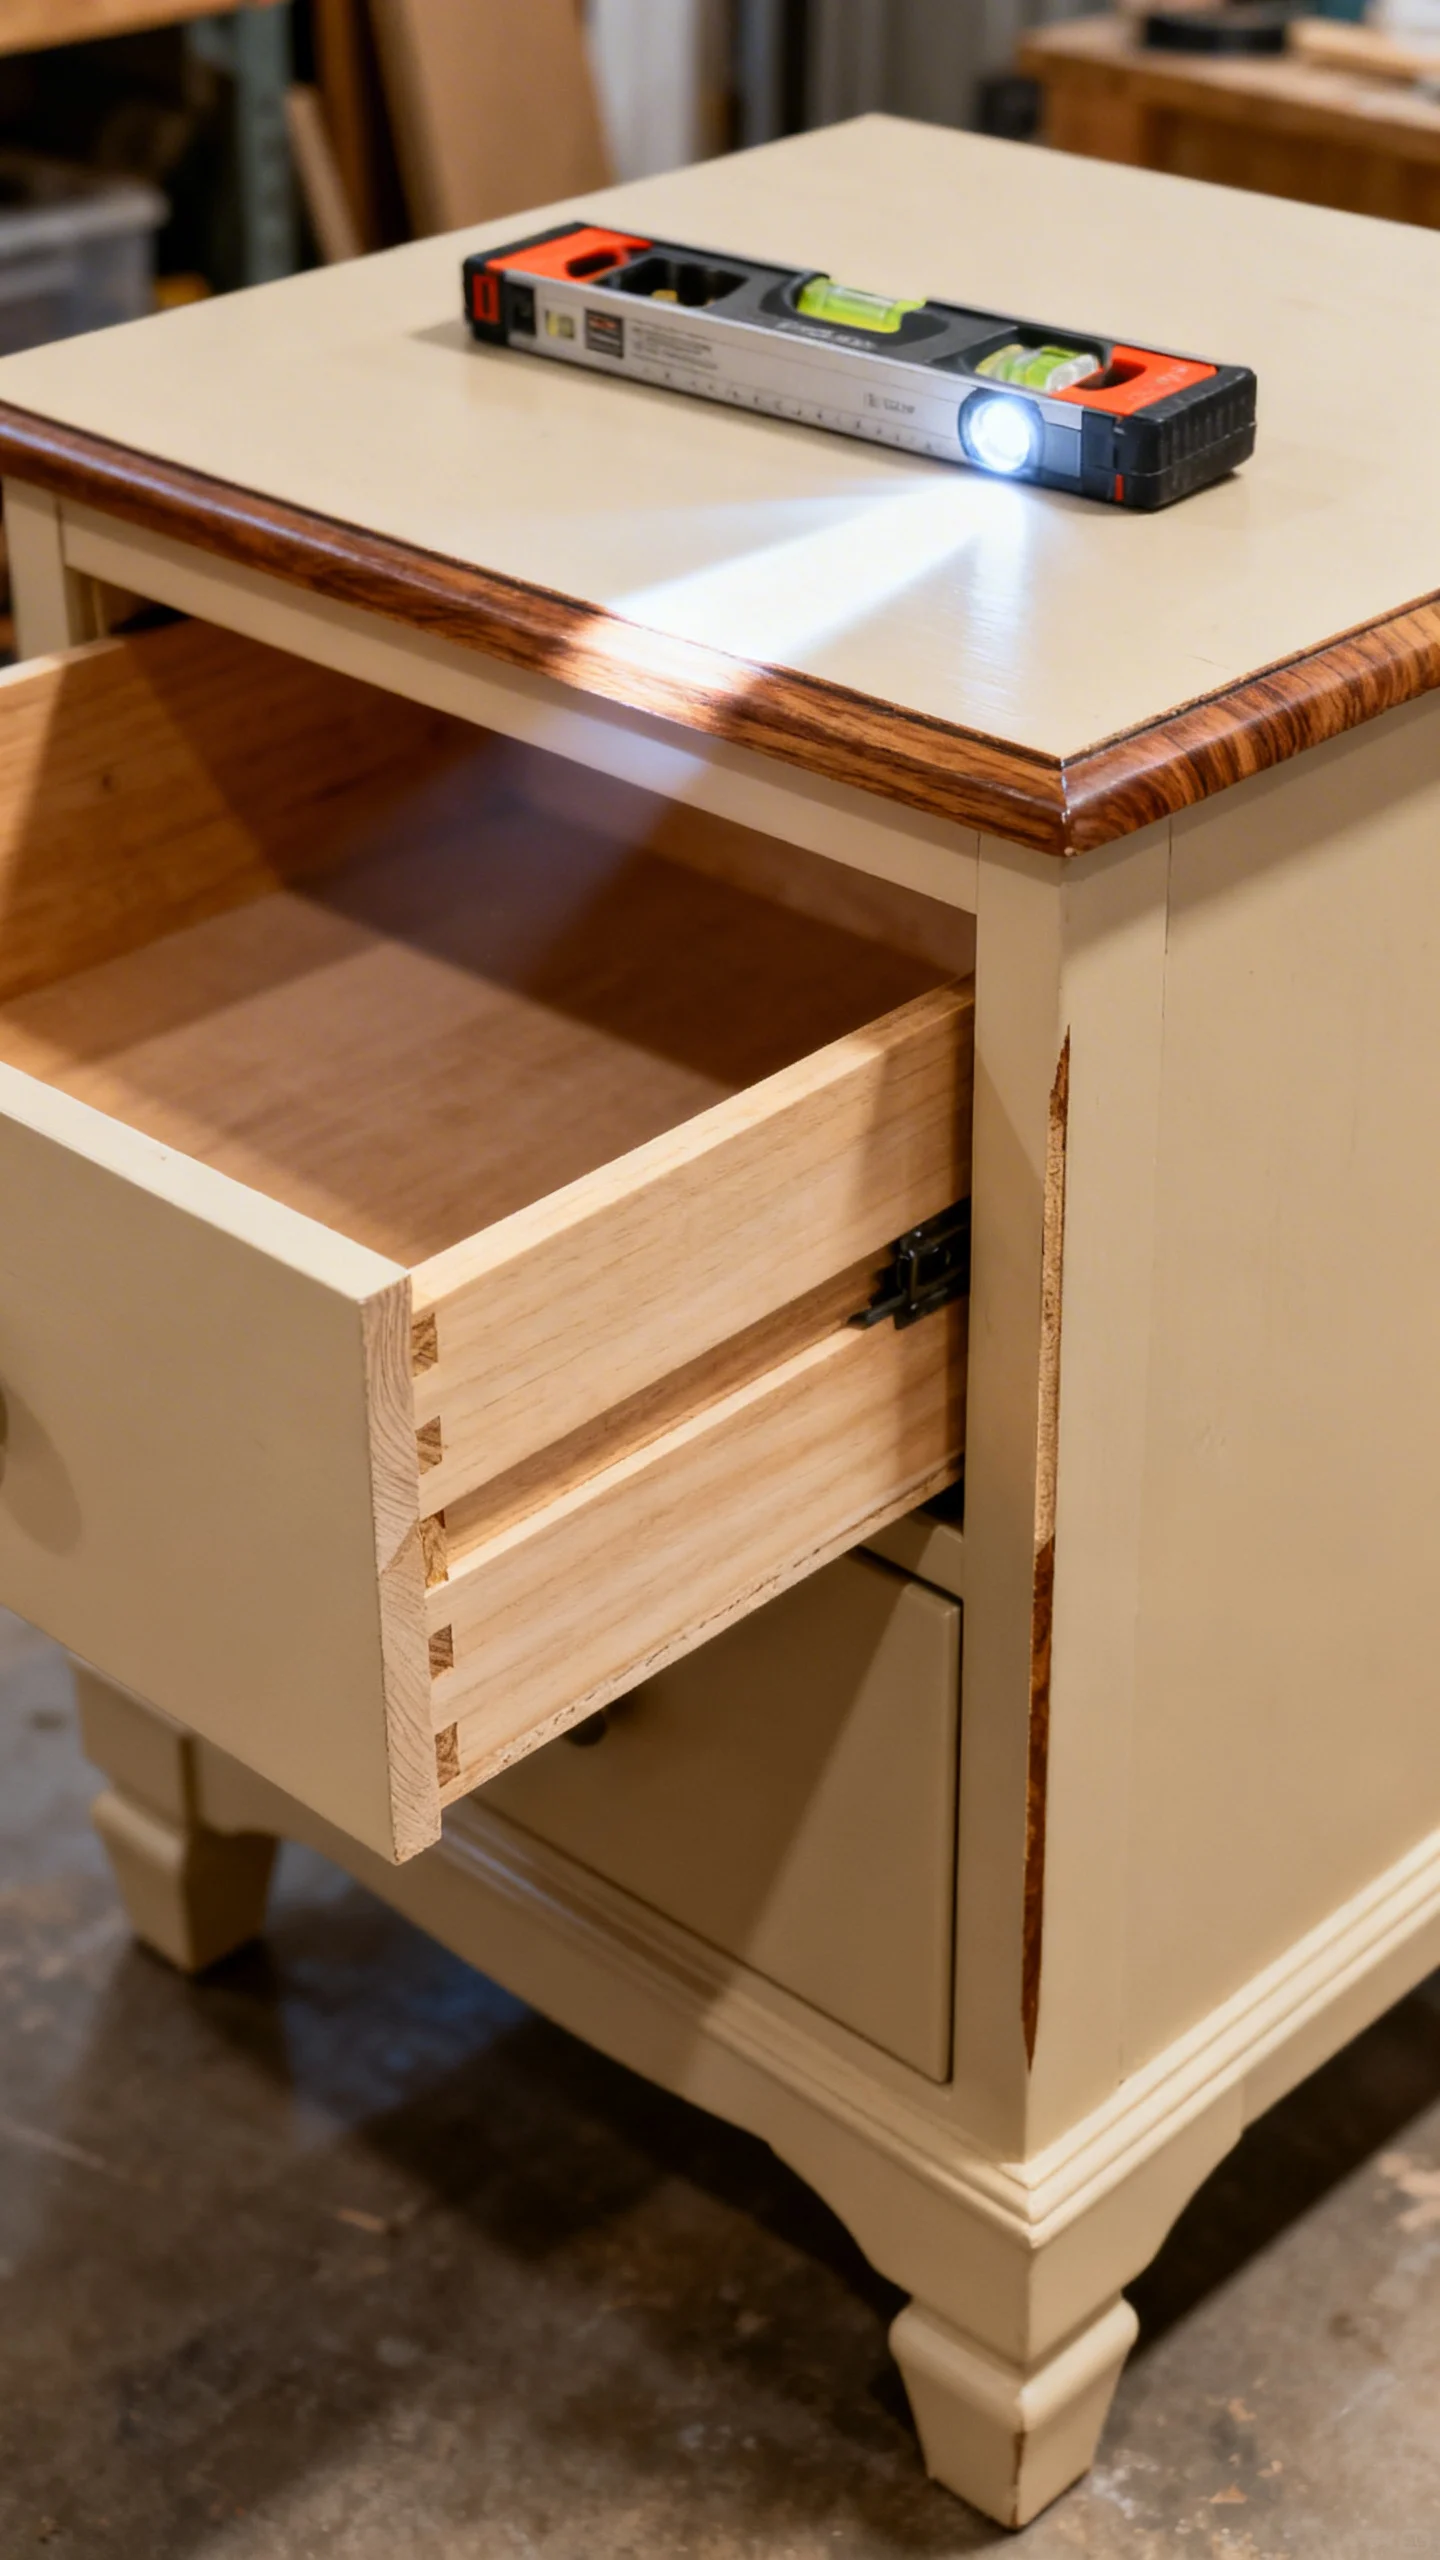
8) Fix the “Cheap Furniture Tell”: Drawers That Stick, Slam, or Sag
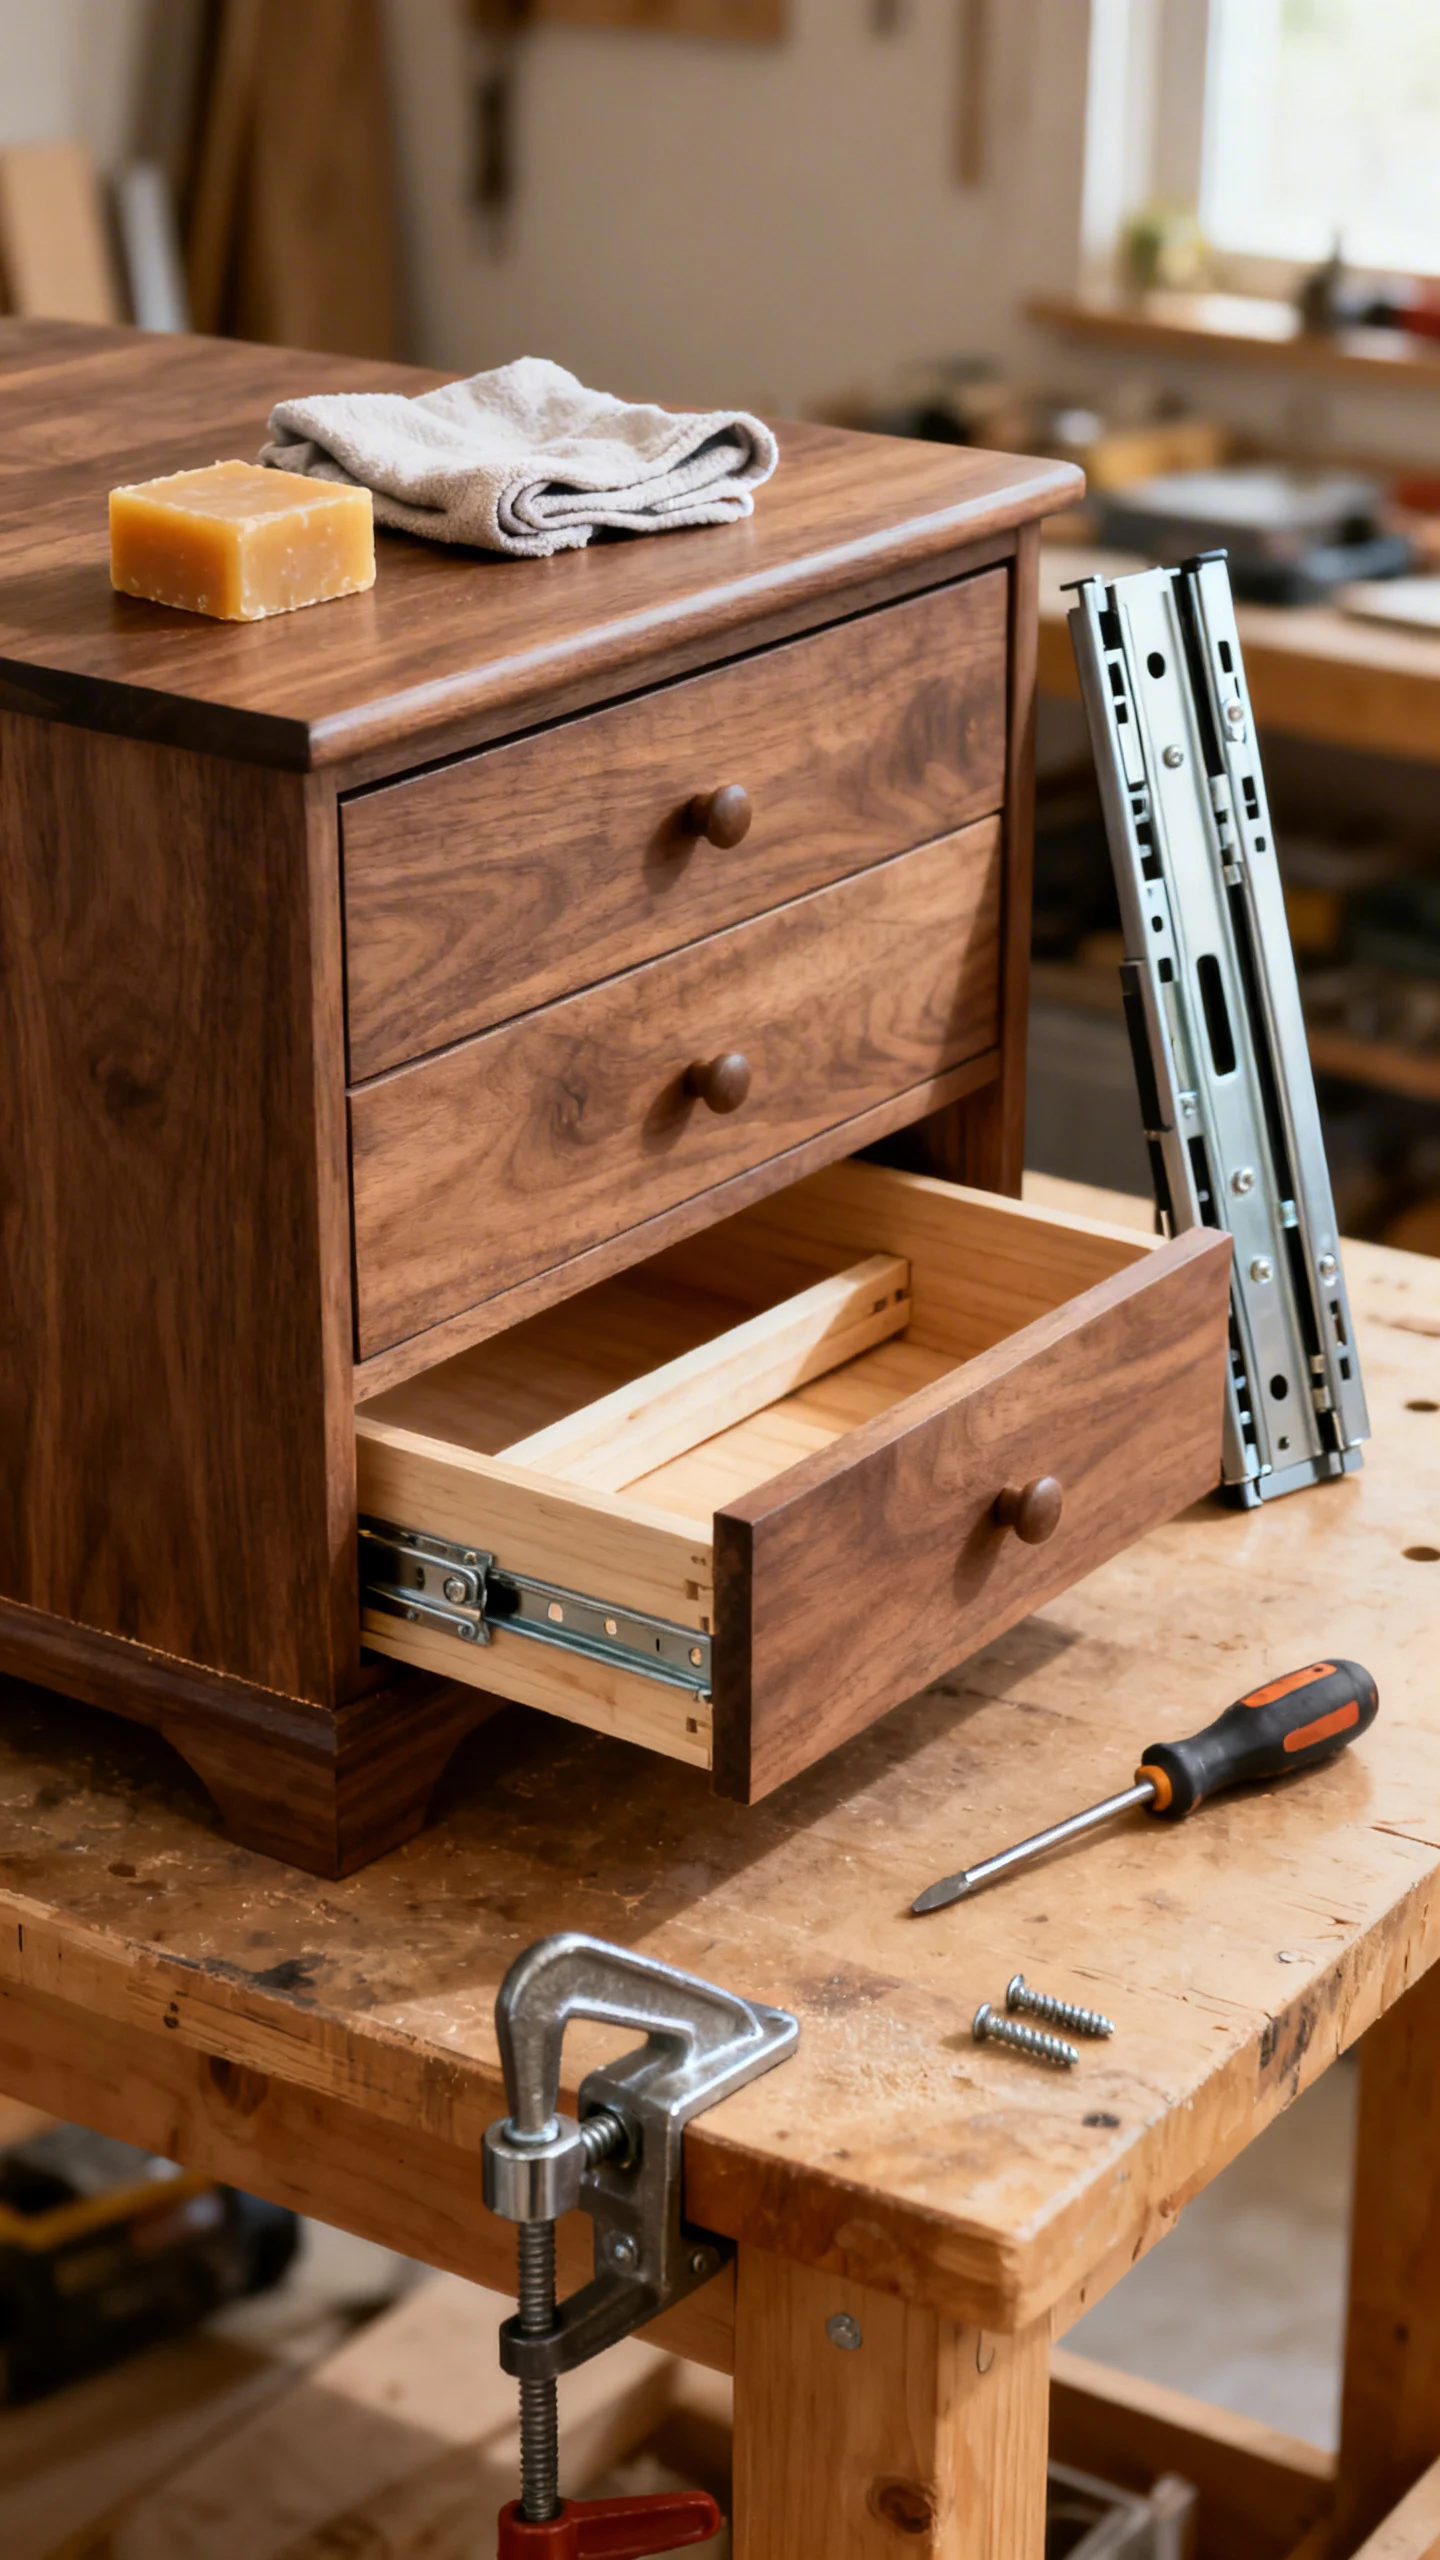
Even a gorgeous exterior won’t feel designer if drawers fight you. Start by tightening screws and checking for square. Wax wooden runners with paste wax or a bar of paraffin for smoother glide. If drawers are sagging or misaligned, consider side-mount slides—an upgrade that makes an old dresser feel surprisingly luxe.
Clearance matters: measure the cabinet opening and drawer box width to choose the right slide size. Many side-mount slides require about 1/2 inch clearance per side (check your slide specs). Add a simple stop block inside to prevent over-pulling if the original design relied on wood stops that have worn down.
9) Add Feet, Casters, or a Base Plinth for a Built-In Look
Changing the “stance” of furniture is a designer trick that’s often overlooked. Adding taller legs can make a piece feel lighter and more modern; a base plinth can make it feel architectural and custom. Choose based on function: legs for airiness and easy cleaning, plinths for a grounded, built-in vibe.
For stability, keep legs inset slightly from the edges (especially on dressers) and use mounting plates rated for the weight. If the piece is tall, avoid very tall, spindly legs that raise the center of gravity. For casters, pick locking options and check the added height so drawers still clear nearby trim and doors still open fully.
10) Seal and Cure Like It’s Going in a Showroom
The final step is what separates “freshly painted” from “professionally finished.” Use a topcoat when the surface will see water, heat, or daily friction. Water-based polyurethane stays clear and is easy to use; oil-based is more amber and can be tougher but has longer dry times and stronger odor. Always test on a hidden area.
Apply thin coats with a high-quality synthetic brush or foam applicator, sanding lightly between coats once dry. Most importantly: respect cure time. Many finishes are dry in hours but take days (or longer) to fully harden. Treat the piece gently for the first week—no heavy décor, no tape, no dragging objects across the surface.
FAQ
What’s the most budget-friendly furniture remodel that still looks designer?
Paint with proper prep plus upgraded hardware is usually the highest impact for the lowest cost. Focus on a smooth finish (primer + thin coats) and choose pulls with the right scale for the drawers to make it look custom.
Do I need to sand furniture before painting?
You typically need at least a scuff sand or deglossing step so primer and paint can grip. For slick finishes (laminate, lacquer), a bonding primer is especially important. Full stripping is rarely necessary unless the finish is failing.
Is it better to reupholster or use a slipcover?
Reupholster when the shape is worth saving and you want a tailored, “made-for-it” look—especially for dining seats and accent chairs. Slipcovers can be great for cost and washability, but they usually read more casual than fully upholstered pieces.
How can I tell if a thrifted piece is worth remodeling?
Look for solid structure: tight joints, minimal wobble, and drawers that can be repaired without rebuilding the entire box. Cosmetic problems (scratches, ugly stain, dated hardware) are ideal because they’re inexpensive to fix.
What finish should I use to protect painted furniture?
For high-use surfaces, a water-based polyurethane topcoat is a common choice because it dries clear and is durable. Use thin coats and allow full cure time before heavy use. If you’re using cabinet/furniture enamel designed for durability, you may be able to skip topcoat—test first to confirm compatibility.