
Furniture Remodeling on a Budget Using Simple Tools
Furniture remodeling doesn’t require a full workshop or a big budget. With a few simple tools, smart prep, and the right products, you can update tired pieces, fix common damage, and get a custom look for far less than buying new.
Below are ten practical, budget-friendly approaches that focus on real remodeling: cleaning, repairing, repainting, refinishing, and upgrading function—using tools most people already have (or can borrow).
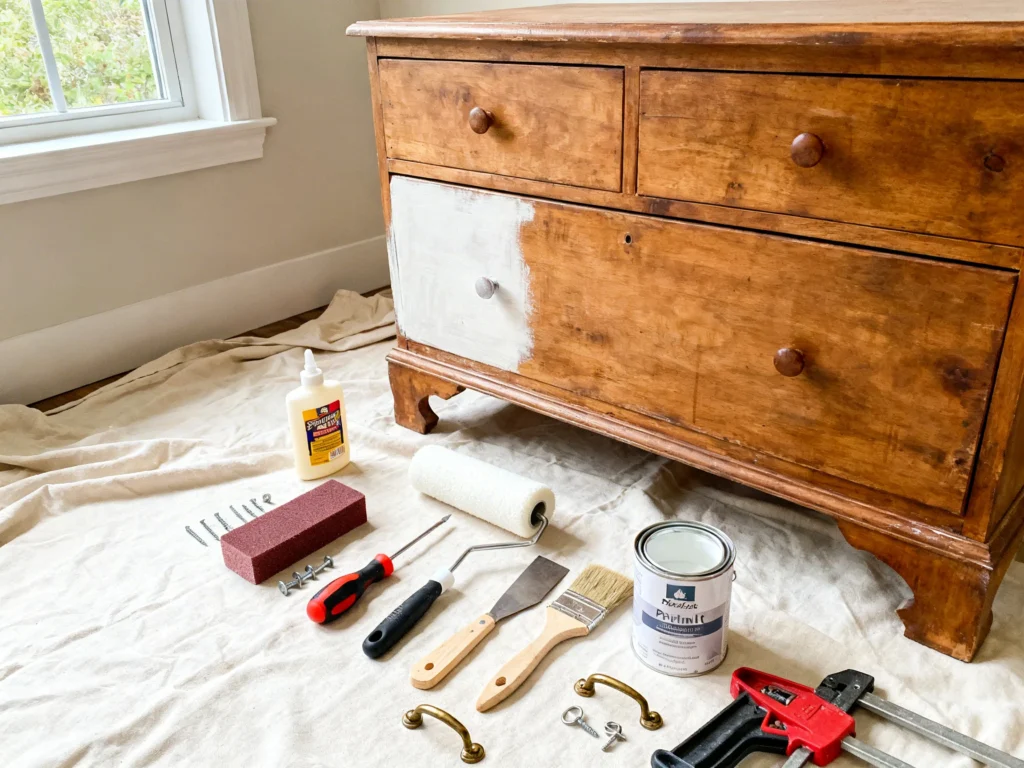
1) Start With a “No-Surprises” Clean and Inspection
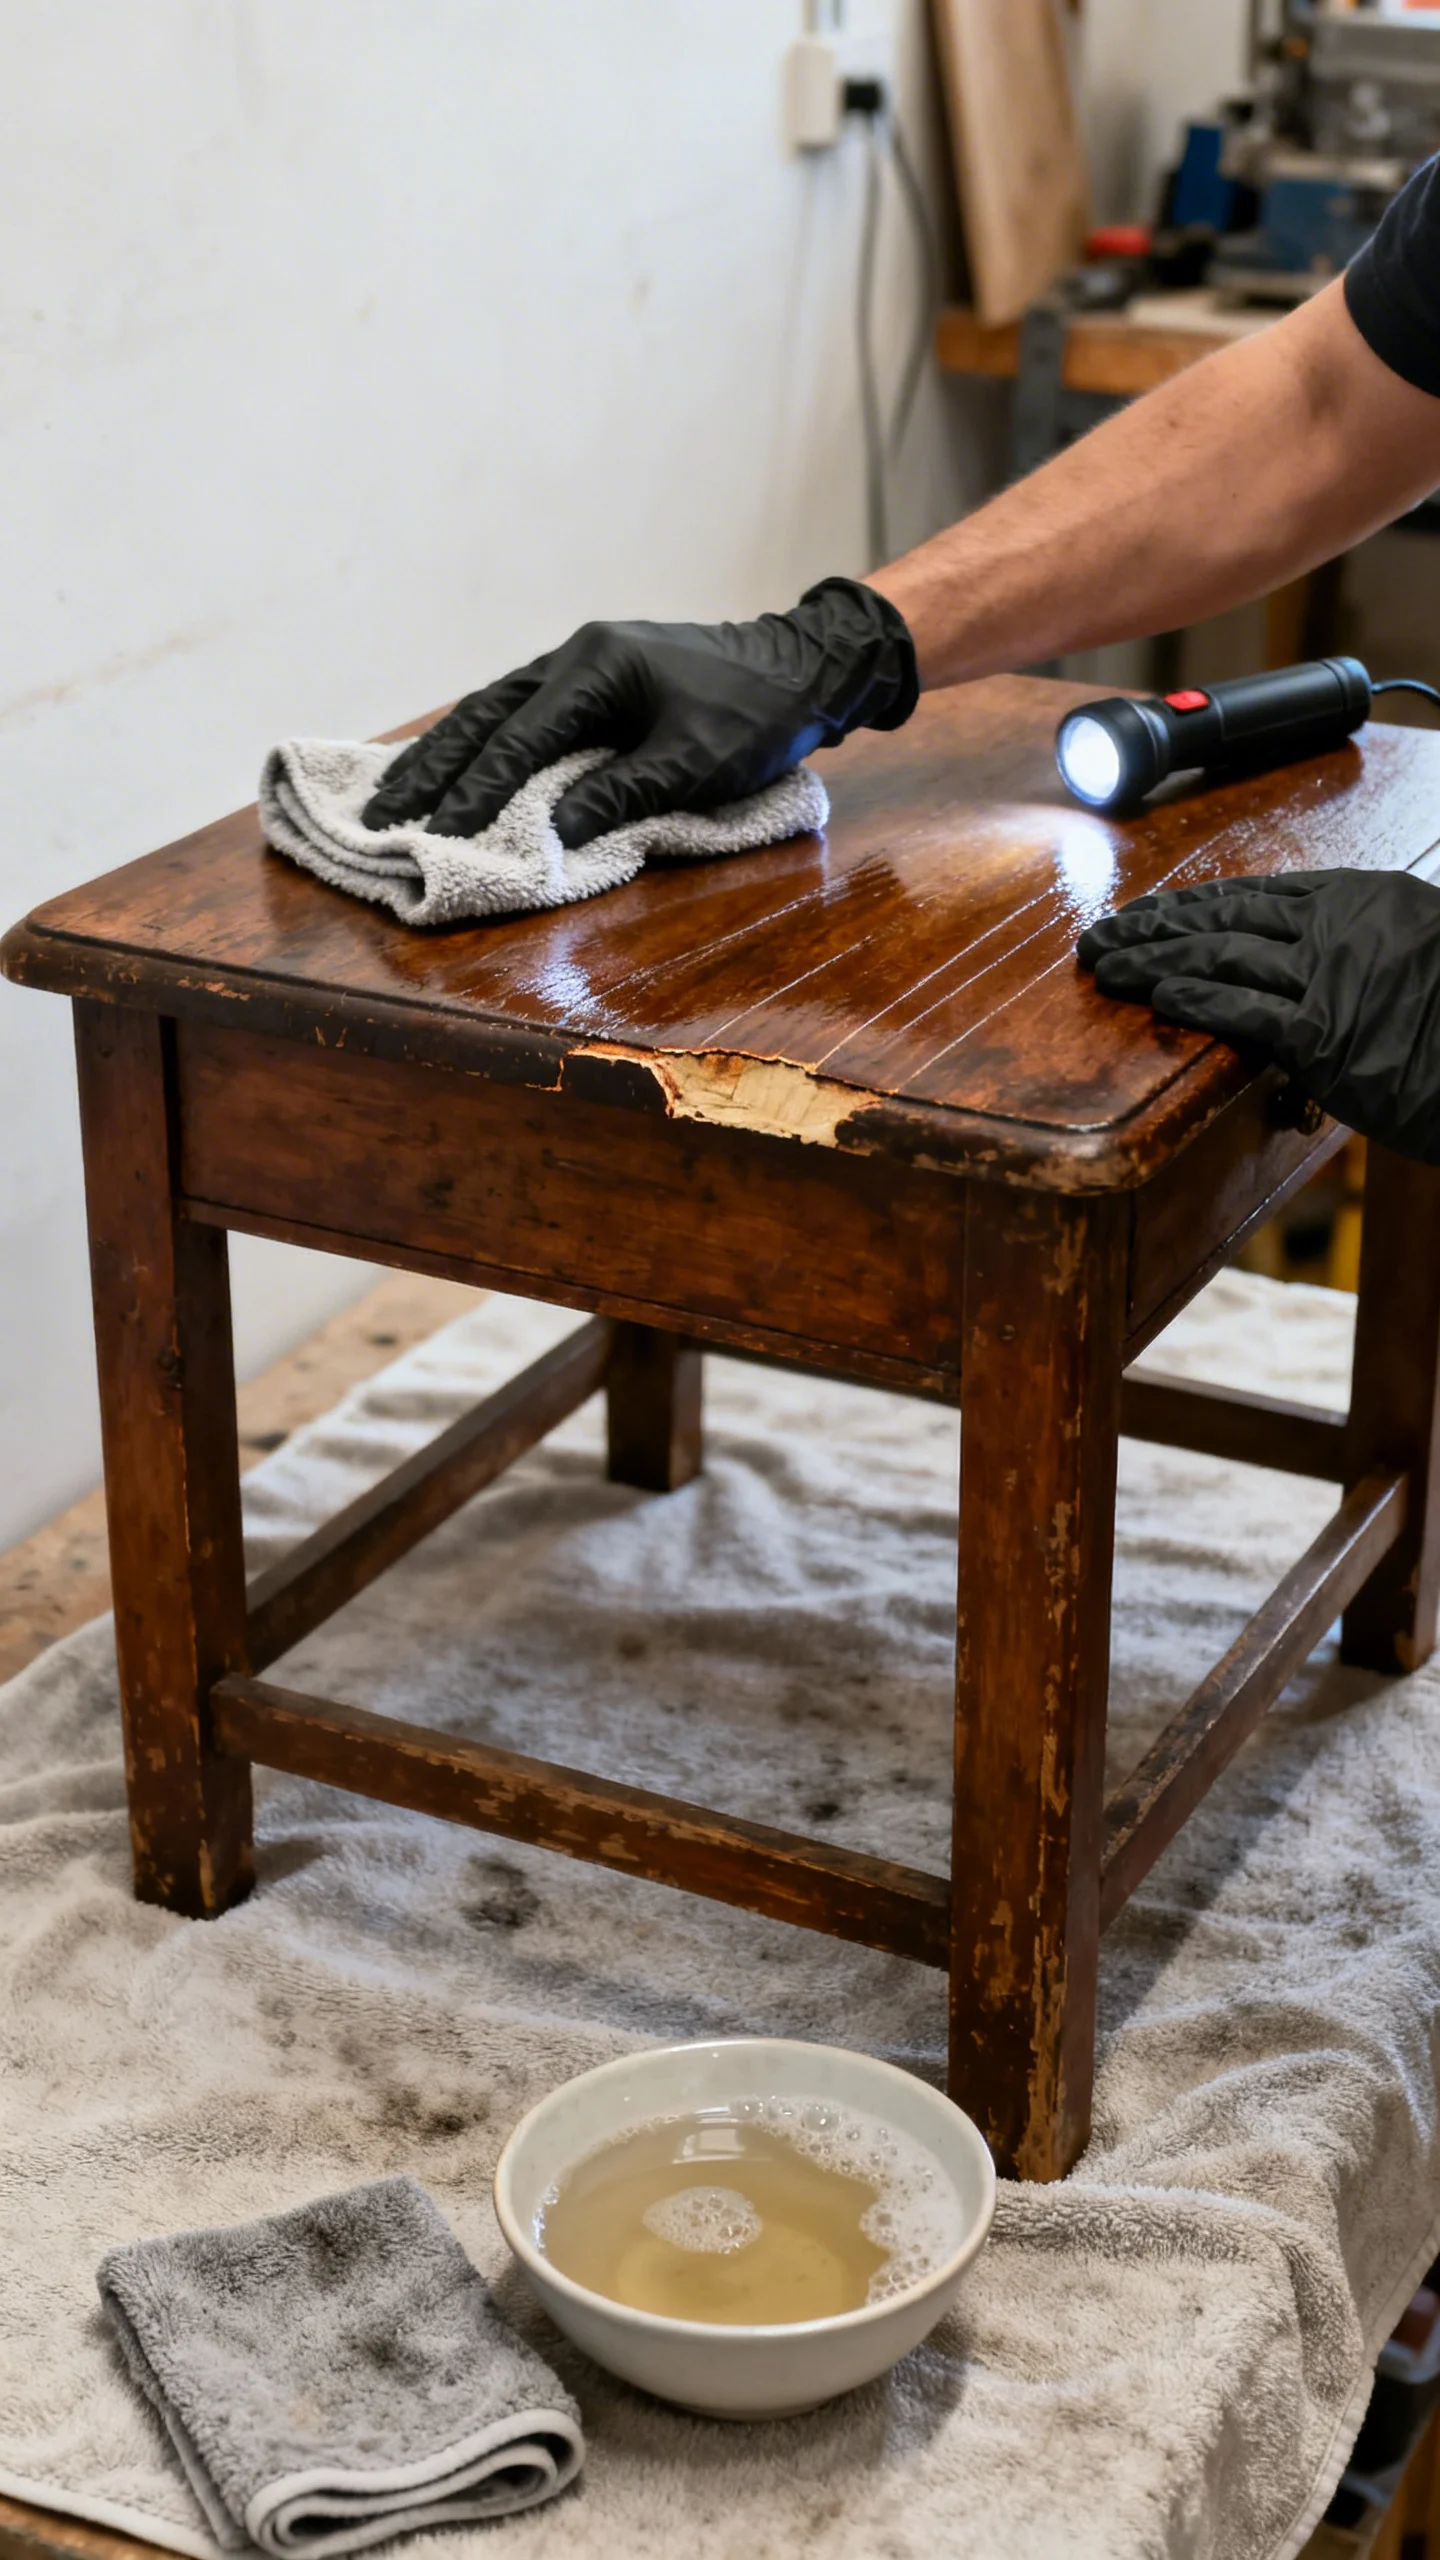
Before you buy anything, clean and assess the piece so you don’t paint over grease, wax, or loose veneer. Use warm water with a few drops of dish soap for general grime. For kitchen pieces or anything tacky, wipe with a degreaser (or a 1:1 mix of white vinegar and water) and let it fully dry.
Inspection checklist: wobble (loose joints), water rings, peeling veneer, swollen particleboard edges, and old wax polish (common on vintage pieces). Mark problem areas with painter’s tape. This step prevents the most common budget-remodel mistake: investing time in paint or stain that later flakes because the surface wasn’t clean or stable.
2) Tighten Wobbly Furniture With Simple Joint Fixes
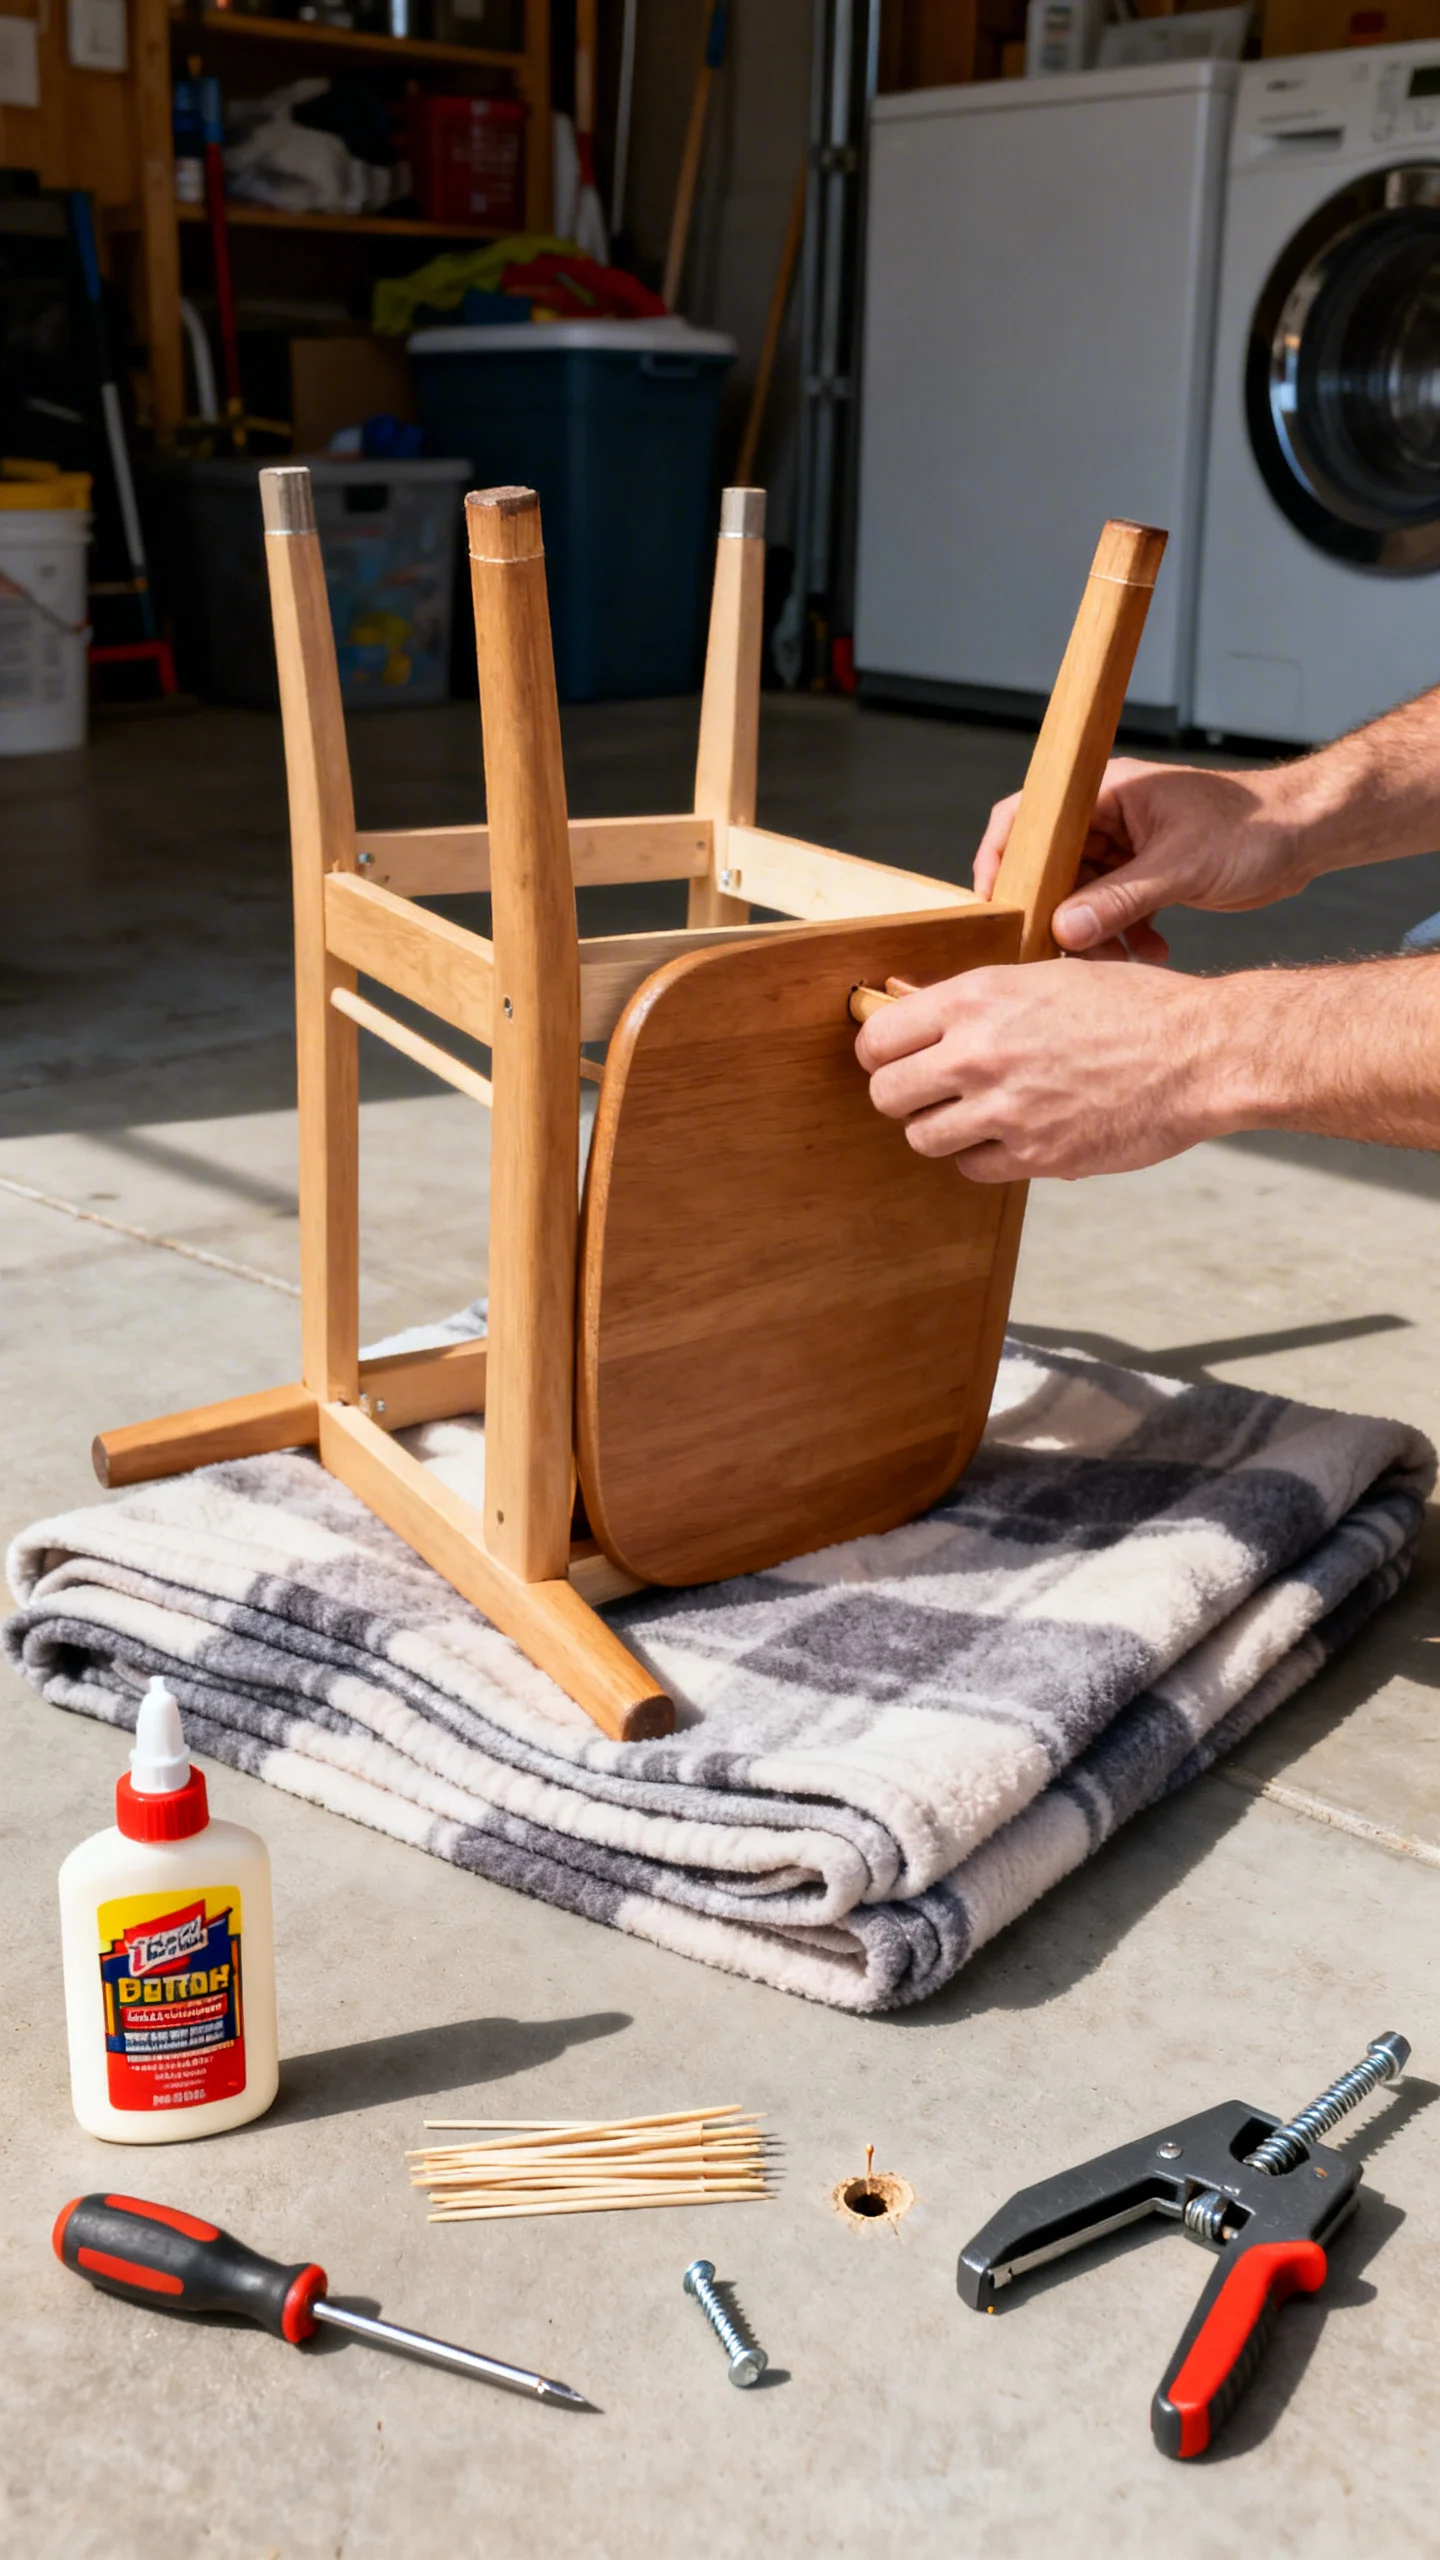
Wobble usually comes from loosened joints, not “bad legs.” Flip the piece over and gently wiggle each connection to find movement. If screws are loose, remove them and add a toothpick-and-wood-glue “plug” inside the hole, then re-screw after 30–60 minutes (full cure per glue label). If a joint is glued but separated, work wood glue into the gap and clamp.
Budget tool set: screwdriver, wood glue, a couple of clamps. No clamps? Use a ratchet strap or tightly wrapped belts to hold frames together while glue dries. Aim for even pressure—too much clamping can squeeze out all glue and weaken the bond.
3) Patch Chips, Dents, and Edge Damage Without Power Tools
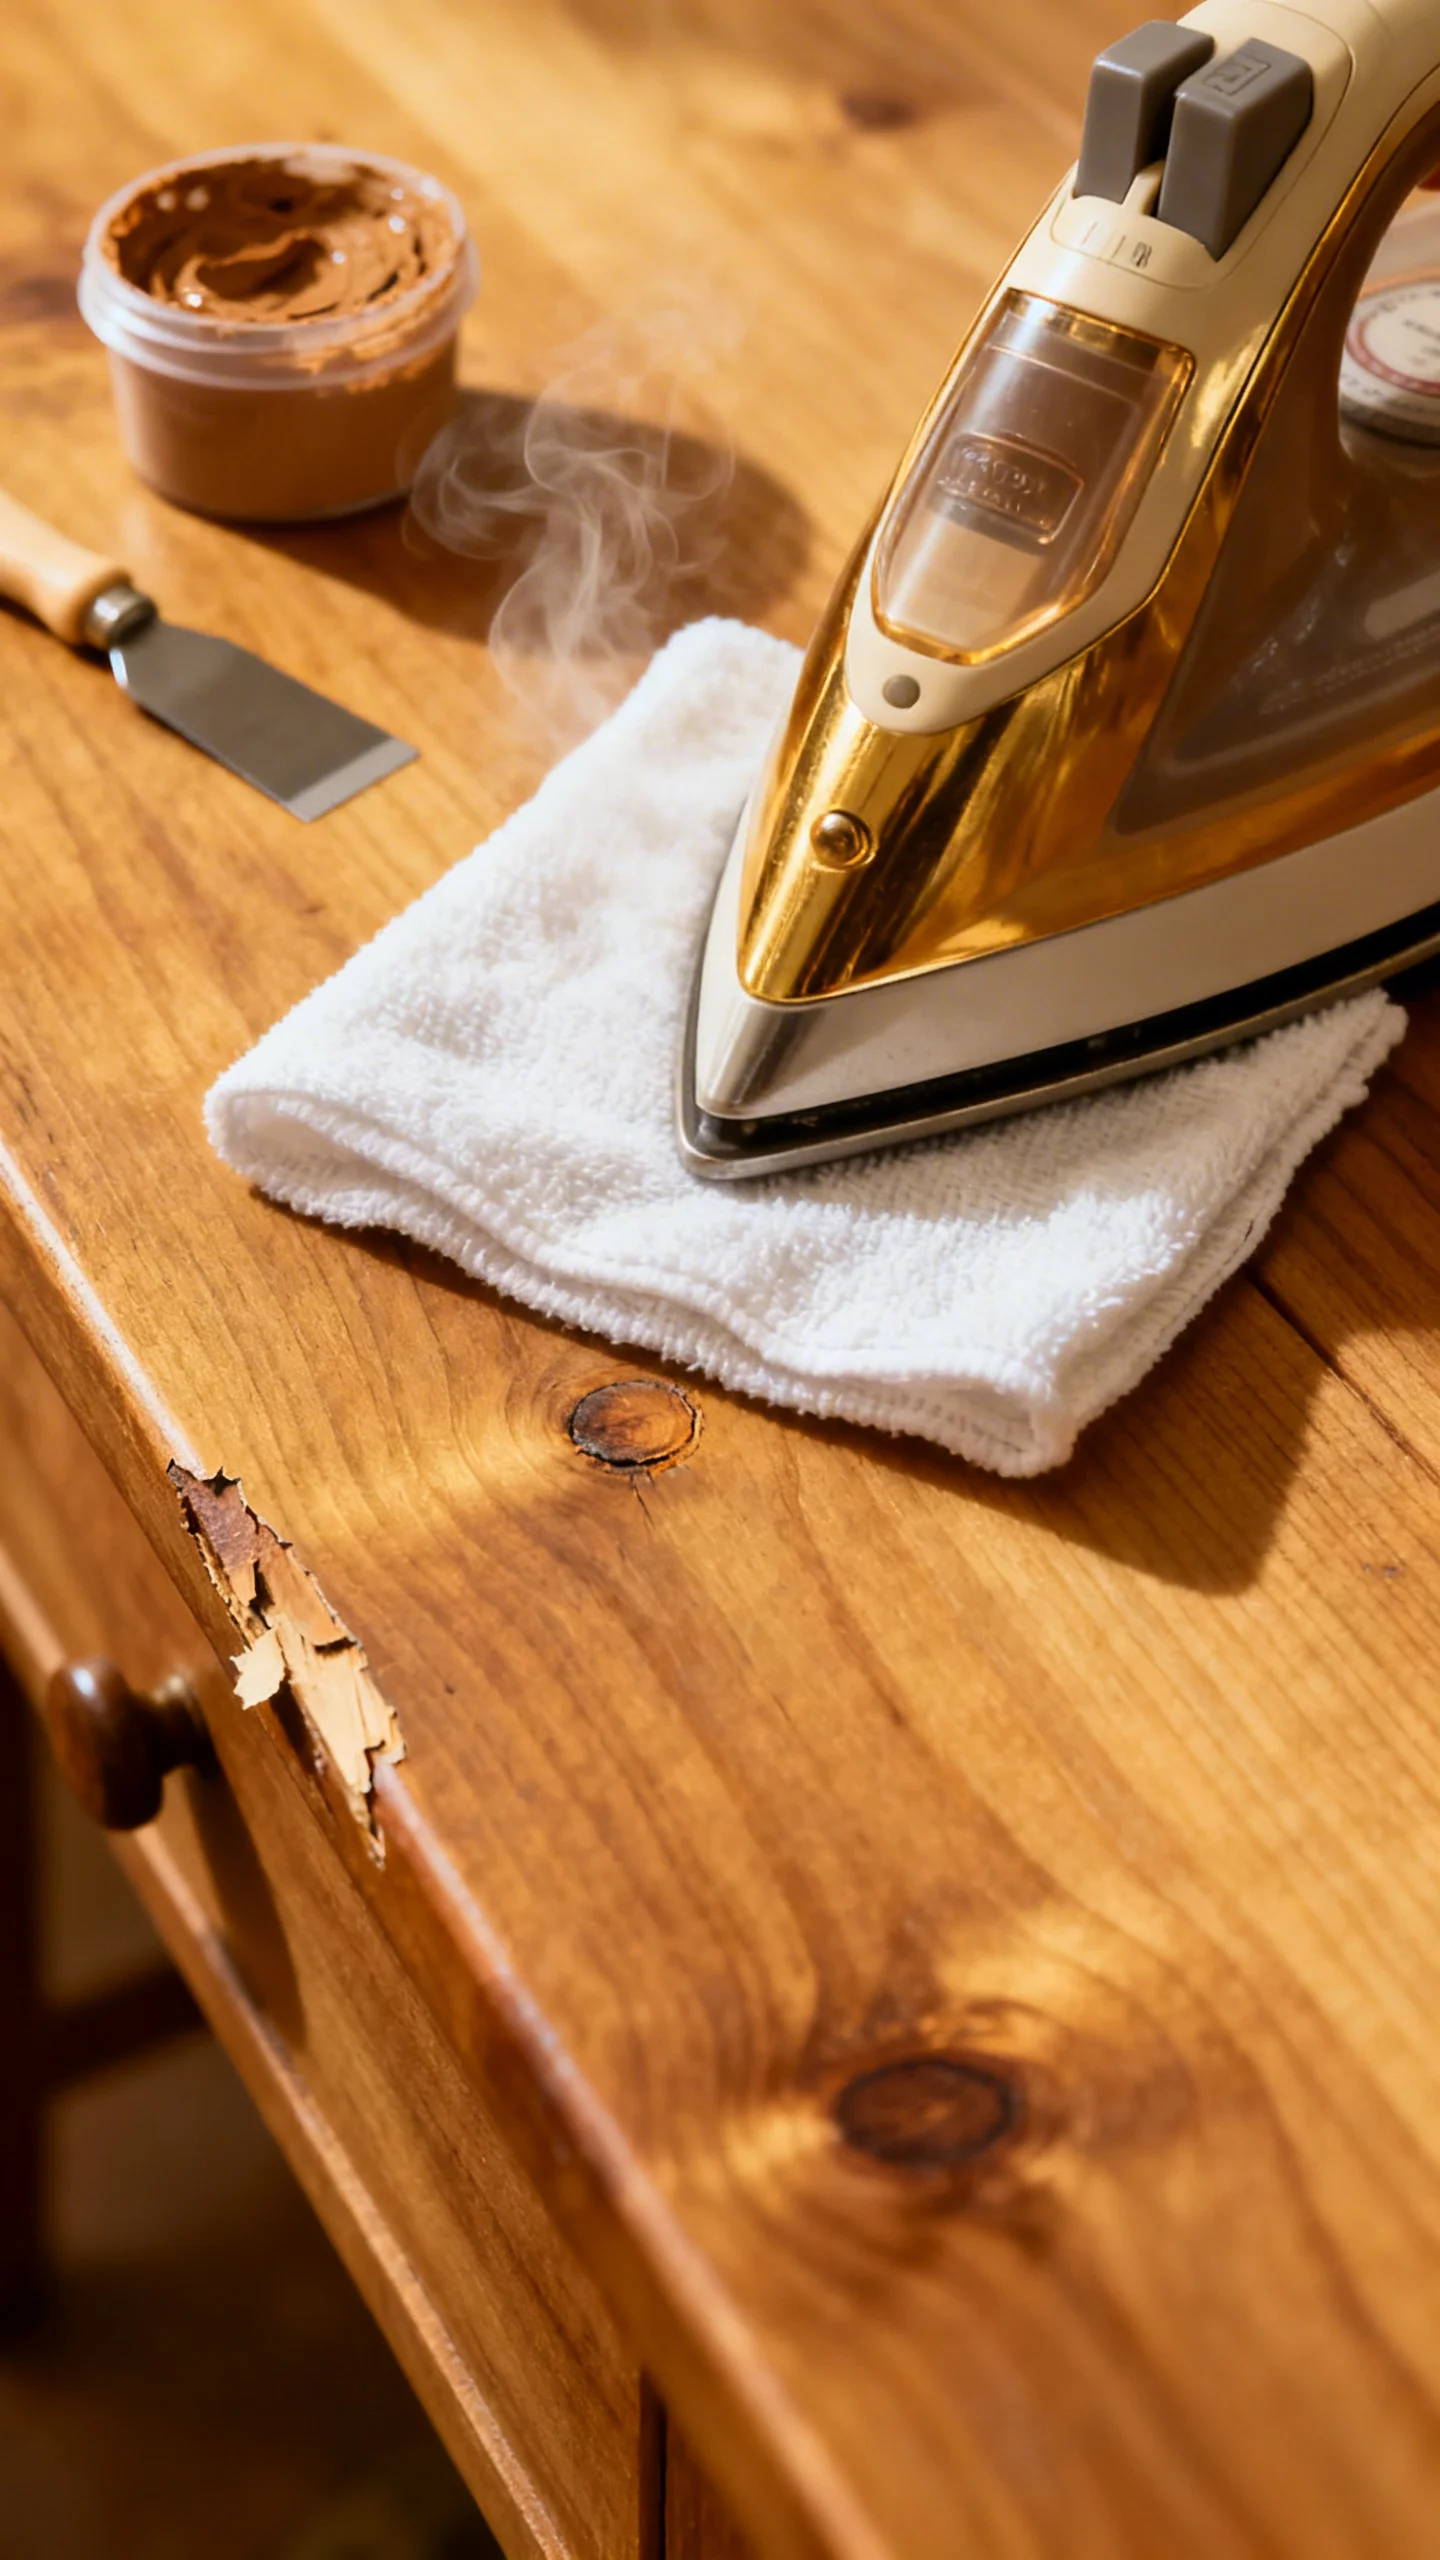
Small dents in solid wood often lift with moisture and heat. Place a damp cloth over the dent and press with a warm iron for a few seconds; repeat until the fibers swell closer to level (test first in an inconspicuous spot). For chips, use lightweight spackle (easy sanding) on painted pieces, or wood filler on stained pieces.
Apply in thin layers with a putty knife or old gift card. Let it dry completely, then sand smooth with 120–220 grit. Keep patches slightly proud (raised) while drying—filler shrinks, and you can sand it flush for a seamless remodel.
4) Sand Smarter: Targeted Scuffing Instead of Full Strip-Down
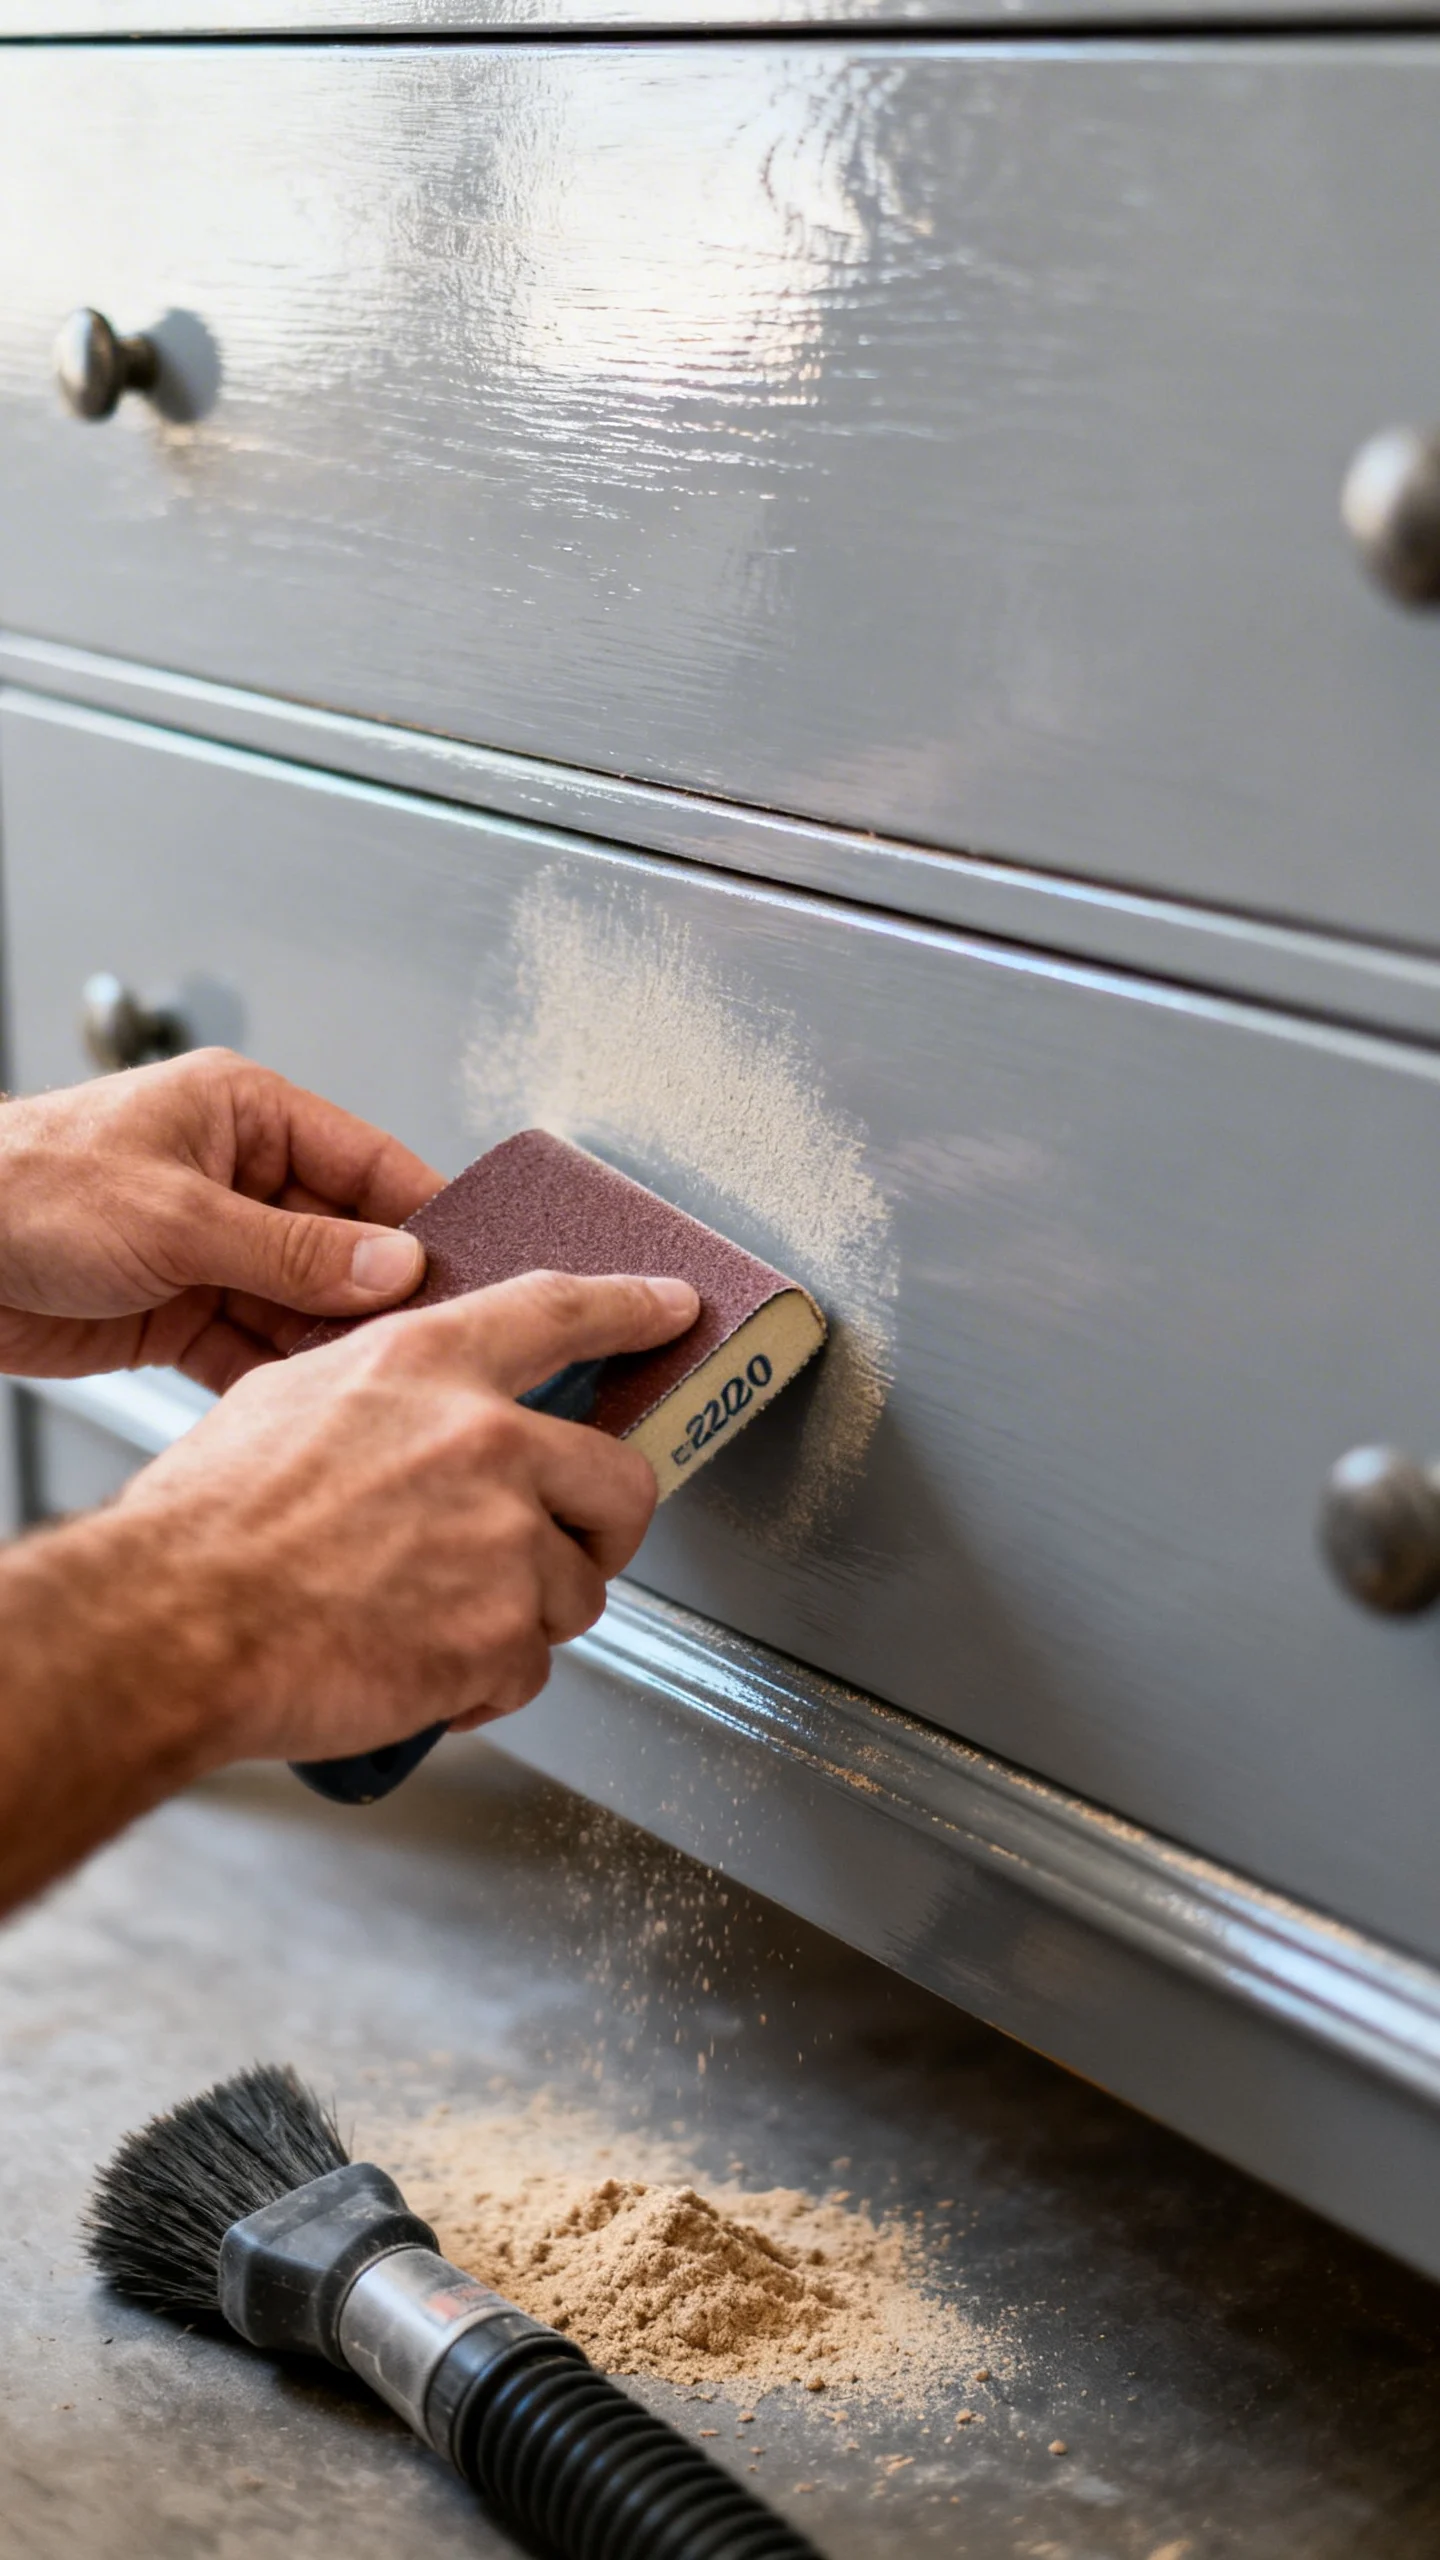
Full stripping is messy and rarely needed for budget remodeling. For most repaints and many topcoats, a thorough scuff-sand is enough. Use 150–220 grit to dull the sheen, especially on glossy finishes. Focus on edges, routed details, and high-touch areas like drawer fronts and table aprons.
Use a sanding block for flat areas and a folded sheet for curves. After sanding, remove dust with a vacuum and a slightly damp microfiber cloth. If the piece is oily or waxy (common on older dressers), follow with a deglosser or a dedicated cleaner so your new finish actually bonds.
5) Prime Only When It Counts (and Save Money Where You Can)
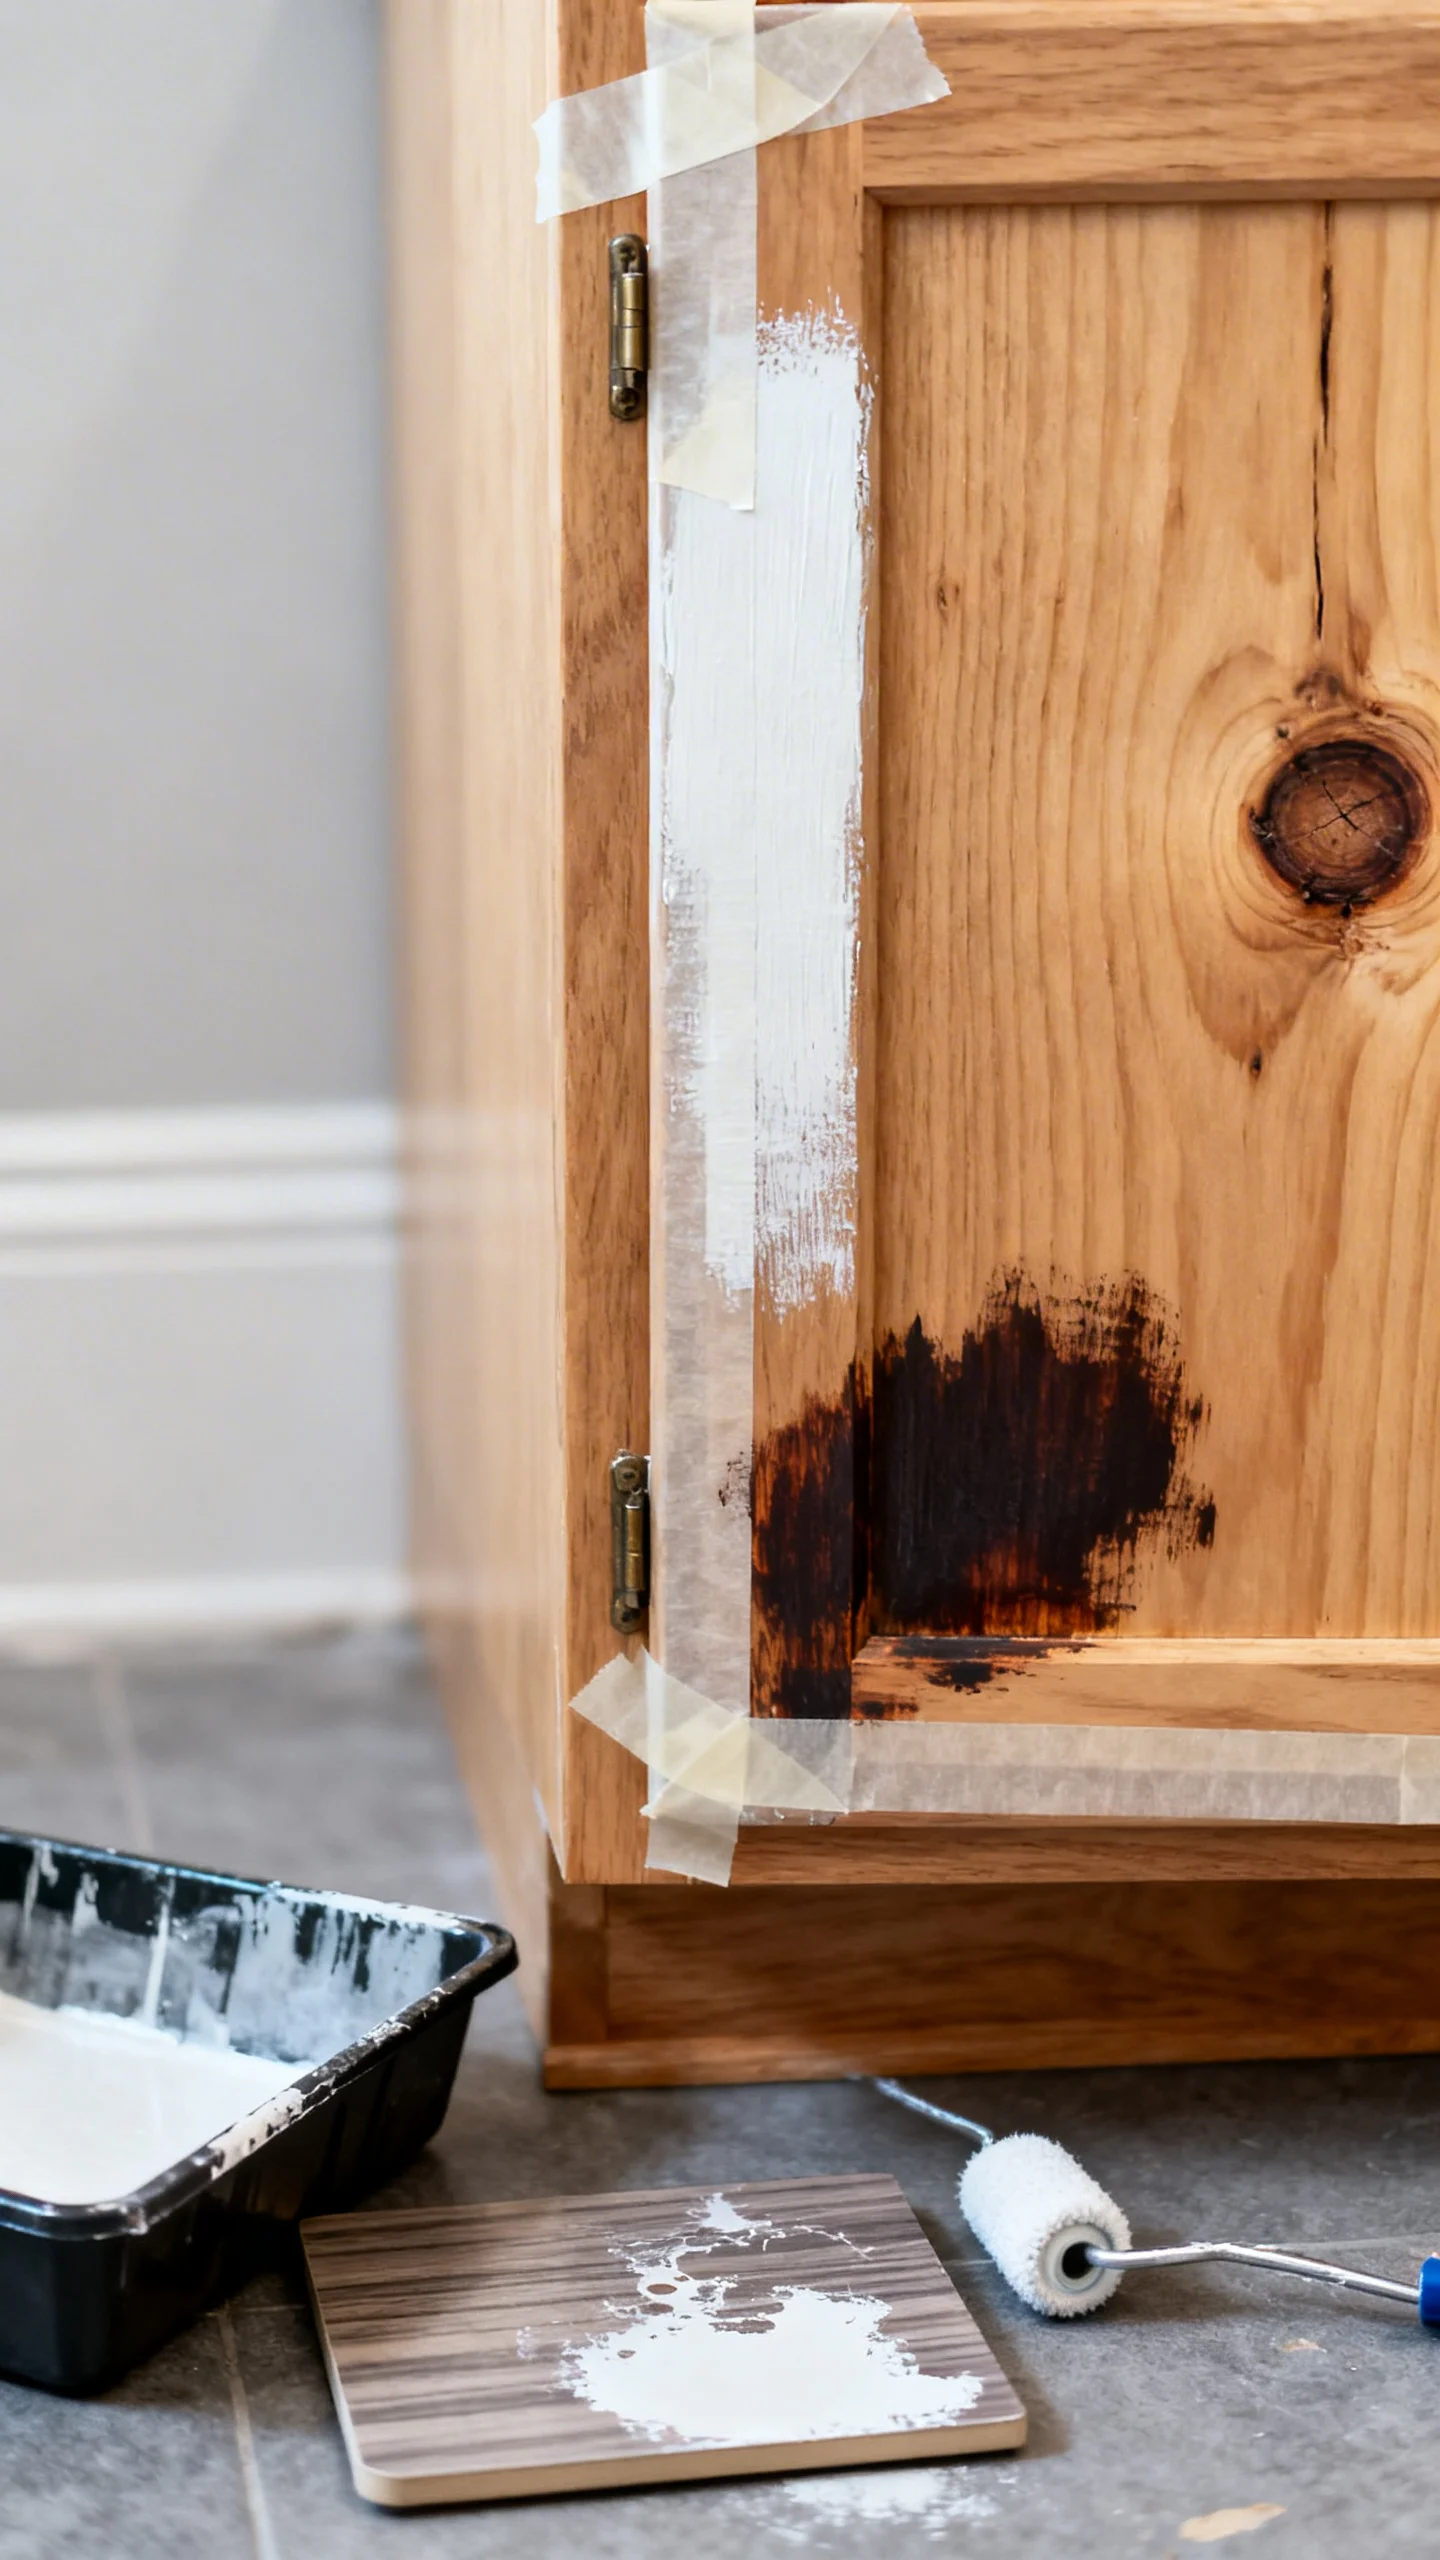
Primer is your budget insurance policy, but you don’t always need it everywhere. Prime when you’re dealing with: stained wood that can bleed through, knots in pine, glossy laminate, or switching from dark to light colors. For tannin-heavy woods (like oak or mahogany), a stain-blocking primer prevents yellow-brown ghosting under paint.
If the surface is already matte and stable, and you’re repainting a similar color, you may be able to skip primer and go straight to a quality paint. Money-saving approach: spot-prime only repaired areas and any knots, then do one light full coat if needed.
6) Get a Pro-Looking Paint Finish With a Foam Roller and Brush
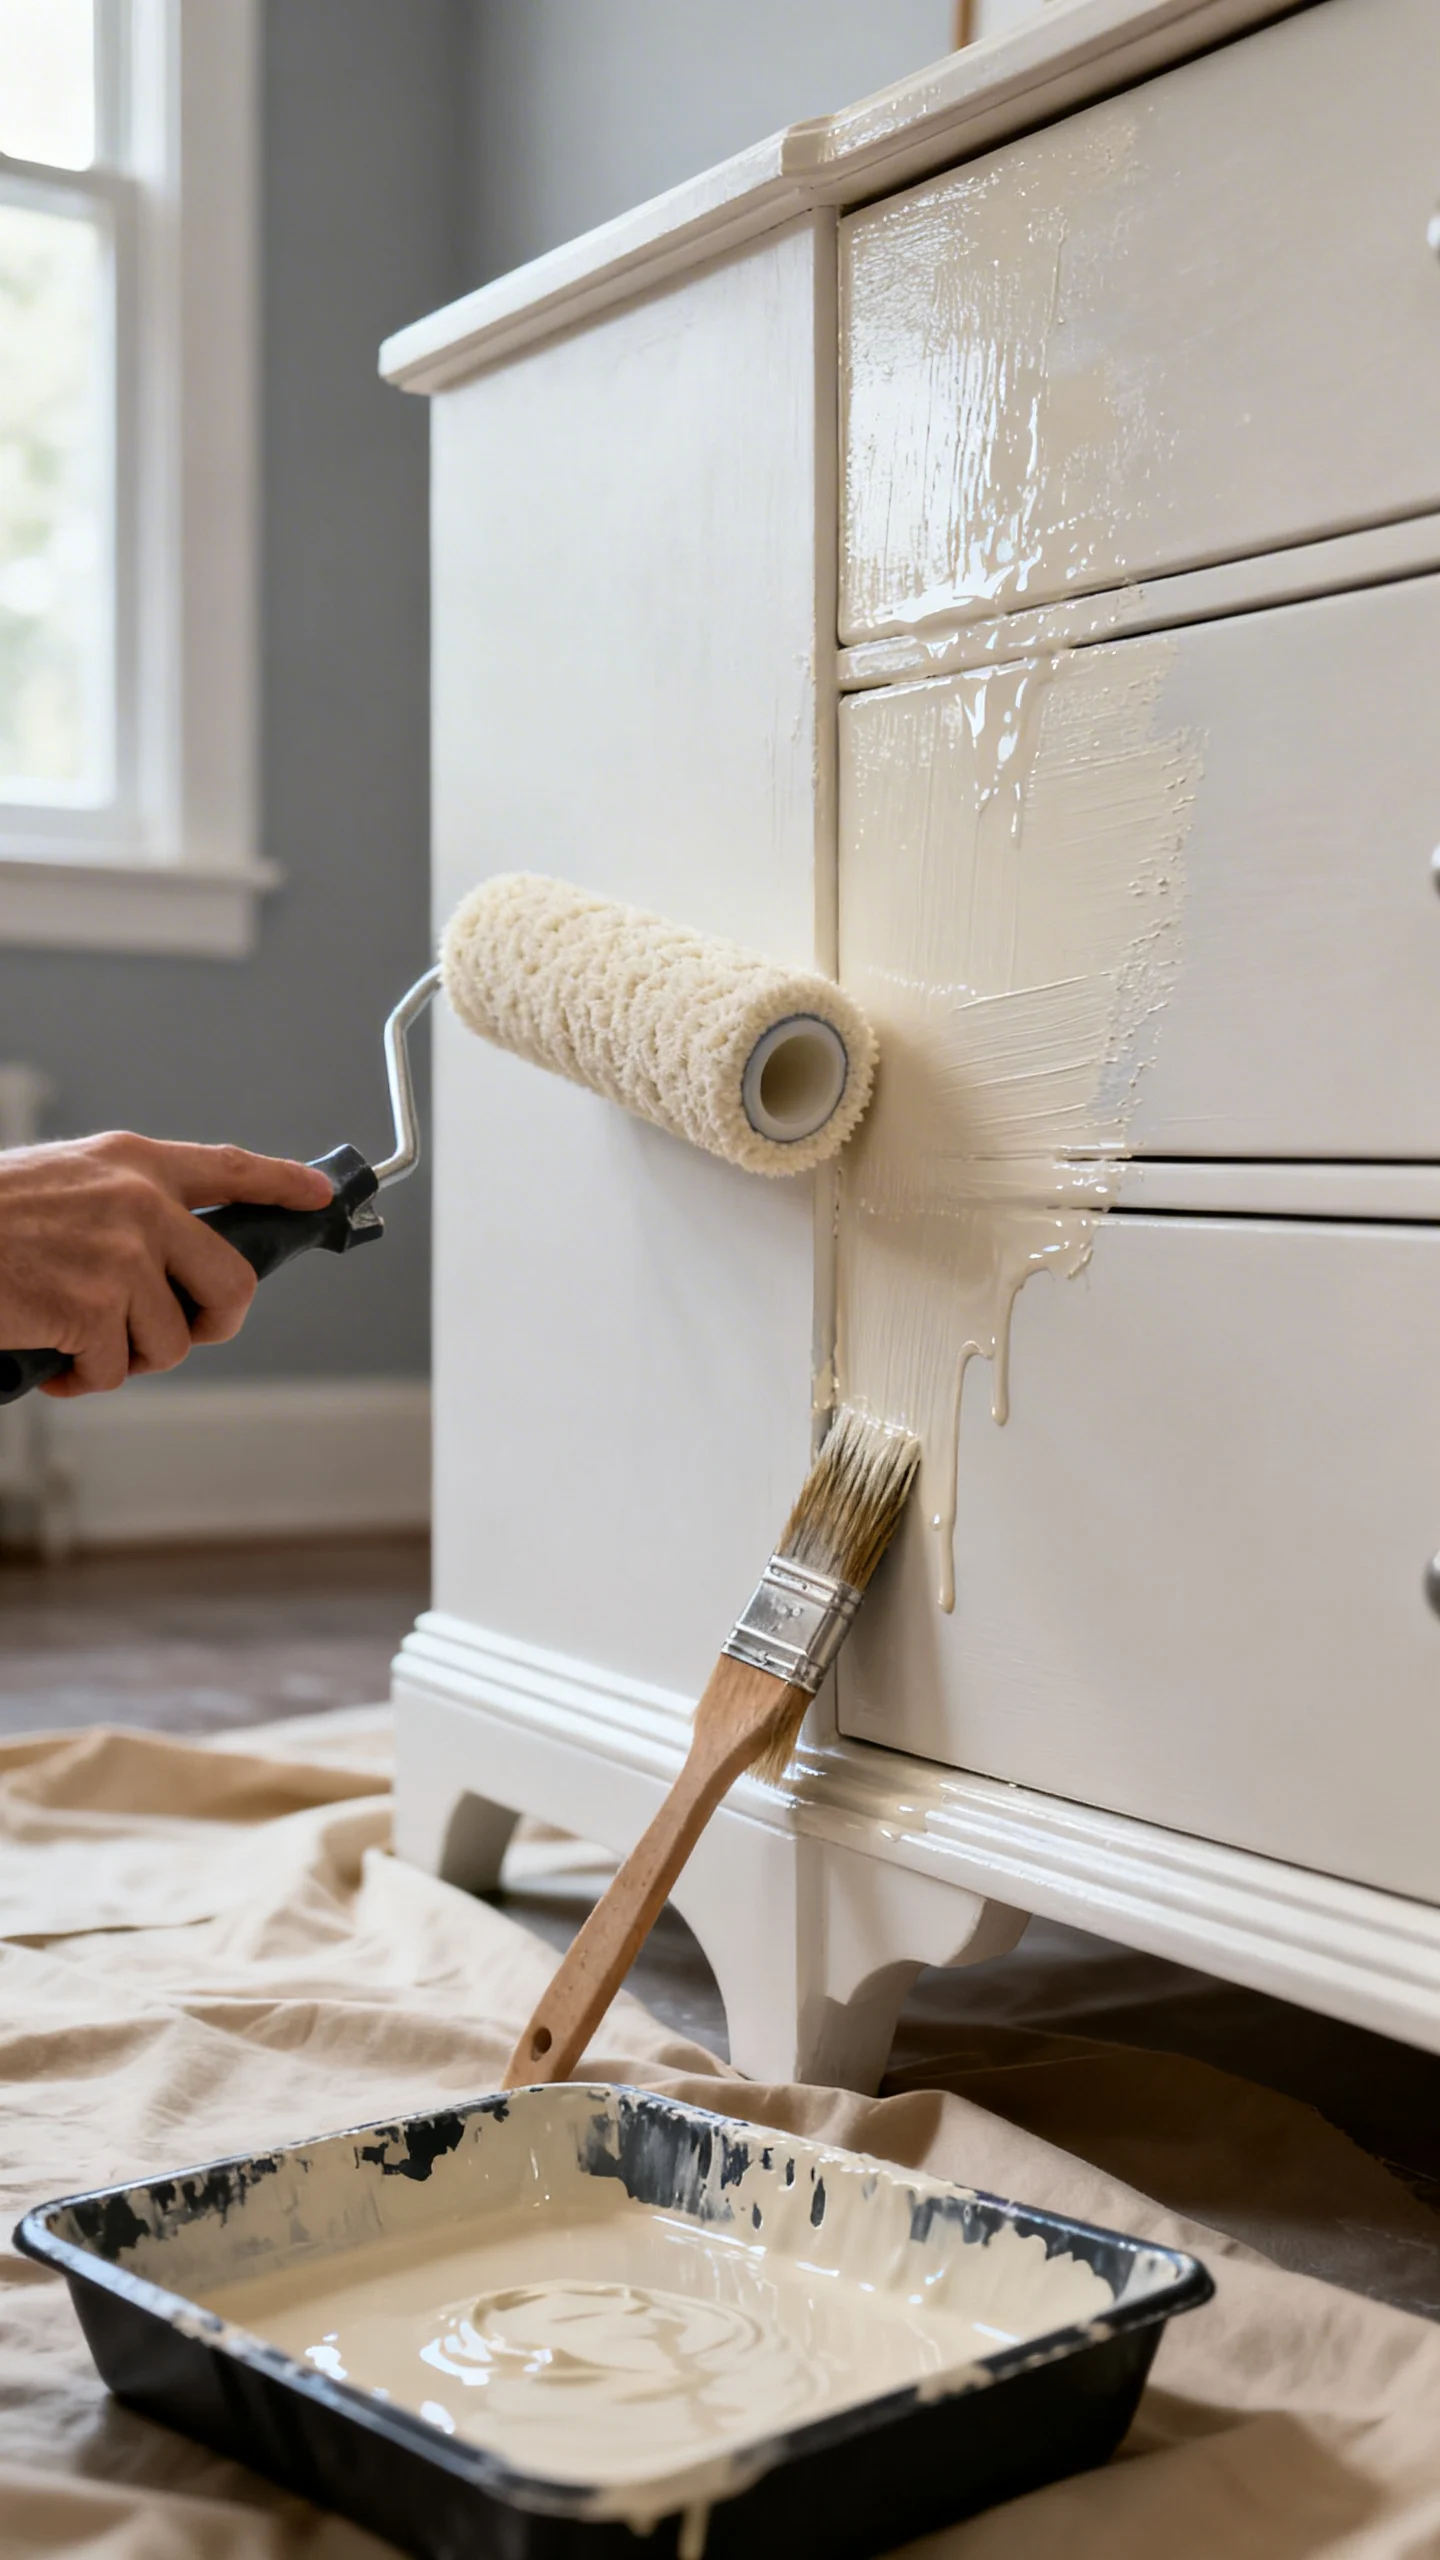
You don’t need a sprayer for a smooth, updated look. Use a small high-density foam roller for flat panels and a good angled brush for corners and details. Thin coats are the secret—two to three light coats beat one thick coat that drips and shows brush marks.
Technique tips: “tip off” rolled paint by lightly dragging the brush in one direction before it sets. Let each coat dry as directed (rushing causes tackiness and imprinting). Lightly sand between coats with 220–320 grit if you feel texture, then wipe clean. This simple-tool method is one of the easiest budget upgrades for dressers, side tables, and cabinets.
7) Refinish a Wood Top on a Budget Using Wipe-On Products
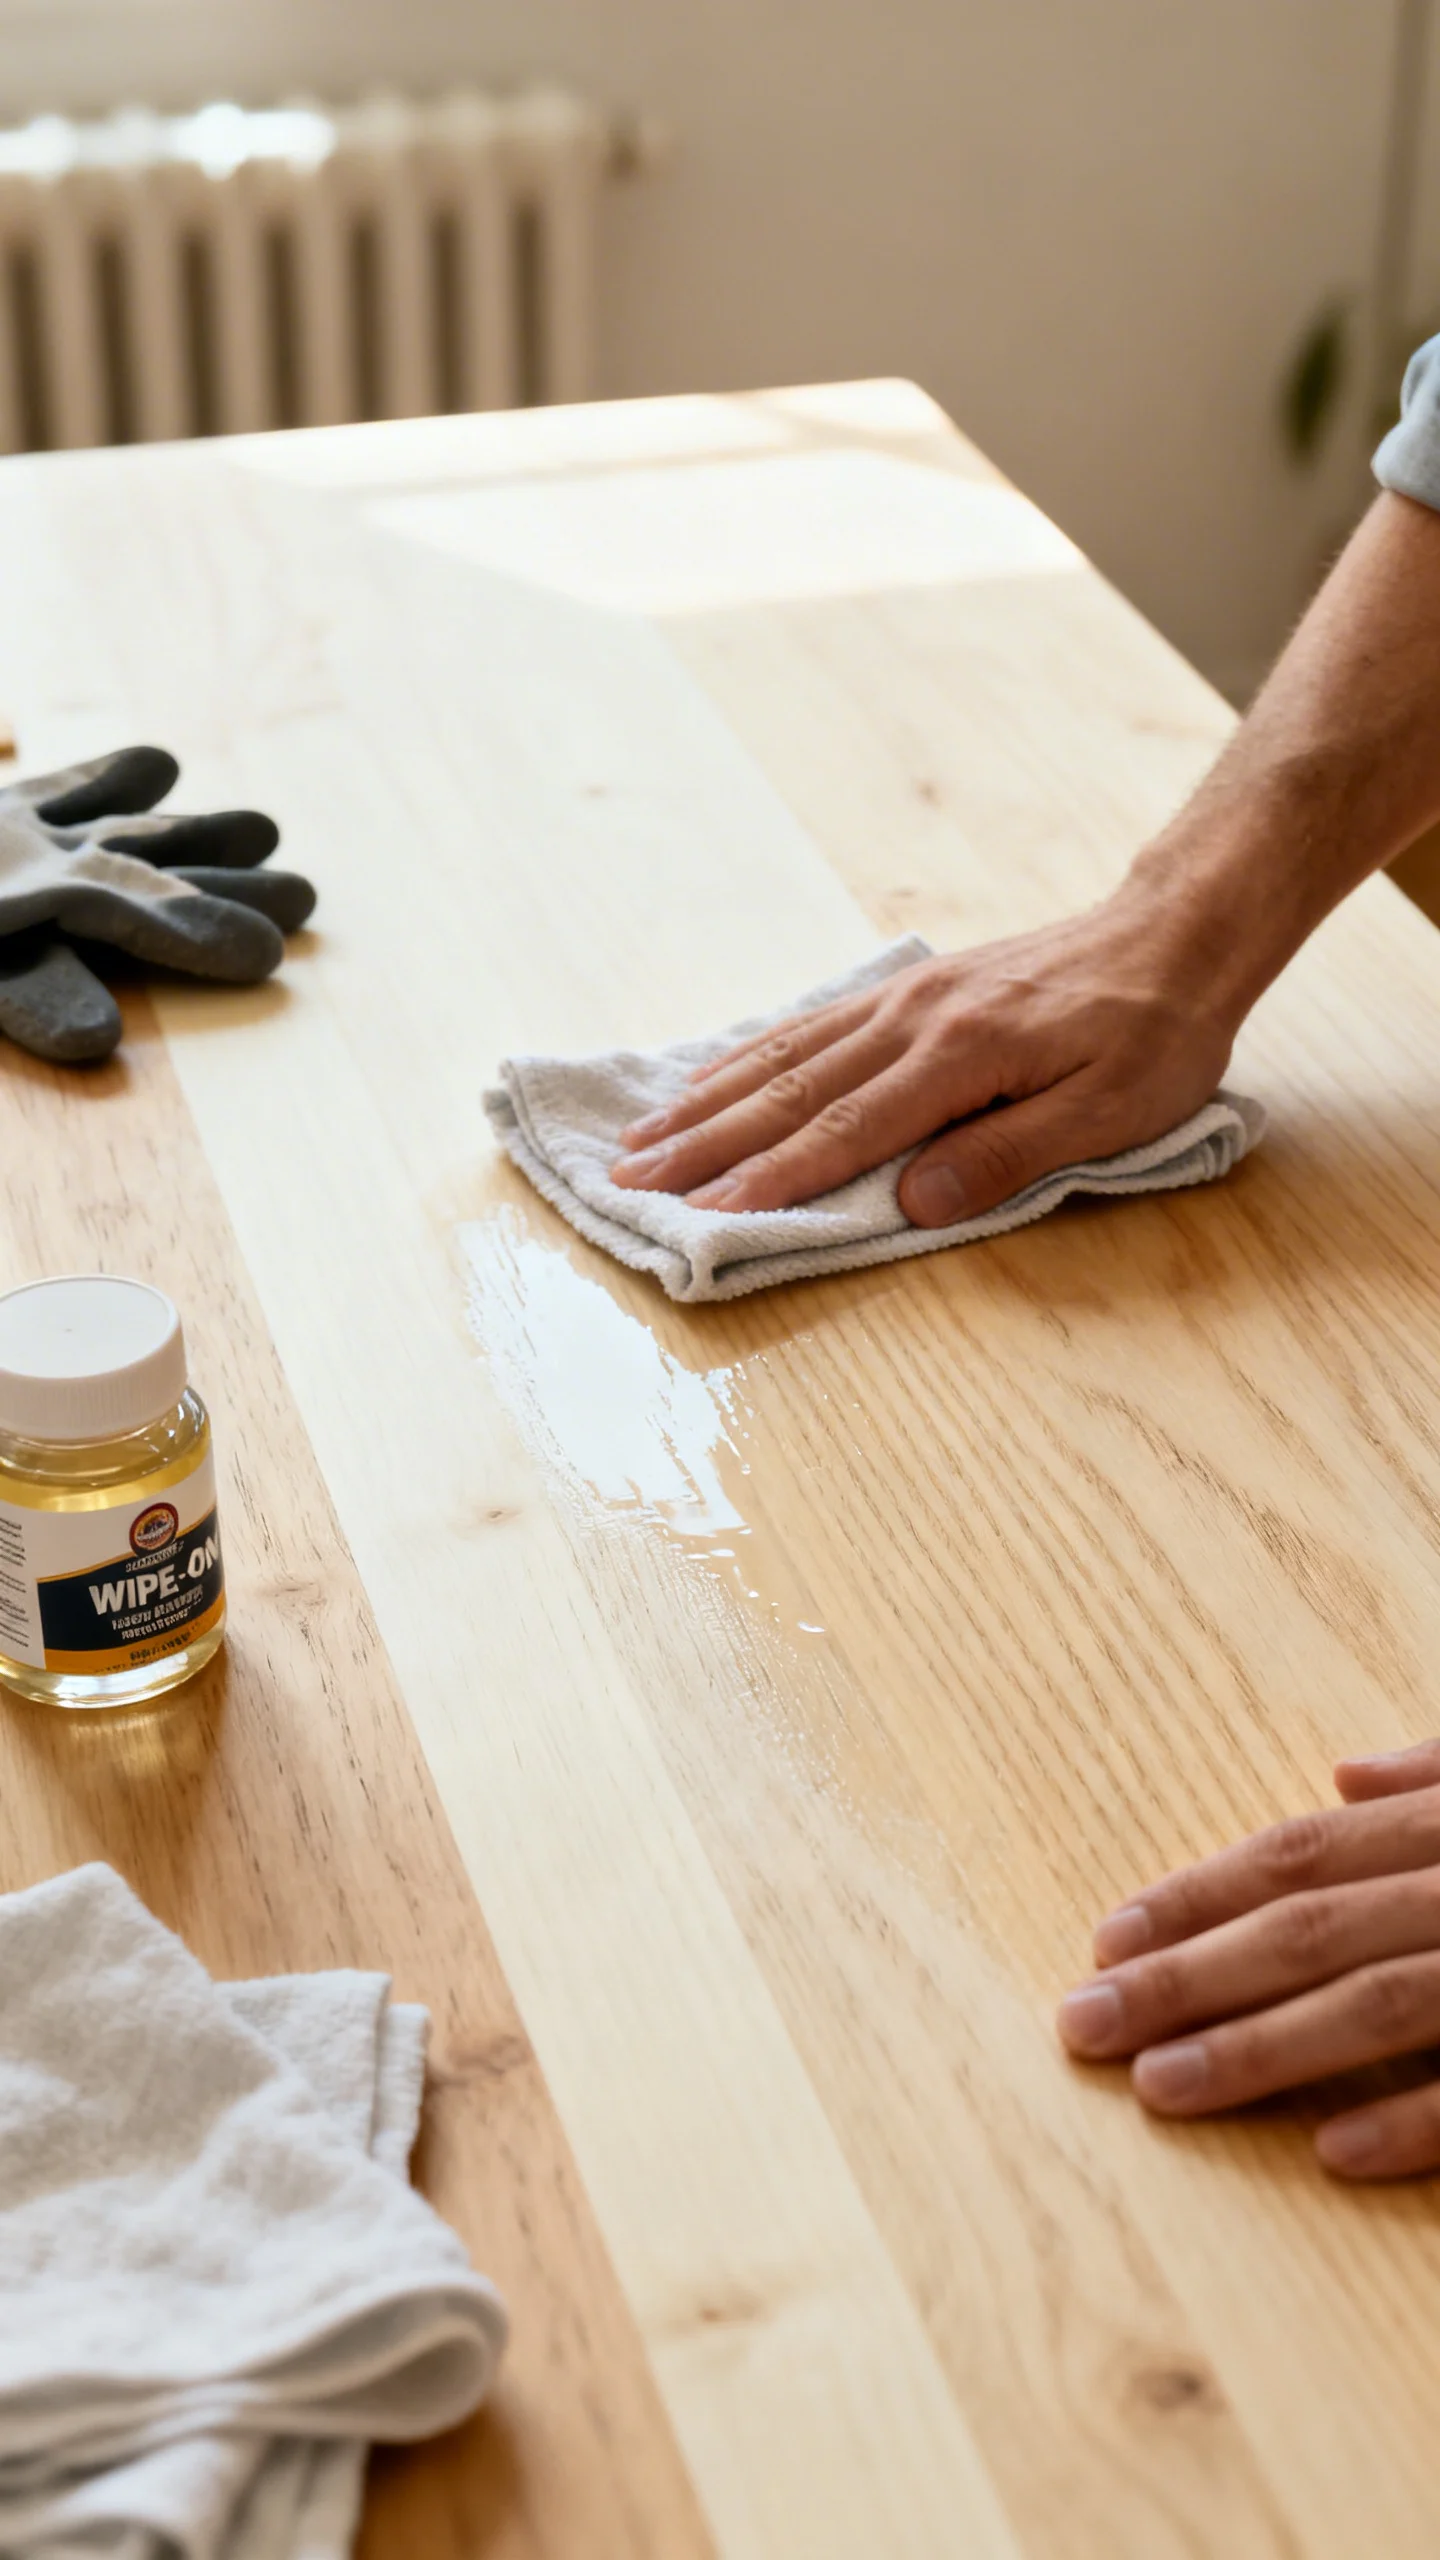
If you love the wood but hate the finish, focus on the top surface for maximum impact. For many pieces, you can refinish the top only—sand the surface evenly (start at 120–150 grit, finish at 180–220), then apply a wipe-on finish. Wipe-on polyurethane is beginner-friendly and reduces brush marks because coats are thinner.
Pros: minimal tools (sandpaper, rags), durable for everyday use. Cons: takes more coats (often 3–6). Keep a “wet edge” and wipe with the grain. For water resistance on tables, let the final coat cure fully (often several days) before heavy use—dry to touch isn’t the same as cured.
8) Upgrade Hardware and Fix Drawer Function for a True Remodel
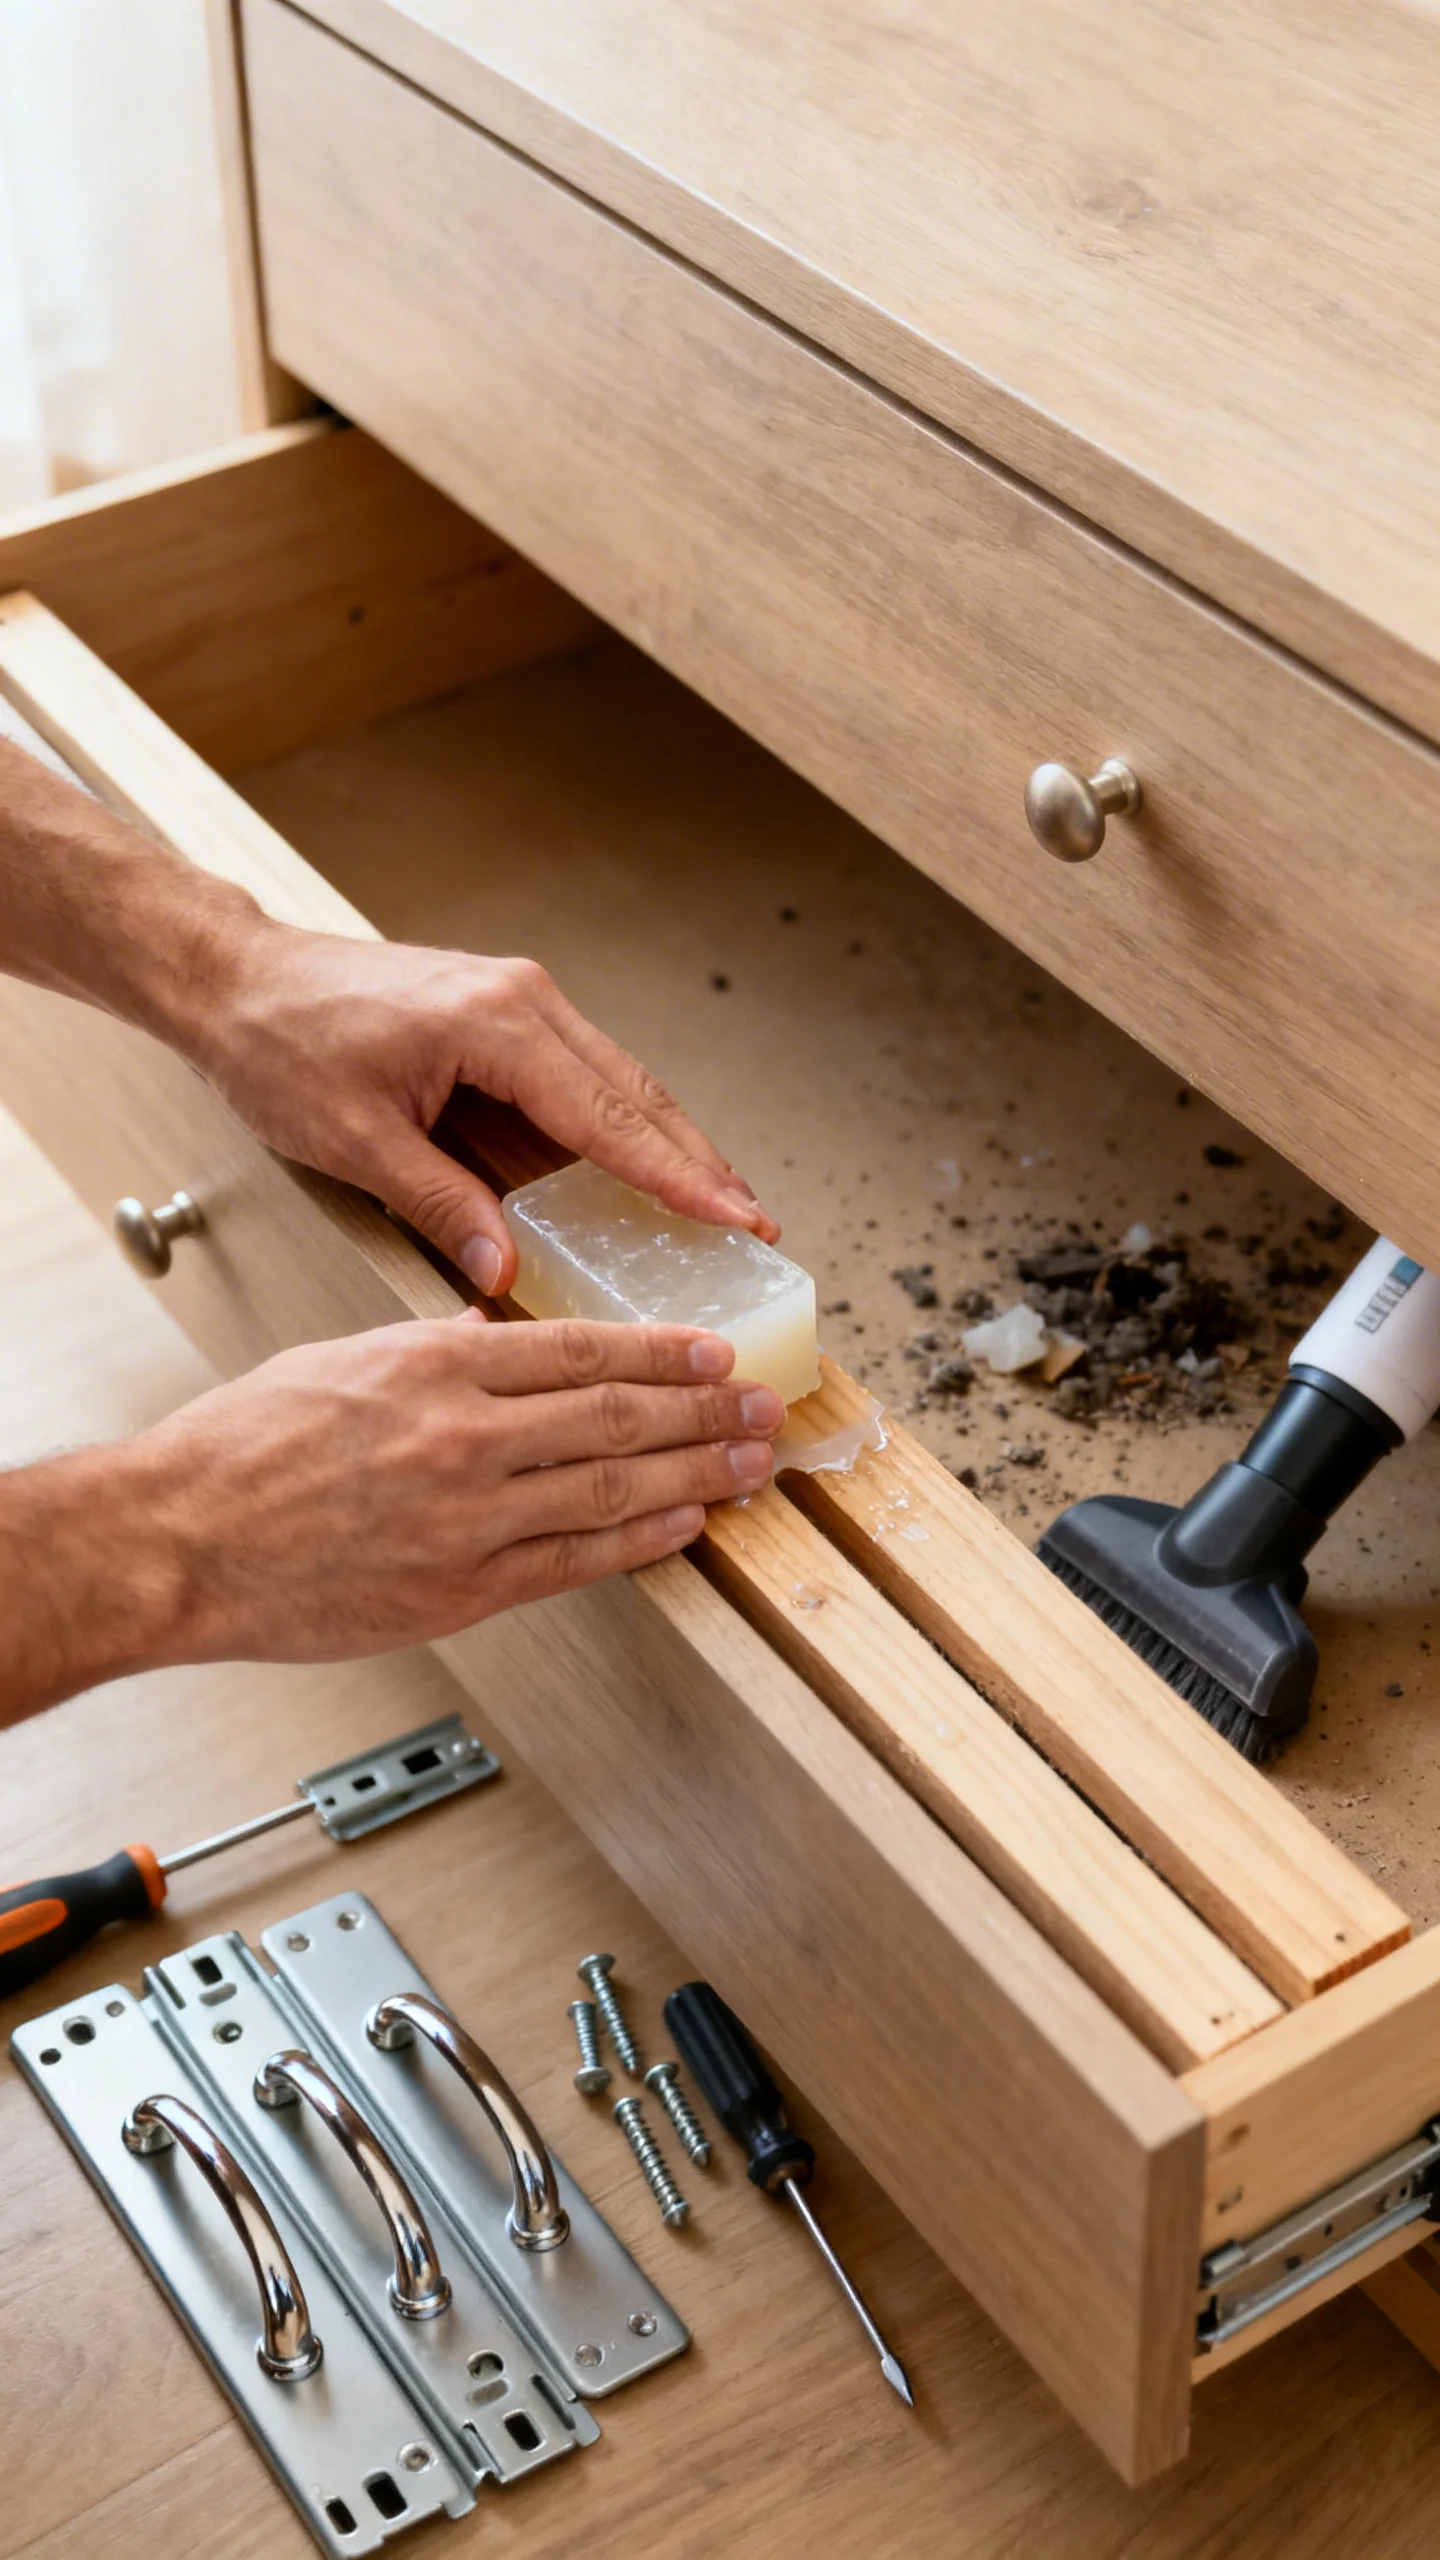
Hardware swaps are affordable, but the real win is making drawers work smoothly. First, vacuum out debris and check for loose screws. Rub candle wax or clear bar soap on wood runners to reduce sticking. If drawers are misaligned, tighten or replace corner brackets and ensure the box is square.
When replacing pulls, measure the center-to-center hole spacing (common sizes include 3 inches/76 mm and 5 inches/128 mm). If new hardware doesn’t match existing holes, fill old holes with wood filler, sand, then drill new ones. Use painter’s tape to mark locations and prevent tear-out. Even with simple tools, this step can make an old dresser feel new.
9) Add Feet, Casters, or a Base Frame to Change the Silhouette
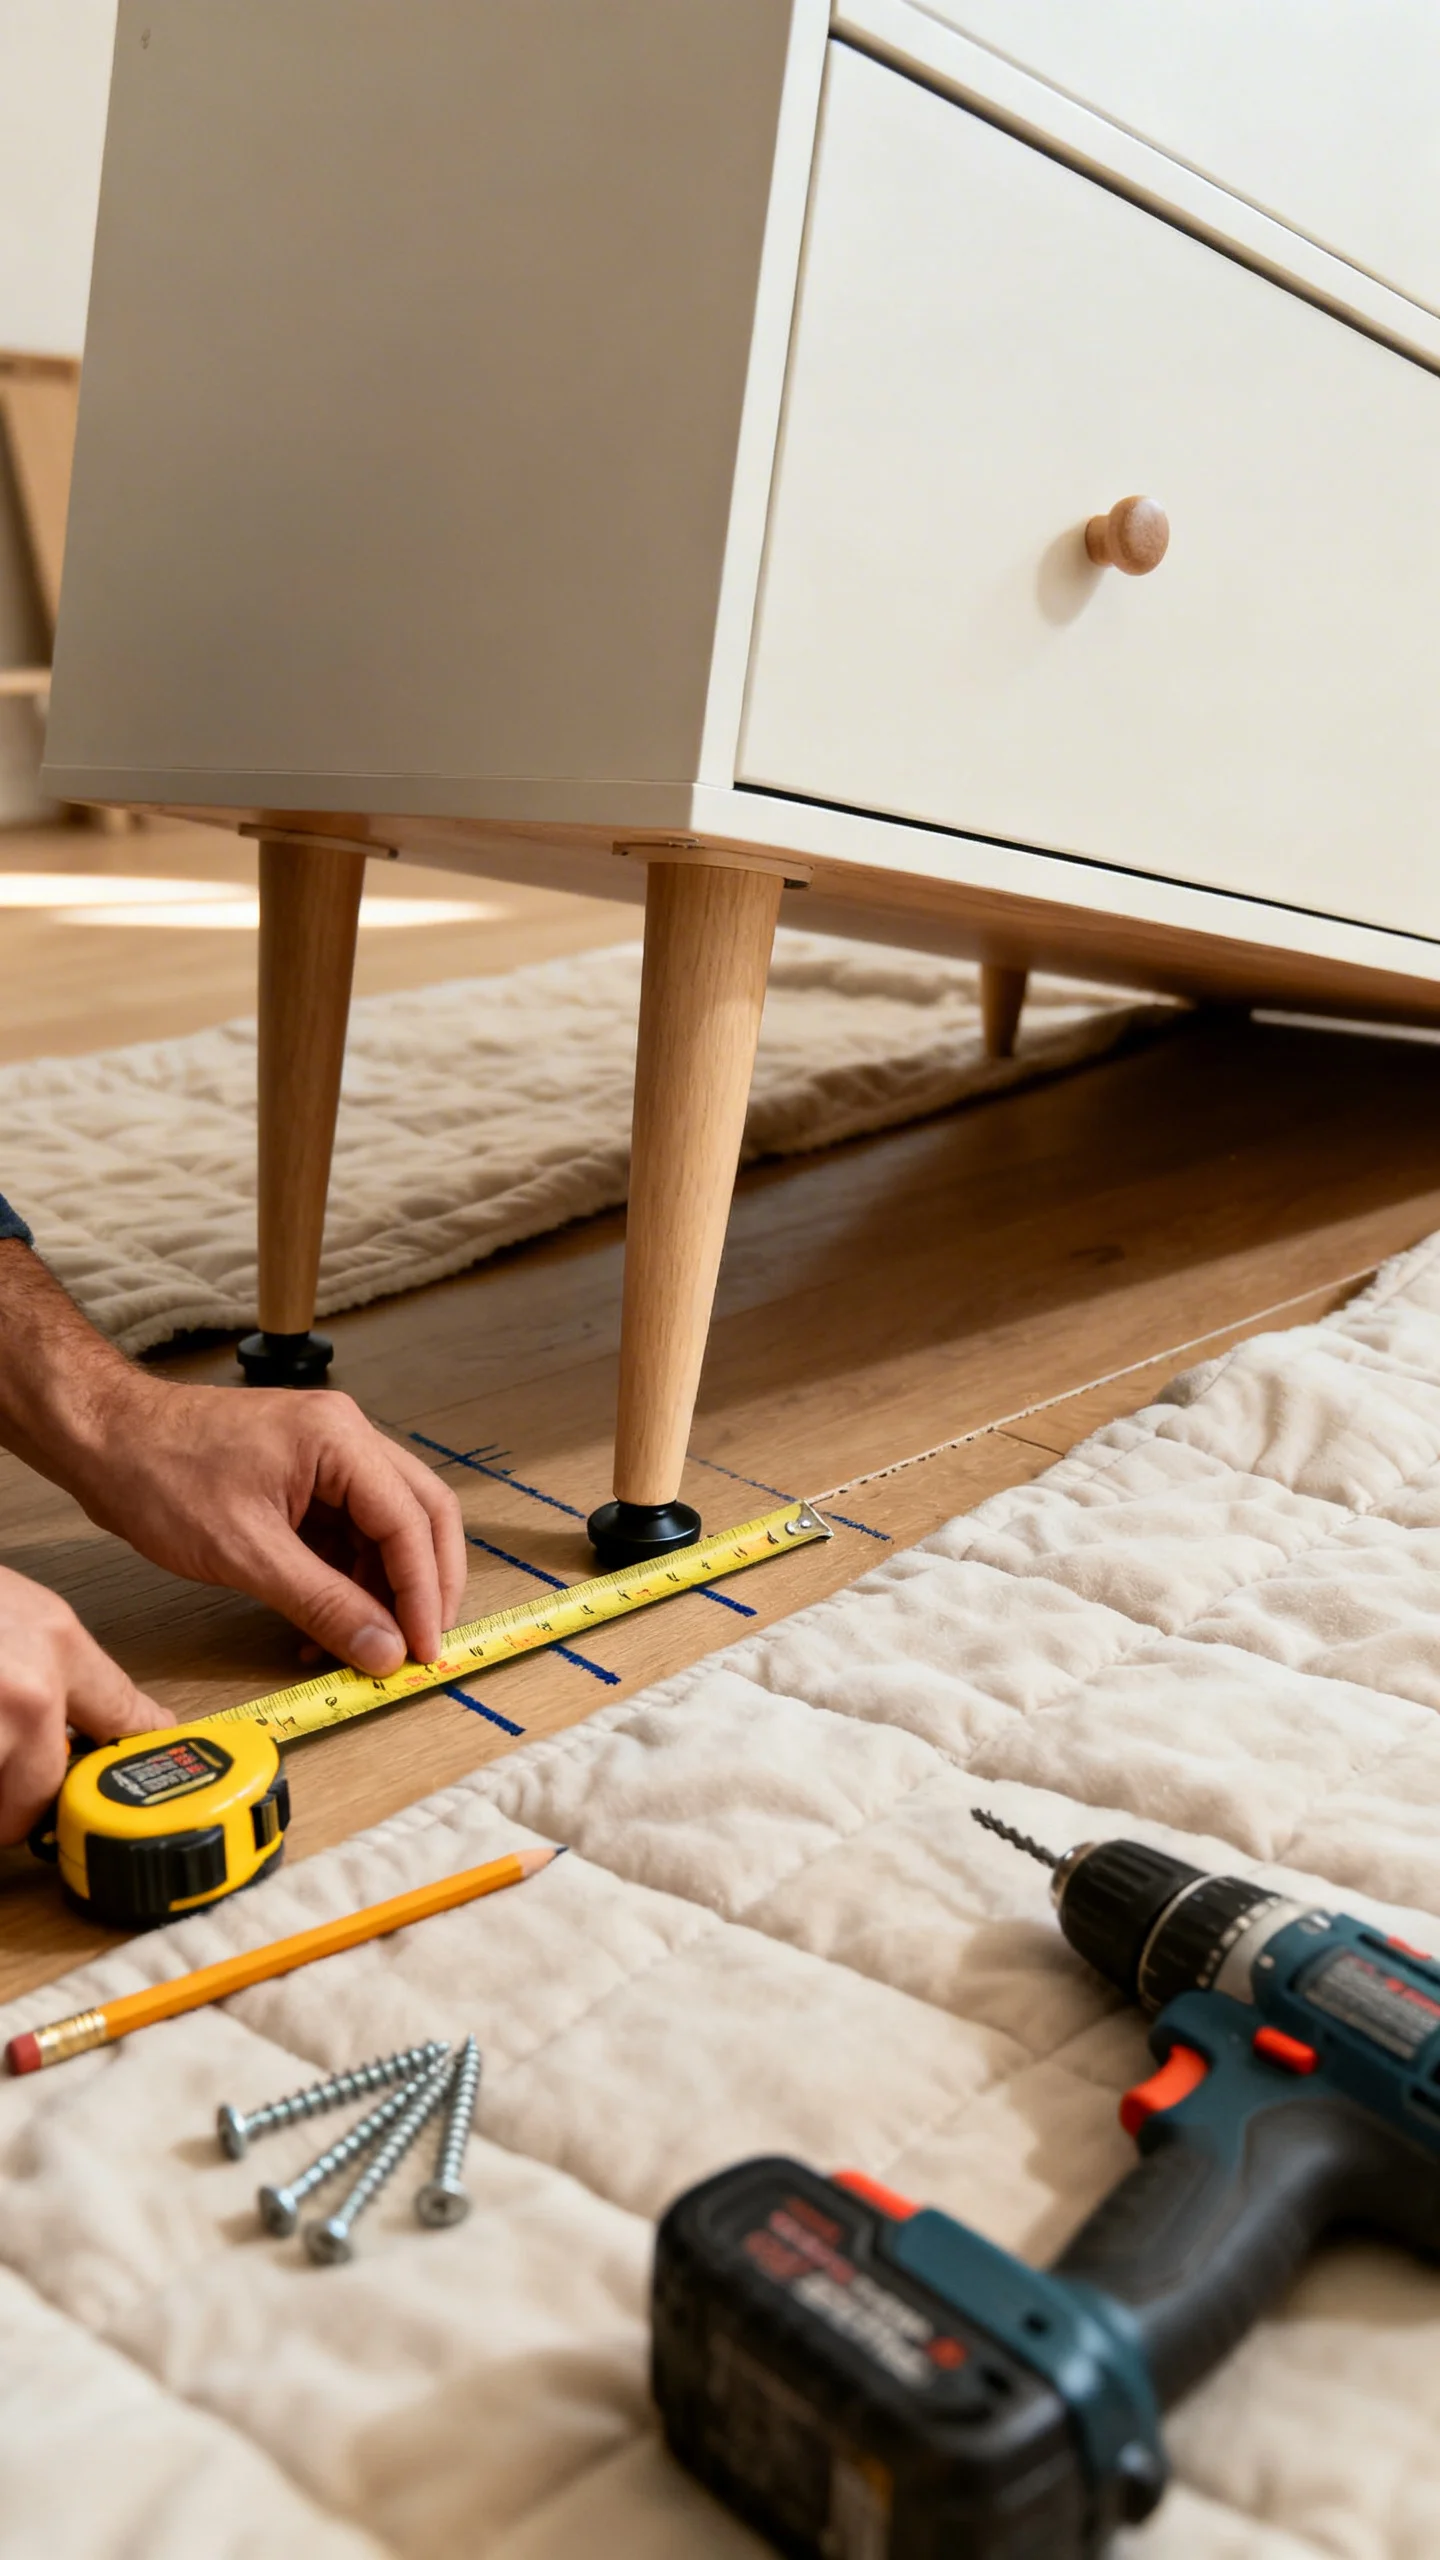
Changing how a piece meets the floor is a budget-friendly remodeling move that looks custom. Add furniture legs, a plinth base, or small casters using basic tools (drill, screws, measuring tape). Always check clearance: for drawers to open comfortably, keep at least 1/4 inch clearance above any rug pile; for cabinet doors, ensure they don’t scrape.
For casters, choose a load rating that exceeds the piece’s weight plus contents. As a simple estimate, divide the total expected weight by the number of casters, then choose casters rated higher than that number. Install into solid framing whenever possible—particleboard edges can crumble without reinforcement.
10) Protect Your Work With the Right Topcoat (and Avoid Sticky Finishes)
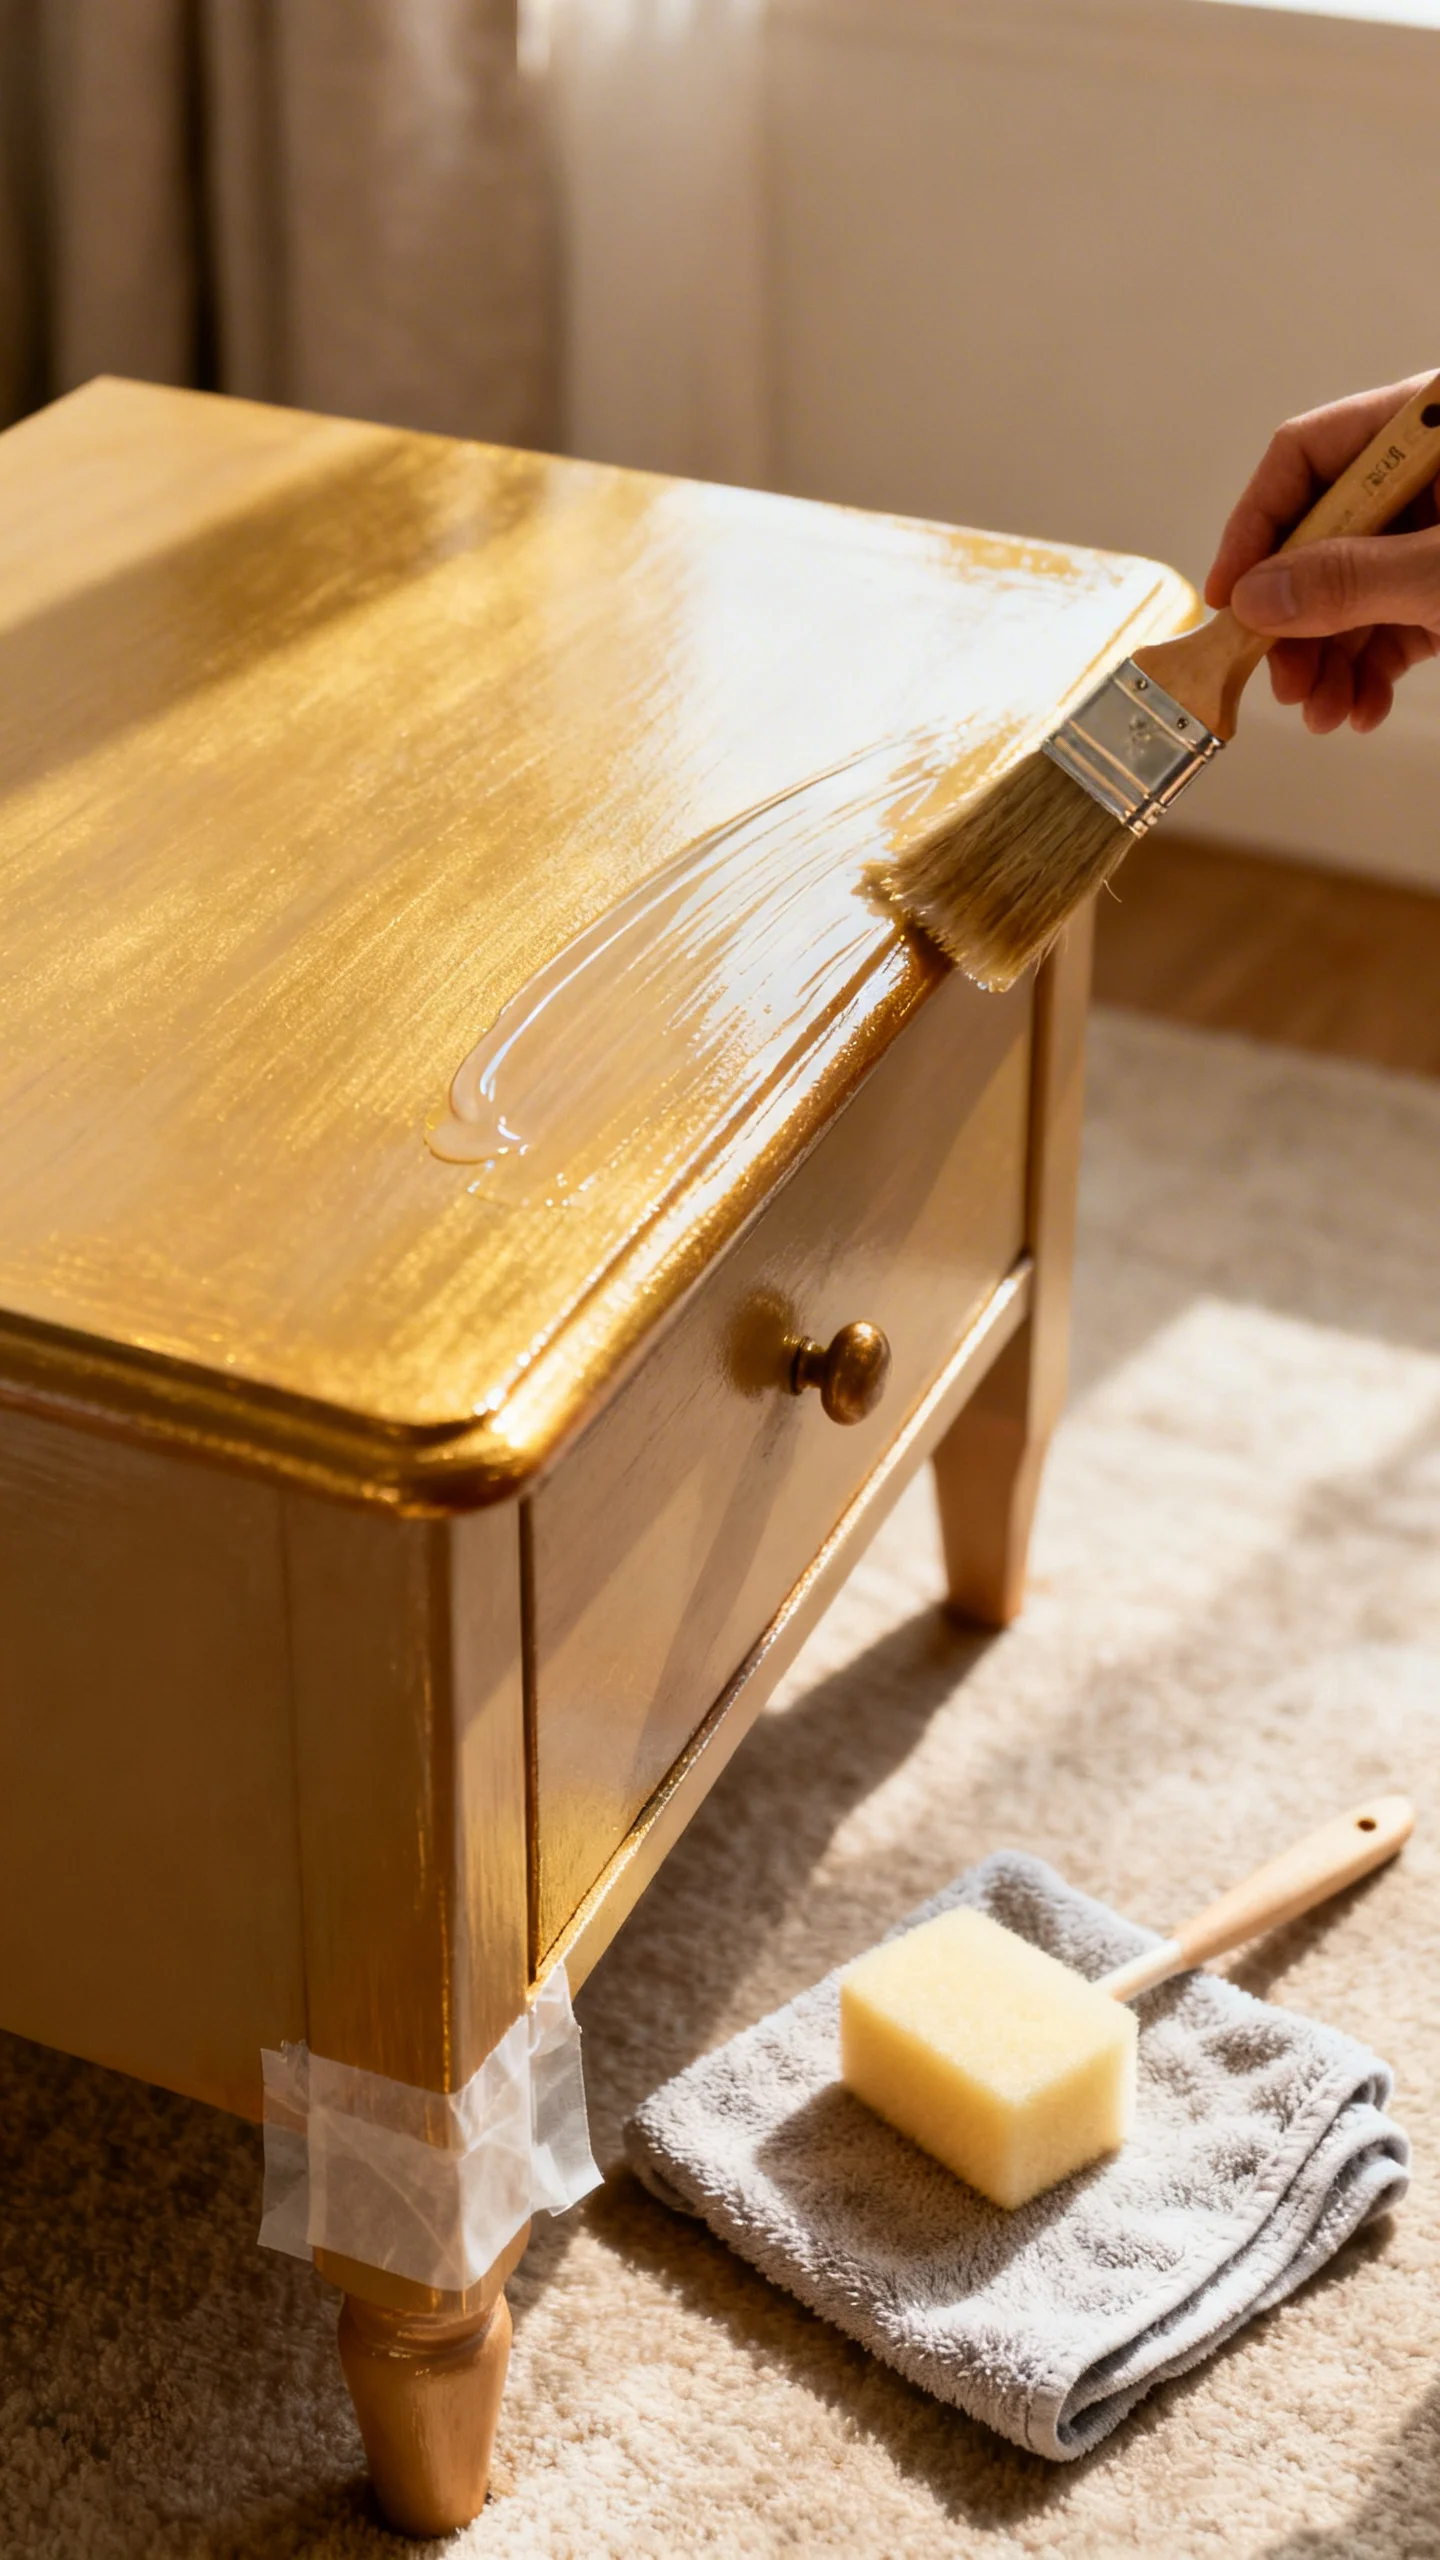
A budget remodel should last. Choose a topcoat based on how the furniture is used. For dressers and nightstands, water-based polyurethane is clear and low-odor. For dining tables or desks, a tougher poly or a tabletop-rated finish is worth the extra cost. Wax looks beautiful but offers limited protection and can cause future paint adhesion problems if you later repaint.
Apply thin coats with a synthetic brush or foam applicator, sanding lightly with 320 grit between coats for smoothness. Avoid heavy use until fully cured (often 3–7 days). To prevent “sticking” (items leaving prints), don’t stack objects or add drawer liners too soon—give the finish time to harden.
FAQ
What are the most useful simple tools for budget furniture remodeling?
A screwdriver set, drill (even a basic one), sanding block with 120/180/220 grit paper, wood glue, a putty knife, clamps (or a strap), painter’s tape, a foam roller, and a good angled brush. With these, you can tighten joints, patch damage, and get a clean paint finish.
Do I have to strip old finish before painting?
Usually not. If the surface is stable, a thorough clean plus scuff-sanding (150–220 grit) is typically enough. Strip only when the old finish is failing badly (peeling/flaking) or when you need to remove thick layers that won’t level out.
How do I keep paint from chipping on furniture edges?
Edges need extra prep and thin coats. Scuff-sand edges well, spot-prime if needed, and avoid heavy paint buildup. After painting, use a durable topcoat for high-touch pieces, and let everything cure fully before regular use.
Can I remodel laminate or veneer furniture on a budget?
Yes, but bonding is the priority. Clean thoroughly, lightly scuff-sand, and use a bonding primer designed for slick surfaces. Repair lifting veneer with wood glue and pressure (books or clamps) before painting so the surface stays flat.
What’s the cheapest way to make an old dresser feel “new”?
Fix function first (tighten joints, smooth drawers), then repaint with thin coats using a foam roller, and replace hardware using correct center-to-center measurements. These steps dramatically change both the look and the daily experience without expensive tools.