
You’ve got a gorgeous real tree. It smells incredible. Now let’s make it look like it came straight out of a designer’s holiday shoot—without turning your living room into a tinsel tornado. I’m walking you through the exact steps the pros use, plus a few tricks they don’t tell you (until they’ve had mulled wine). Ready?
1. Start With The Tree You’d Swipe Right On
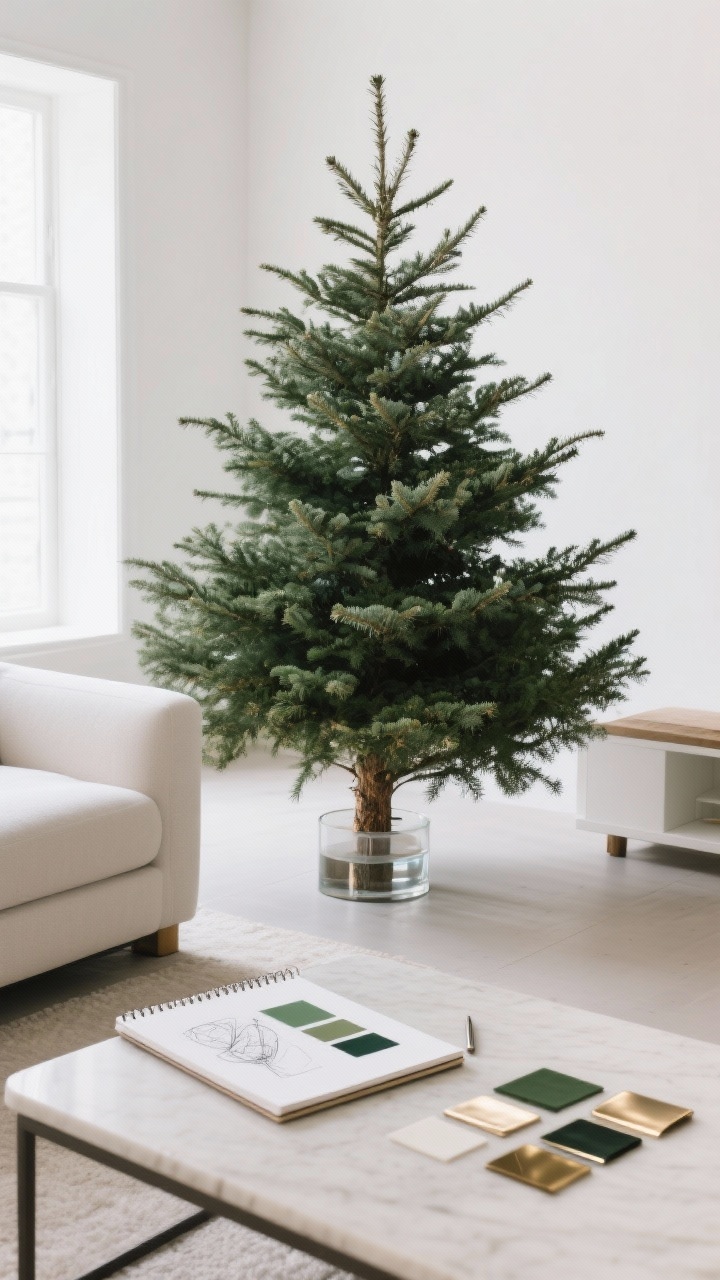
Design-level trees start before the lights ever plug in. Choose a tree with strong branch structure and space to hang ornaments at different depths. Full and symmetrical is lovely, but a slightly imperfect shape feels modern and editorial, IMO.
Pick The Right Species
- Fraser Fir: Sturdy branches, great needle retention—ideal for heavy ornaments.
- Noble Fir: Layered look with space between branches (chef’s kiss for styling).
- Balsam Fir: Classic shape and scent—just don’t overload the branches.
Pro prep: Ask for a fresh cut at the base, get it in water immediately, and let the branches relax for 12–24 hours. While it settles, sketch your color palette: 2 main colors + 1 metallic accent is the sweet spot. FYI, mixed metals look luxe when repeated consistently.
2. Light It Like A Magazine Shoot
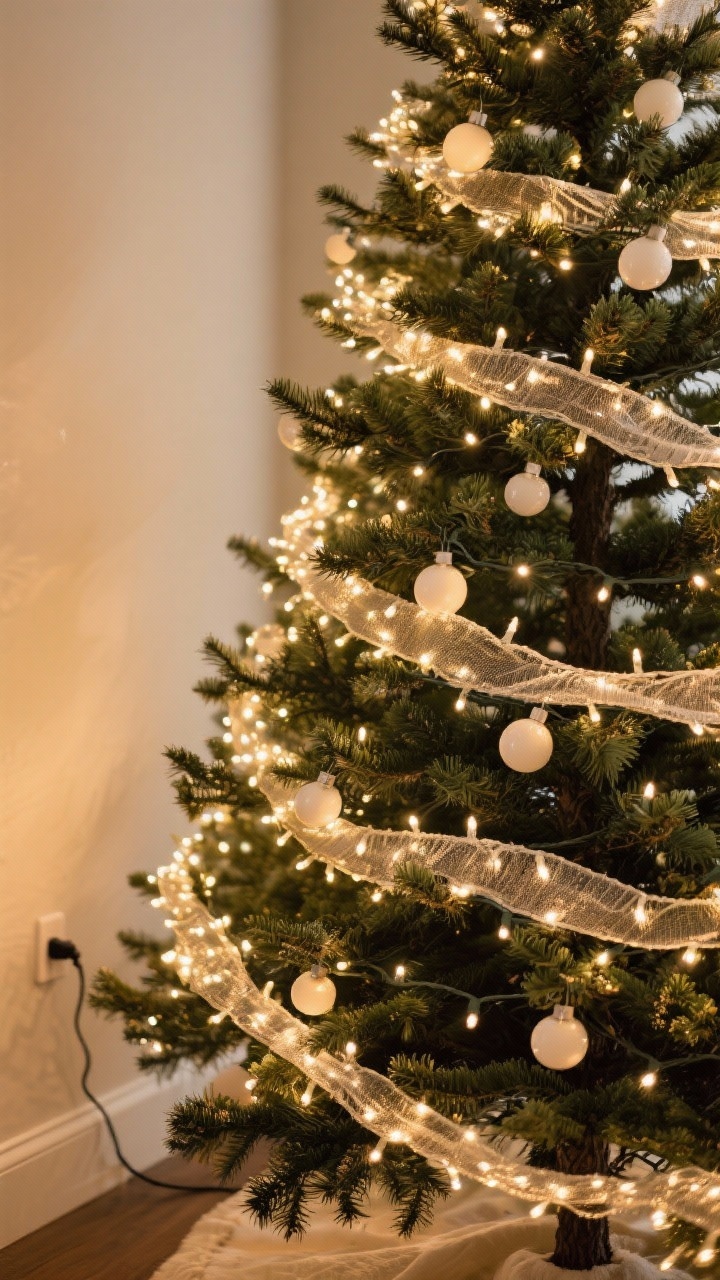
Designers are ruthless about lighting. Dim, patchy lights make even fancy ornaments look sad. Aim for 100 lights per foot of tree height for a bright, balanced glow.
Weave, Don’t Wrap
- Start at the trunk and push lights deep inside for depth, then work outward.
- Use the zig-zag method: Move left to right across one section, then go up a tier and come back.
- Mix bulb sizes: Mini LEDs for twinkle + a strand of larger bulbs for that designer glow.
Pro tip: Add a separate strand of twinkle lights and keep them on a different plug. Subtle sparkle = festive, strobe mode = chaos.
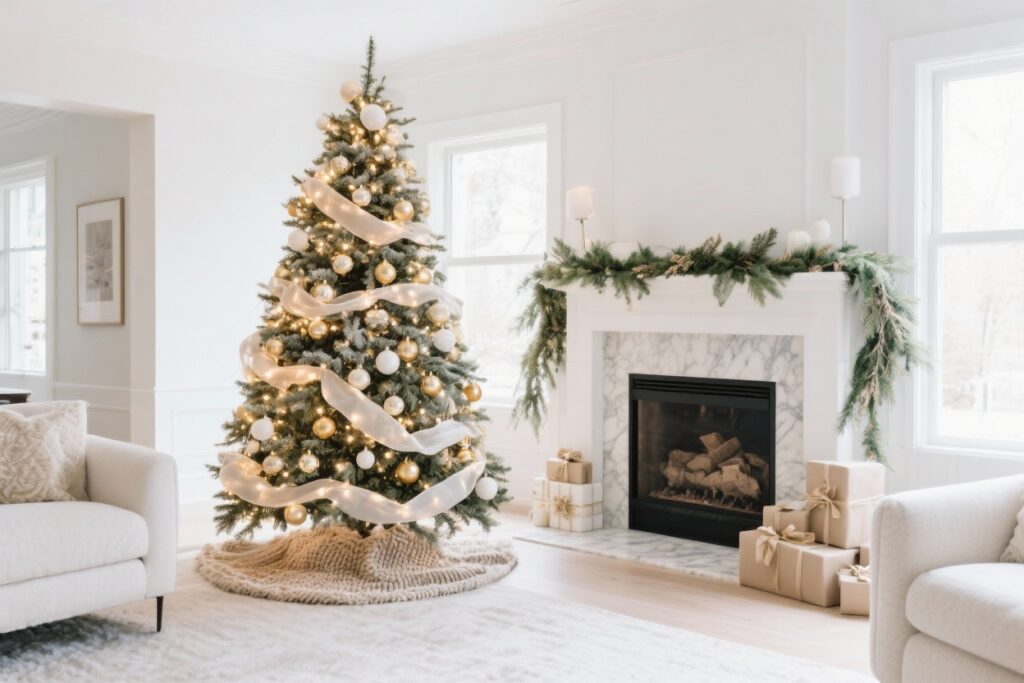
3. Build A Base With Ribbon And Garland
Here’s the secret: ornaments aren’t step one. Layering ribbon and garland first adds shape and movement—like contouring, but for trees.
Ribbon Styling That Doesn’t Look Like Gift Wrap
- Choose two ribbons: One wide (2.5–4″) and one narrow (1–1.5″). Mix textures—velvet + satin or metallic + linen.
- Use the tuck-and-tail technique: Cut 2–3 foot lengths. Tuck one end deep into the tree, let it billow naturally, then tuck again lower down. Repeat randomly.
- Go diagonal or cascade: Start high and angle slightly, varying spacing so it doesn’t look too uniform.
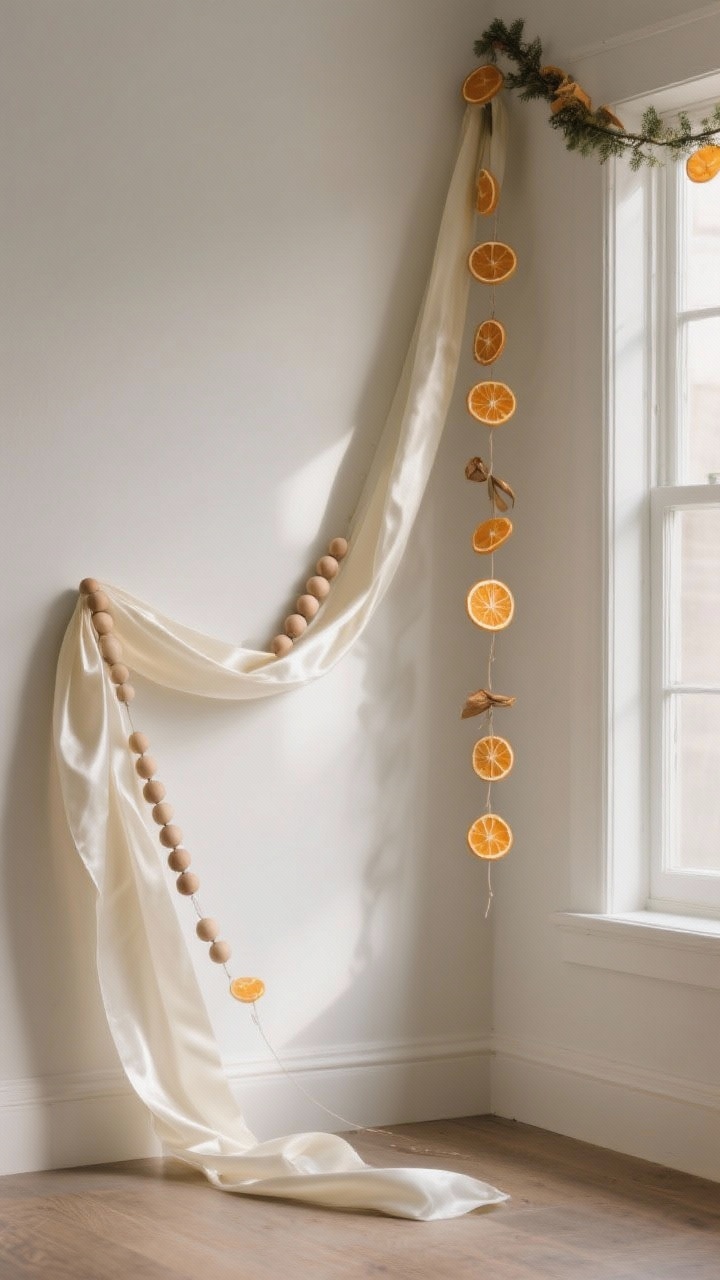
Garland ideas: Wood beads for Scandinavian calm, faux eucalyptus for airy texture, or dried orange slices for organic warmth. Layer one garland, max two—anything more is visual clutter.
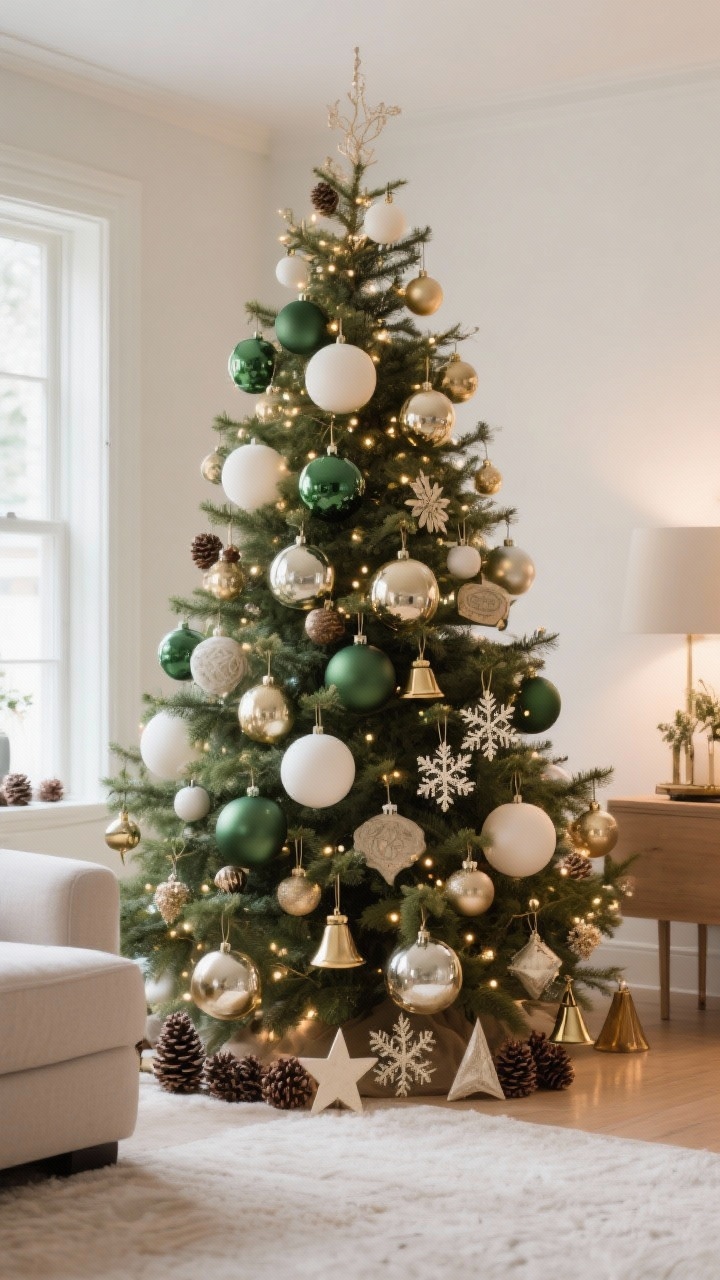
4. Ornaments: Style In Trios And Tiers
This is where your tree becomes a showstopper. Think like a stylist: vary size, texture, and finish. Then place them in intentional clusters.
Organize Before You Hang
- Foundational ornaments: 20–30 plain or subtly textured balls (matte, gloss, mercury glass). These create rhythm.
- Feature ornaments: 12–18 statement pieces—oversized, intricate, or sentimental.
- Fillers: 15–25 small accents—snowflakes, stars, pinecones, little bells.
Placement Rules Designers Swear By
- Deep to shallow: Place basic ornaments deeper in the branches to add depth, then bring the special ones forward.
- Triangles and repetition: Repeat each type in a loose triangle pattern around the tree to balance color and weight.
- Vary the hang height: Not everything should dangle at the tips. Tuck some midway, hang some low for visual interest.
Pro tip: Use ornament hooks in matching metal to your palette. And double up delicate ornaments with floral wire for security (pets and toddlers are crafty adversaries).
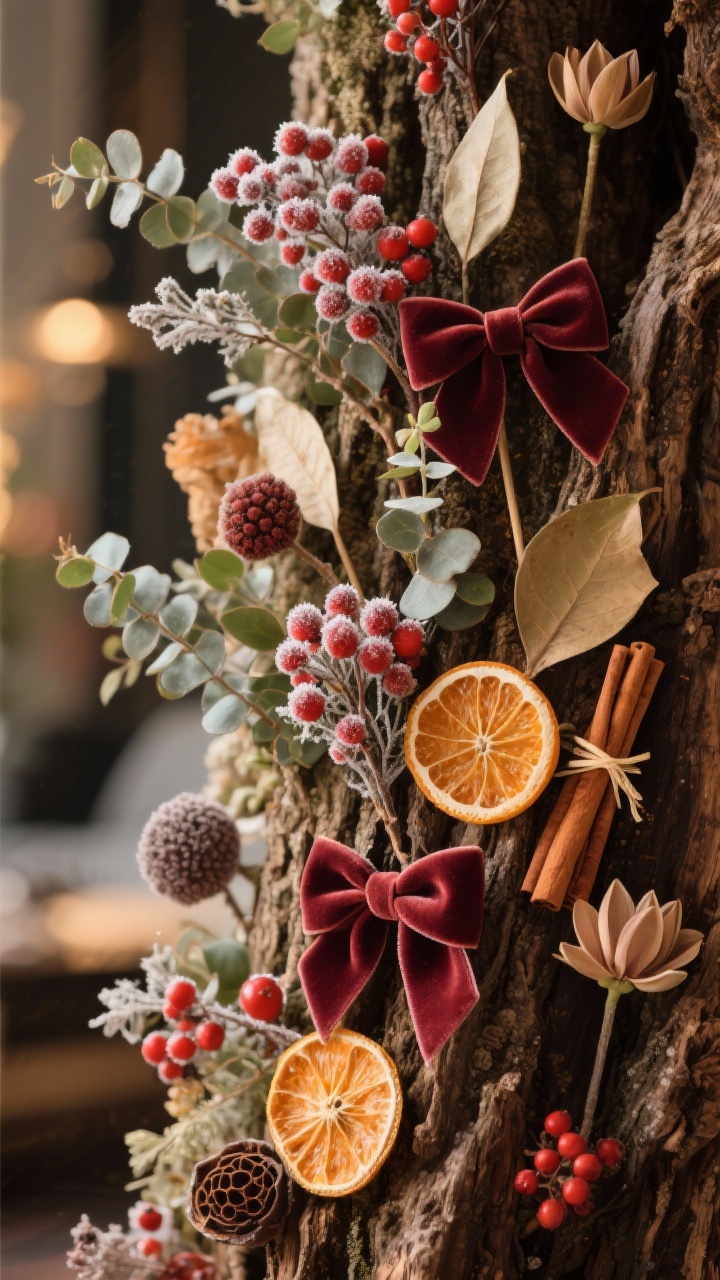
5. Add Unexpected Texture For That Designer “Oomph”
Texture is what makes a tree feel expensive. If your tree looks flat, it’s missing contrast—soft vs. shiny, rough vs. polished. Add layers that photographers love.
Textural Elements To Try
- Floral picks and sprays: Think frosted berries, magnolia leaves, pampas, or eucalyptus. Tuck at angles for dimension.
- Natural touches: Dried oranges, cinnamon sticks, lotus pods, or tiny bundles of twigs tied with ribbon.
- Fabric moments: Mini bows, velvet ties, or tassels. Keep them consistent in color so they don’t look crafty-in-a-bad-way.
Balance check: Add 3–5 of a larger textural element and sprinkle 8–12 smaller ones. If you can spot identical items too close together, spread them out like you’re spacing selfies on your grid.
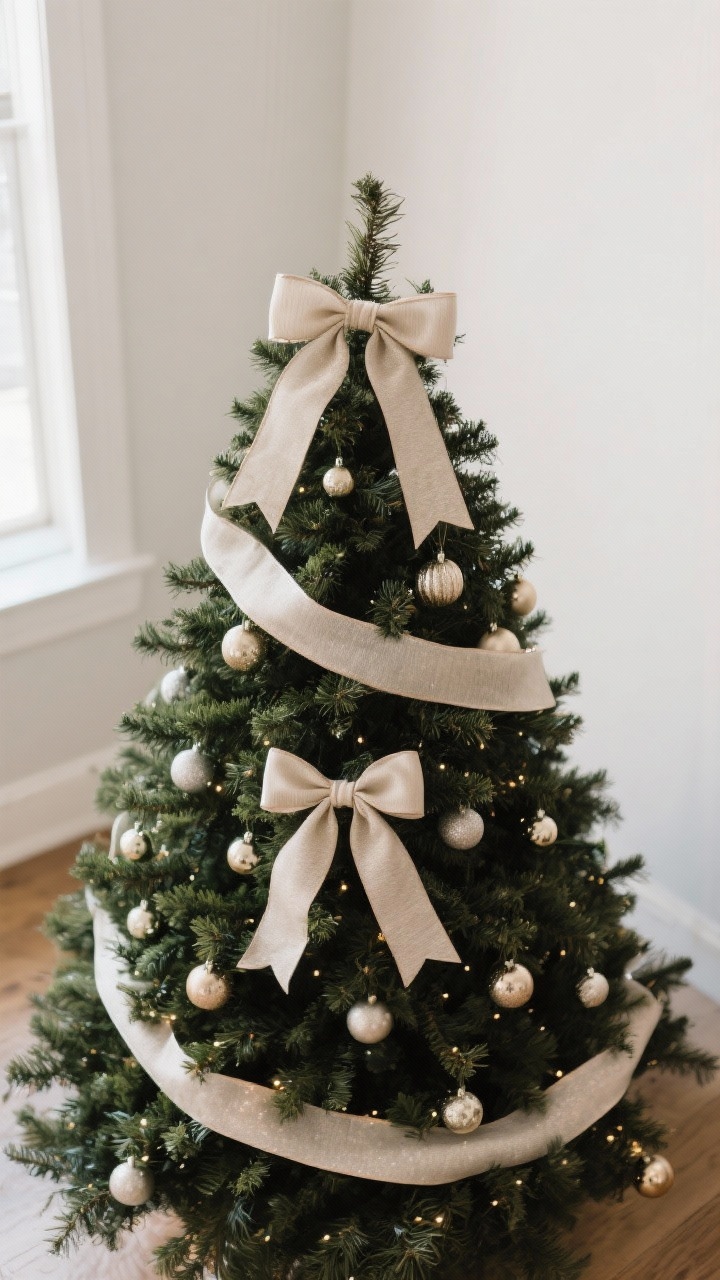
6. Crown It, Ground It, And Frame It
Your tree needs a strong beginning, middle, and end: a topper that fits the vibe, a base that hides the stand, and surroundings that set the scene.
The Topper
- Classic but elevated: A star or angel in matte brass or soft white.
- Modern: A spray of branches or metallic picks arranged like a burst.
- Asymmetrical moment: Place the topper slightly off-center for editorial flair (trust me).
The Base
- Tree collar: Woven, metal, or matte ceramic for clean lines.
- Oversized throw or blanket: Casually gathered for cozy texture (yes, it’s allowed).
- Matching skirt + wrapped boxes: Use coordinating paper and ribbon to extend your color palette.
The Surround
- Add a dimmer or smart plug for mood control.
- Mirror or window nearby? Angle the tree to catch reflections—instant sparkle multiplier.
- Keep nearby decor simple so the tree is the star. No one needs competition from a loud mantel.
Pro tip: Step back every 10 minutes. What looks perfect up close can feel unbalanced from across the room.
7. Keep It Fresh, Safe, And Photo-Ready
Real trees are living decor—keep them happy and they’ll keep the glam going all season. Also, safety is chic. Always.
Care Routine
- Hydrate daily: Check water every morning for the first week, then every other day.
- Location matters: Keep away from heat vents, fireplaces, and direct sun to prevent drying.
- Pet-proofing: Hang unbreakables on the bottom third and skip tinsel (cats think it’s spaghetti).
Safety Basics
- Use LED lights: Cooler to the touch and more energy-efficient.
- Inspect cords: Replace frayed strands and don’t overload outlets—use a power strip with surge protection.
- Turn off lights when you’re out or asleep. Smart plug schedules are your best friend.
Photo polish: For Instagram-level sparkle, tuck a few reflective ornaments near the center lights and turn off overhead fixtures. Let the tree glow do the heavy lifting—no filter needed.
You now have the blueprint to decorate a real Christmas tree like a designer—layered, balanced, and a little bit extra in the best way. Put on a playlist, pour something festive, and have fun with it. Your tree is about to steal the show (and yes, your friends will ask how you did it). Happy decorating!